


One of the hardest, most intimidating parts of making your own Steampunk guns from scratch is the wooden stock of the gun. To be fair, it's probably the hardest part. It requires the most artistry, and is the easiest to mess up.
So, I'm going to give you a guide to making your very own gun stock out of wood, and I'll impart all of the tips and tricks that I've learned along the way. This article is actually the first in a two-part series as I make a Steampunk hand cannon (here's the second part on the barrel and detailing).
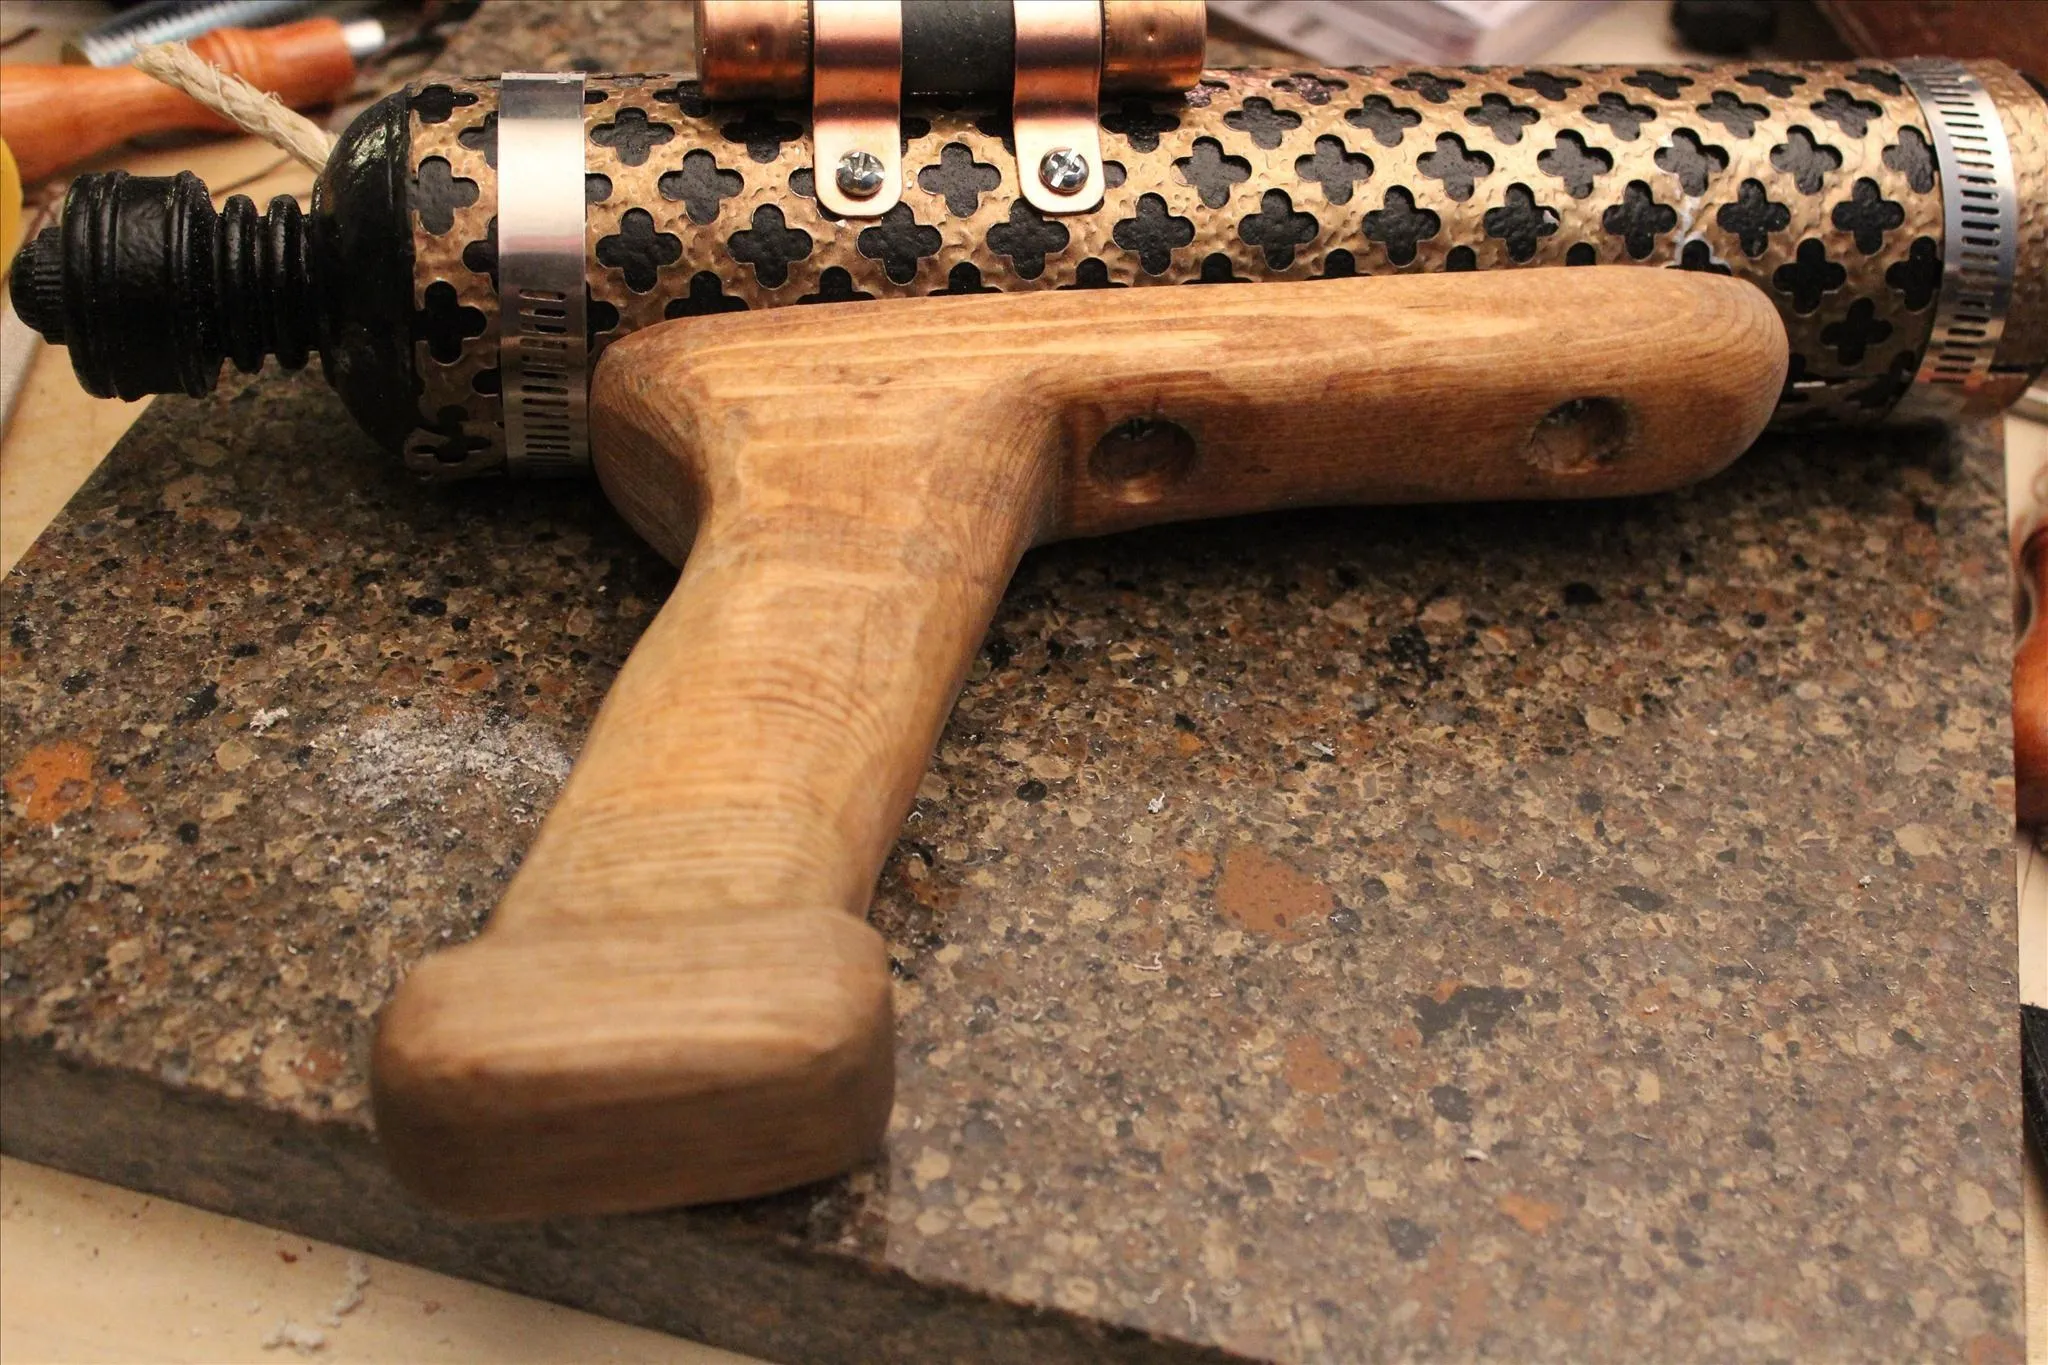
I'll take away all the suspense by showing you the finished product first.
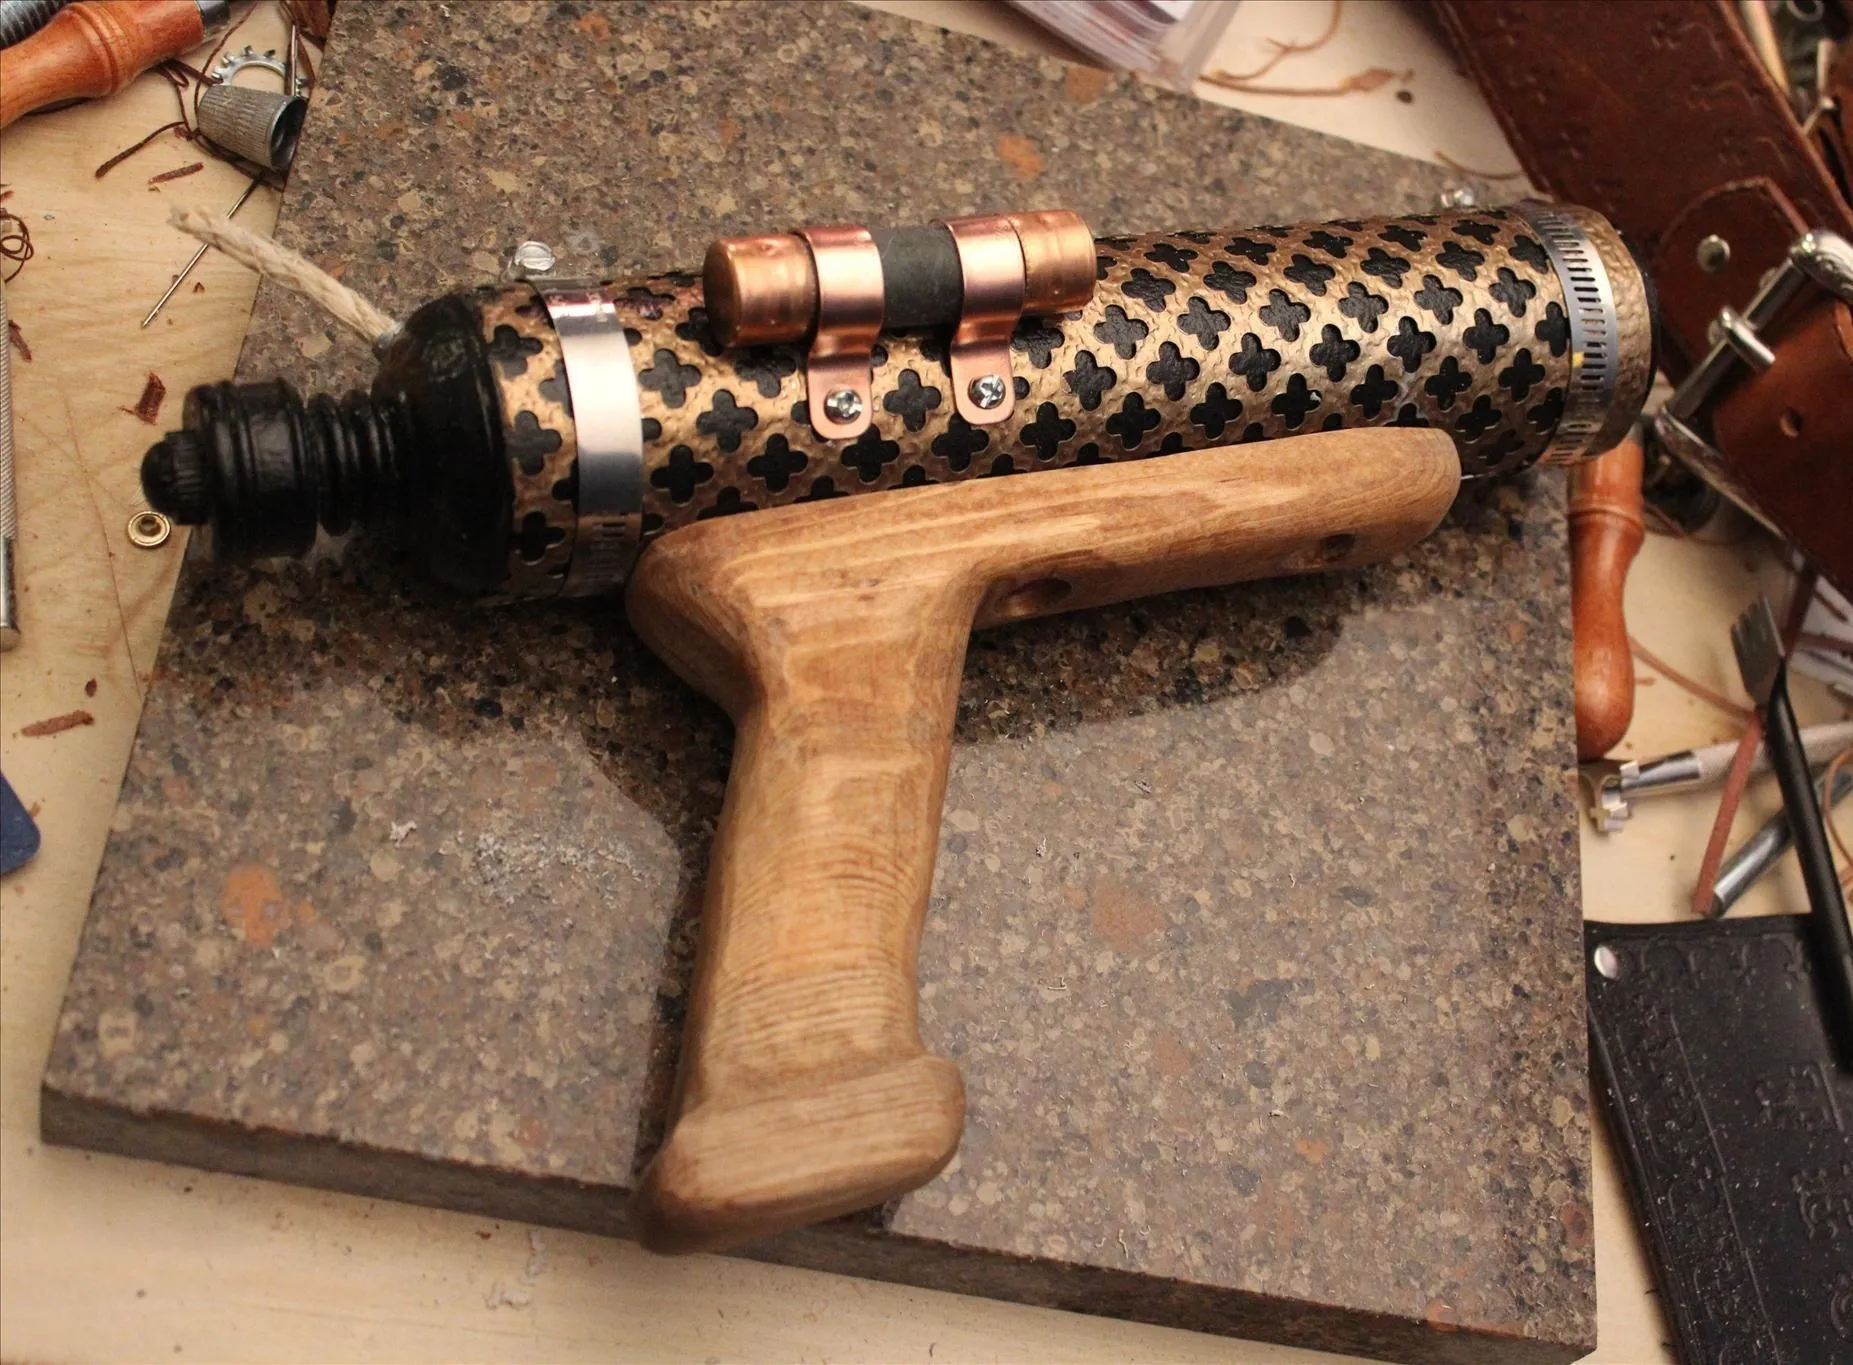
There's no trigger because the gun is shot by lighting the fuse at the back, but I'll talk more about how to make a trigger in a different tutorial. Triggers can be the single most difficult part of making a Steampunk gun, and they deserve their own tutorial.
Tools Needed
Before anything else, let's take a look at our tools and materials for this project. I have nice power tools, but you can use good, old-fashioned handsaws and sandpaper if you're high on energy and low on money.
It just so happens that I used all three of my favorite tools in this project, my band saw, power sander, and Dremel tool. Here they are, in order:
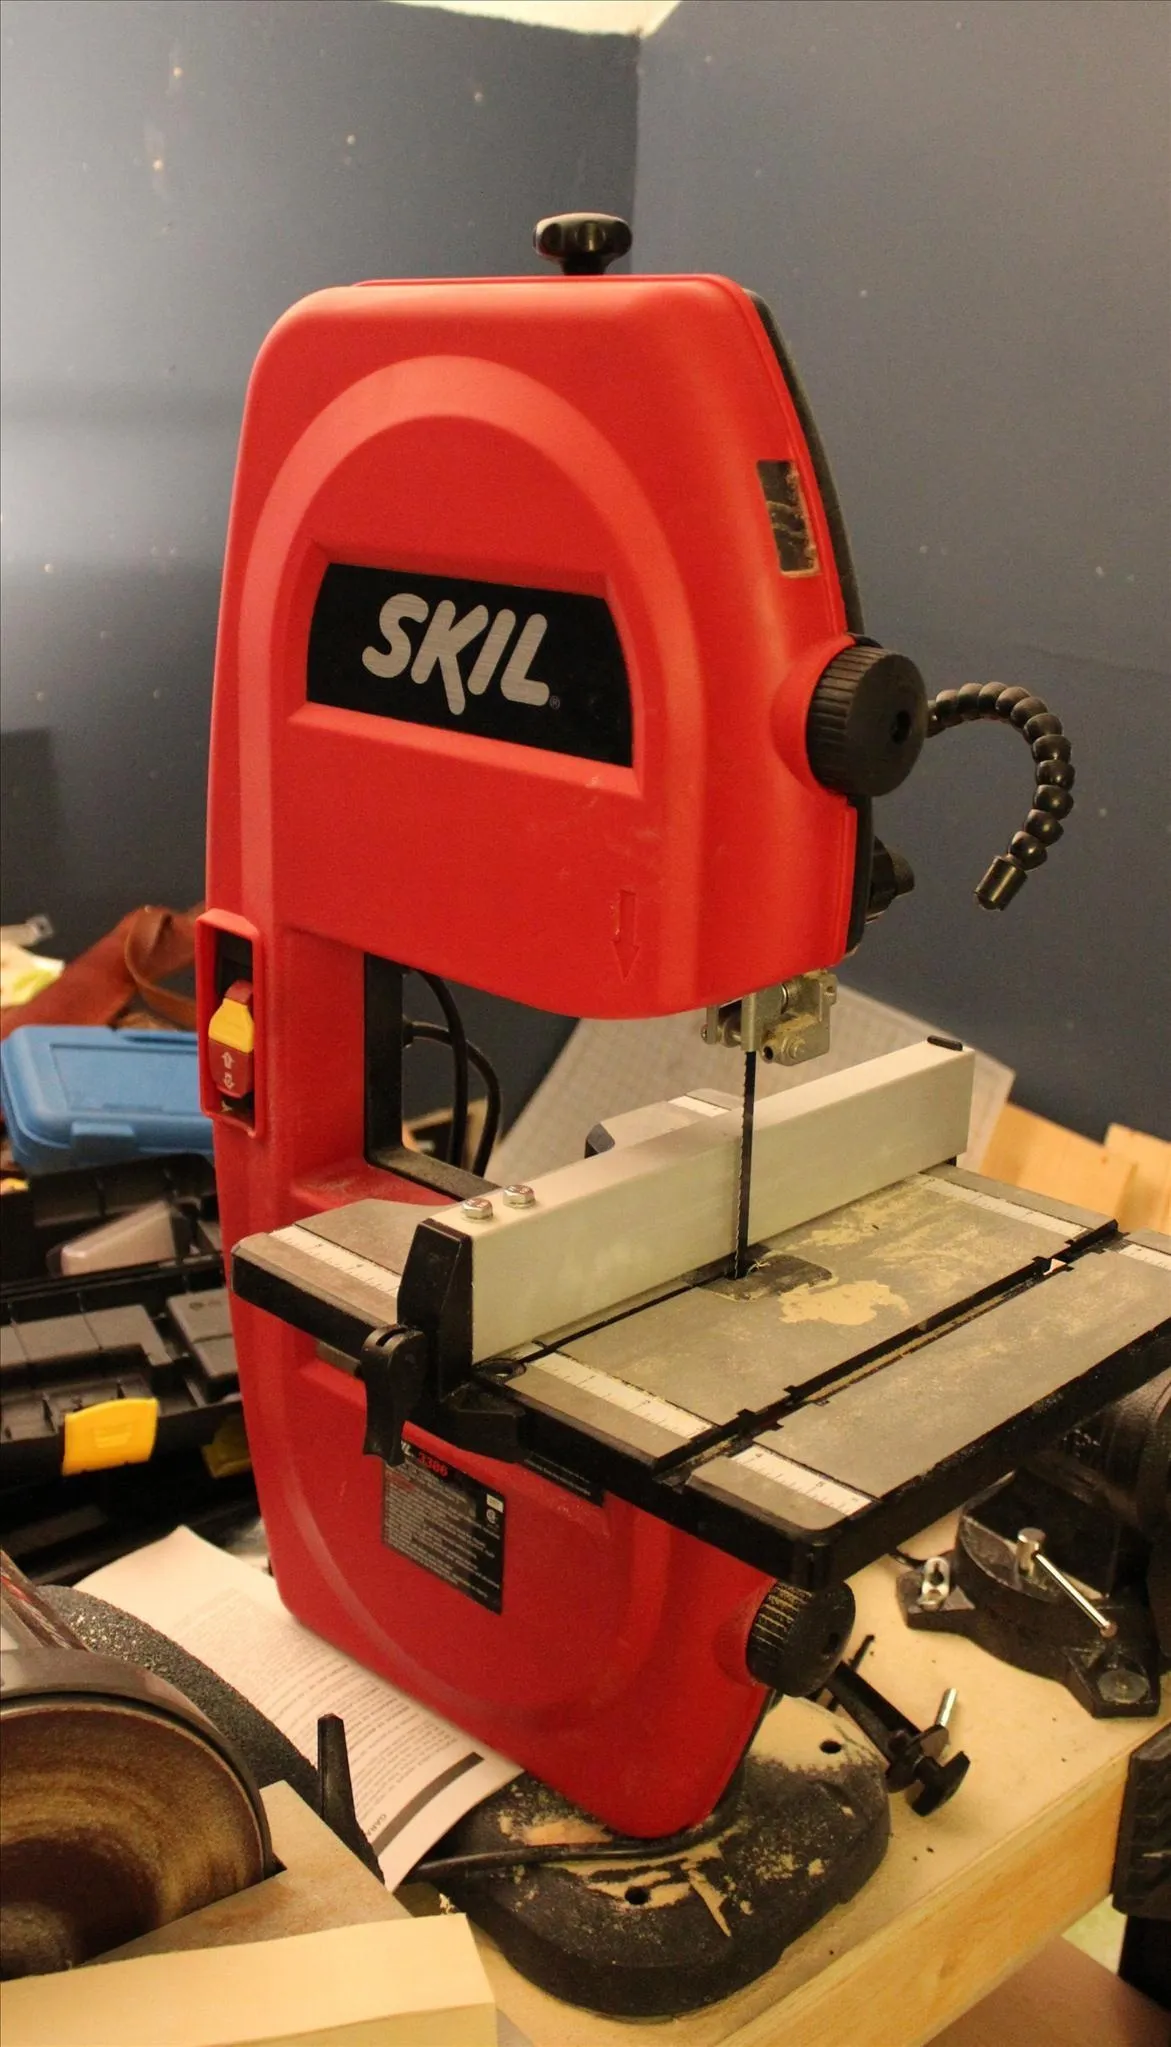

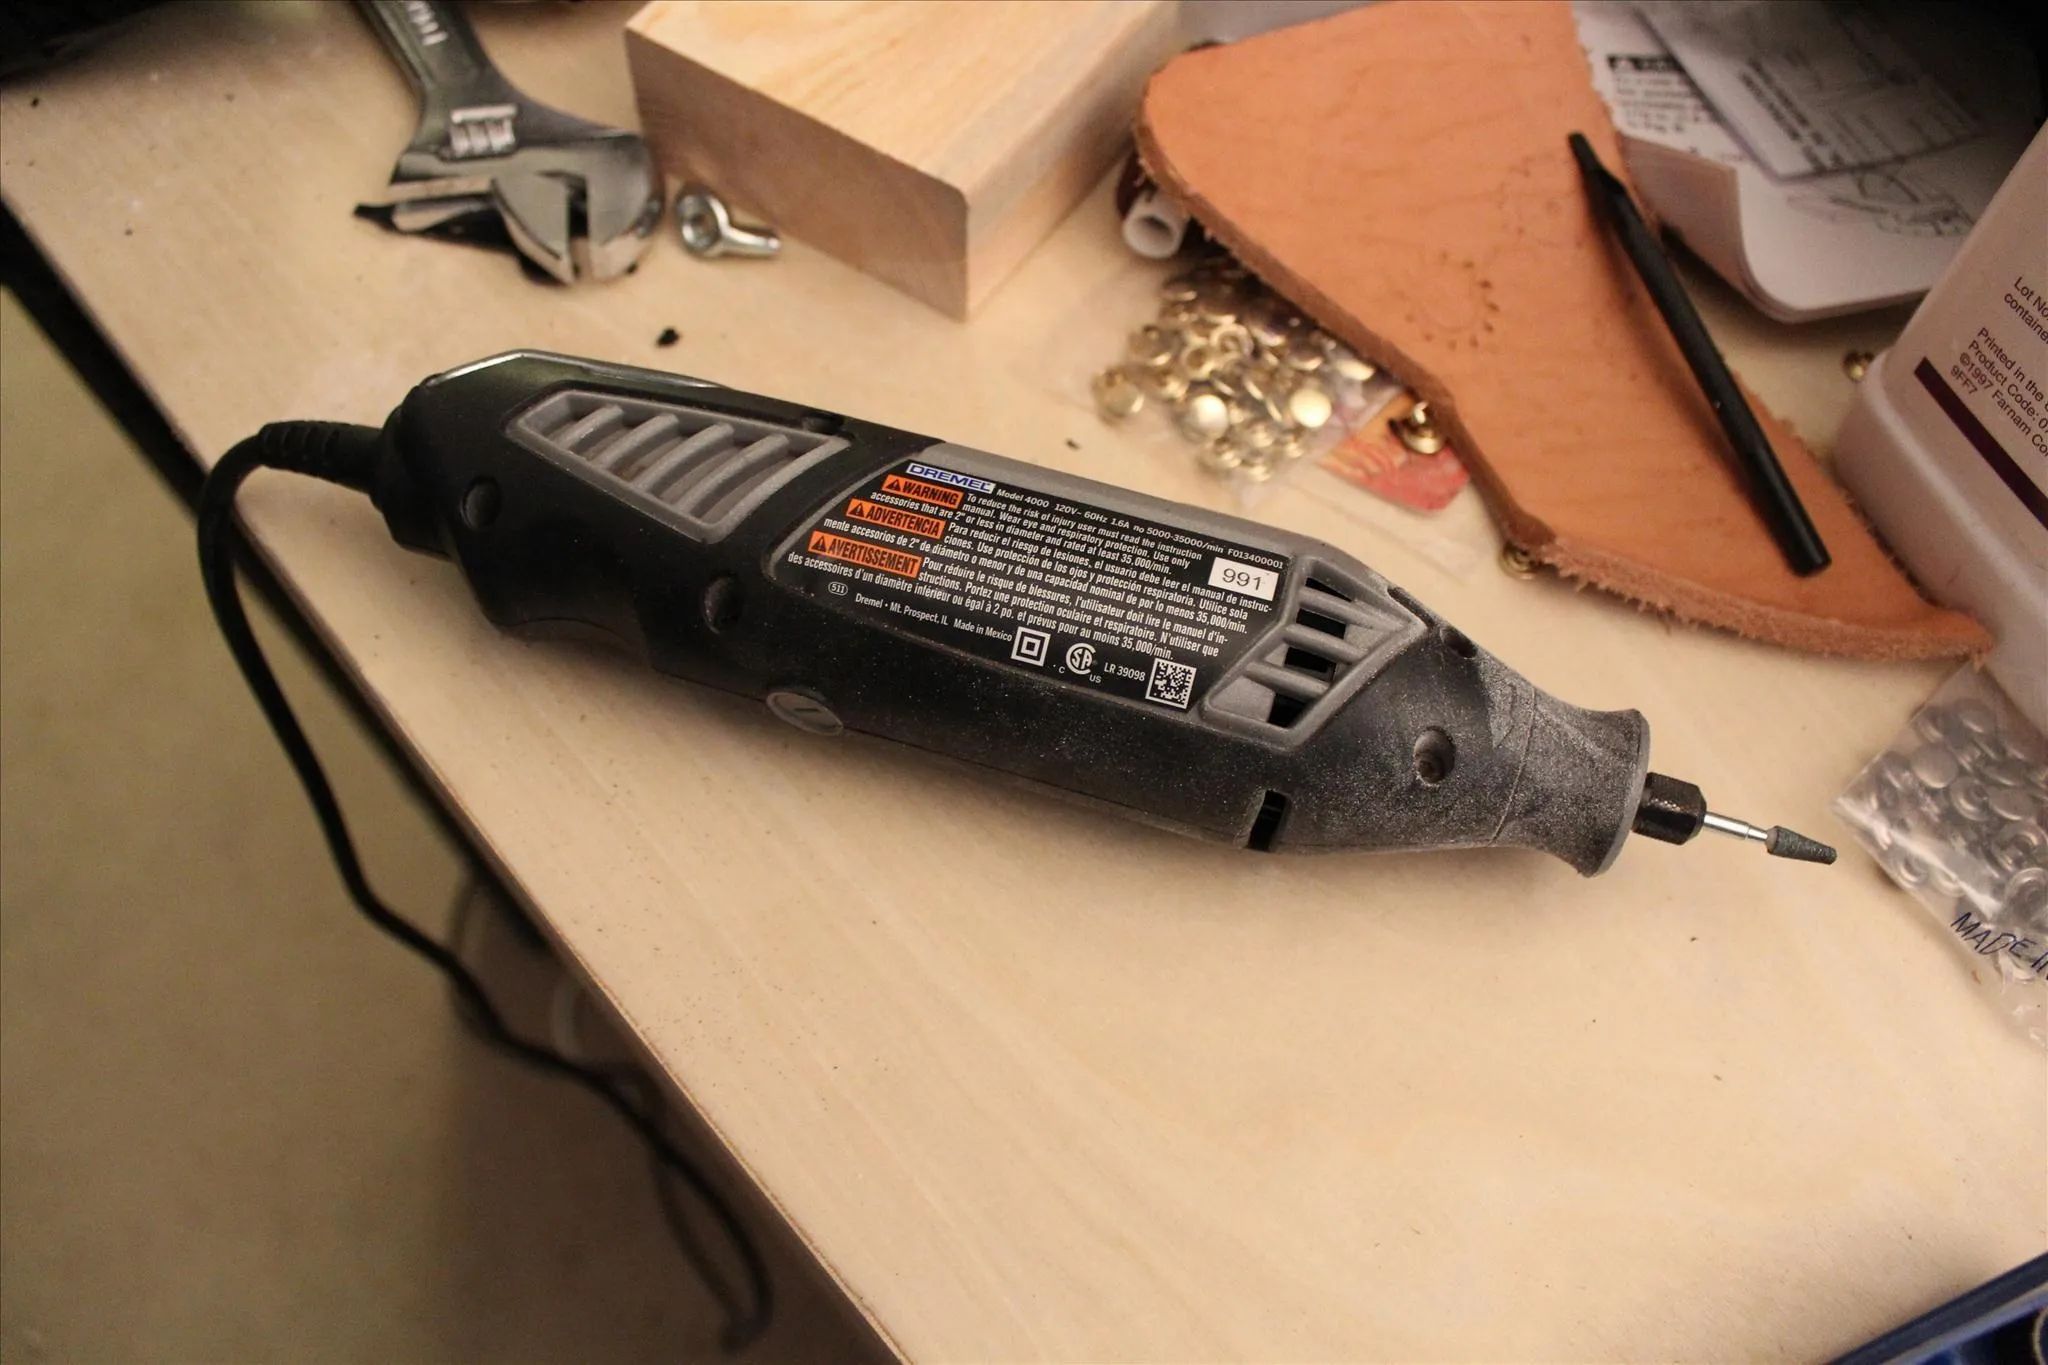
Now, let me take a moment to say exactly how important it is that you follow proper safety procedures. These tools can be very dangerous. Band saws will cut through your hand like wet bread, as will a Dremel, and a power sander will strip the skin from your bones in seconds. Always steady yourself, and keep your hands away from the cutting or sanding surfaces. Never work while distracted, and always focus on the blade.
Also, wear these:
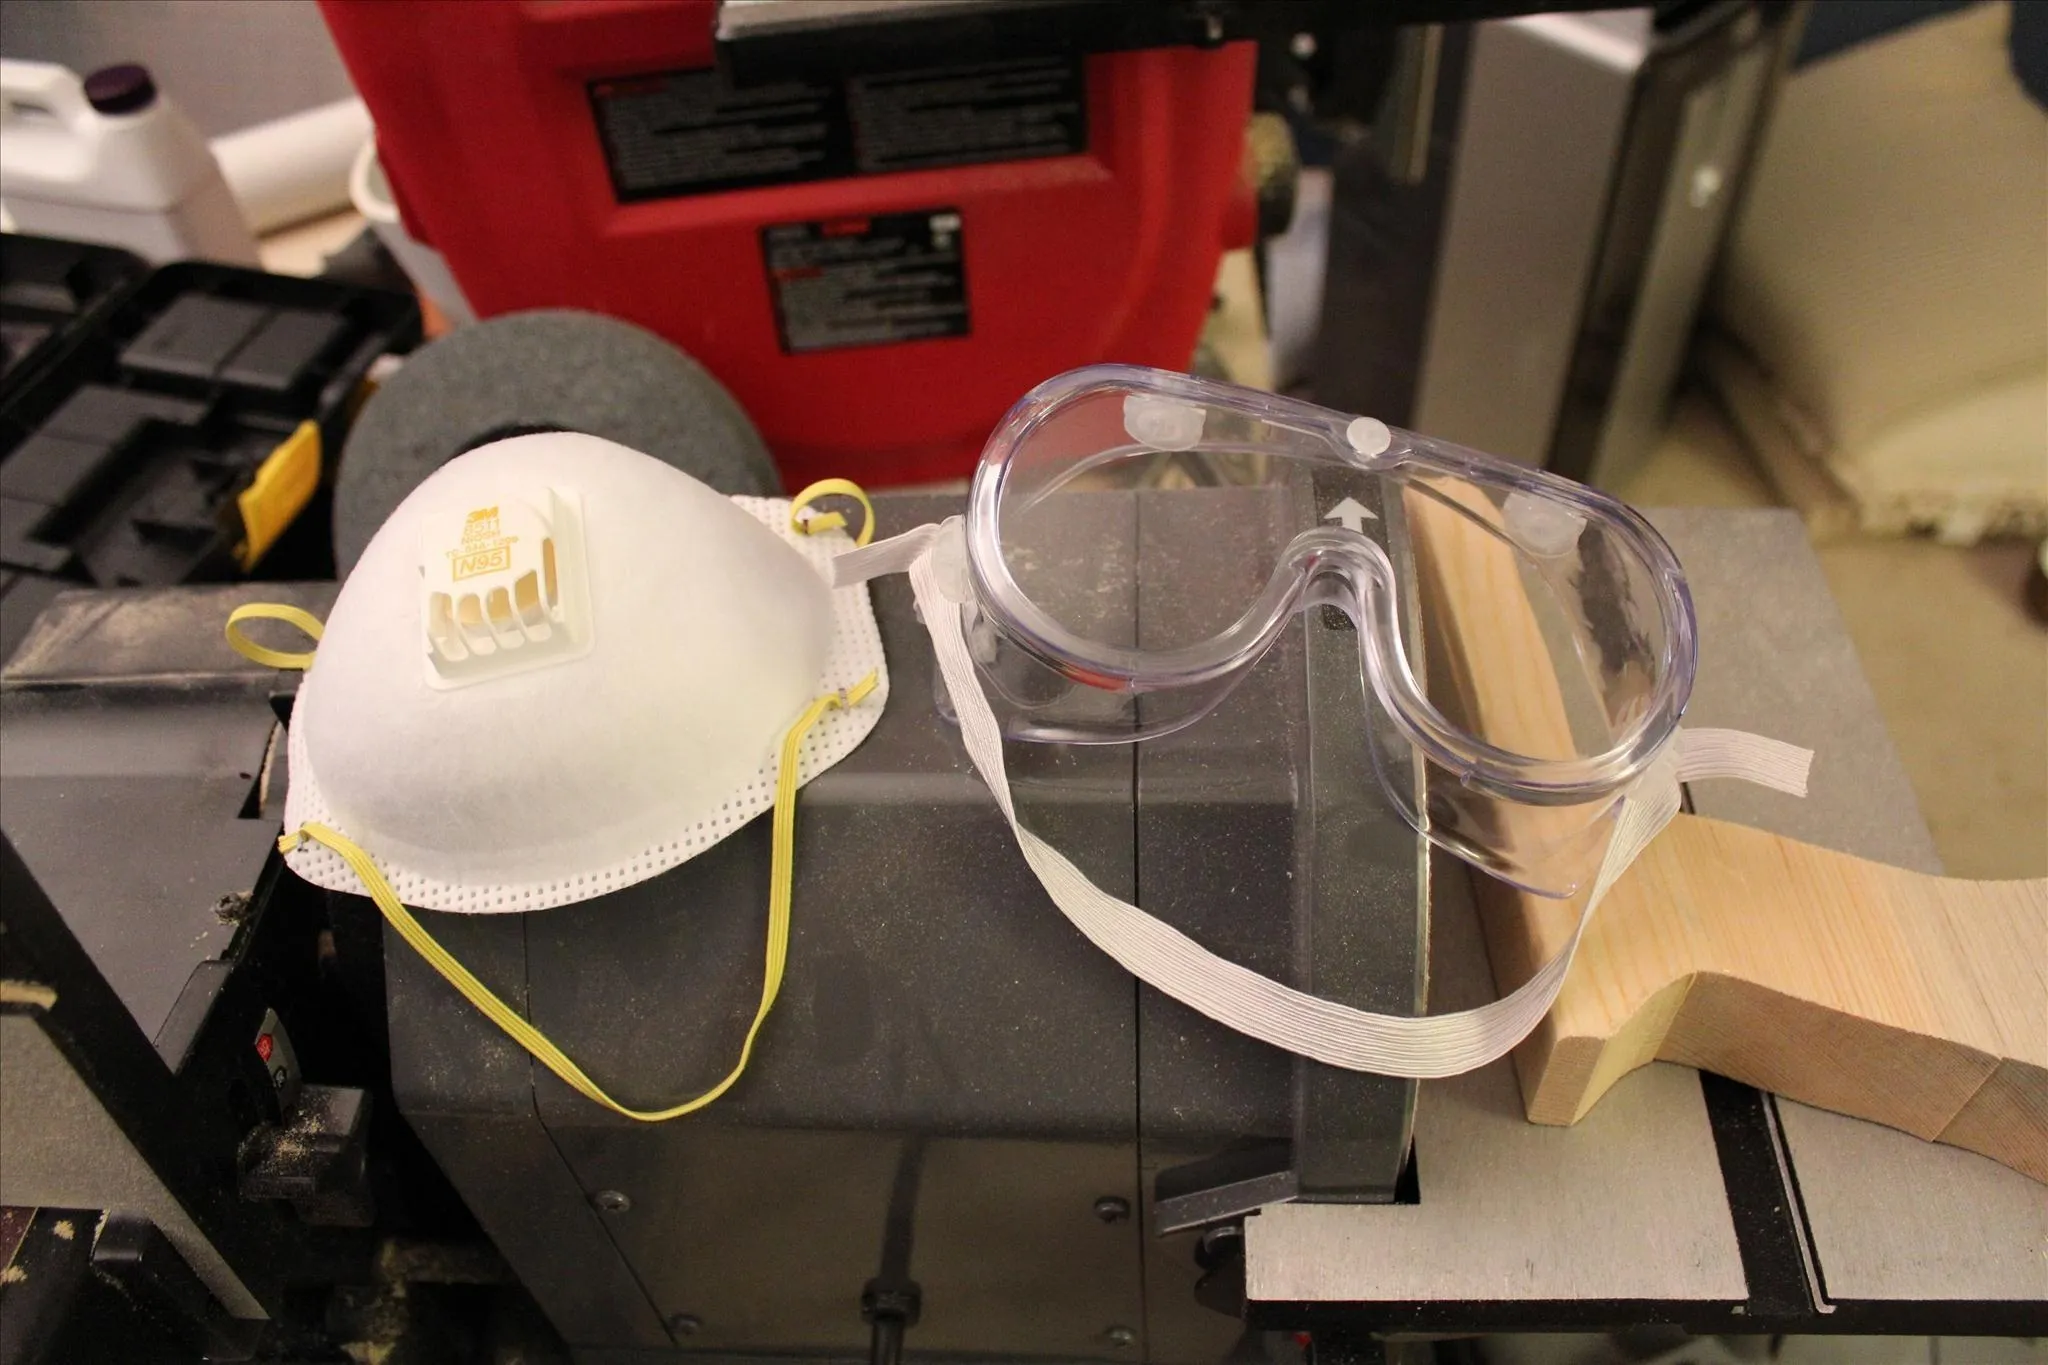
With the safety talk out of the way, let's get on to the tutorial!
Get Yourself a Piece of Wood
A plank is best. I prefer wood two inches thick, as that thickness makes for the best fit in my hand. If you have tiny hands, you may want to consider using wood that's one inch thick. The length is up to you and will depend on the gun you want a stock for.
Do not use composite woods like plywood or chipboard. A solid wood will give you the best result. Here's what I got:
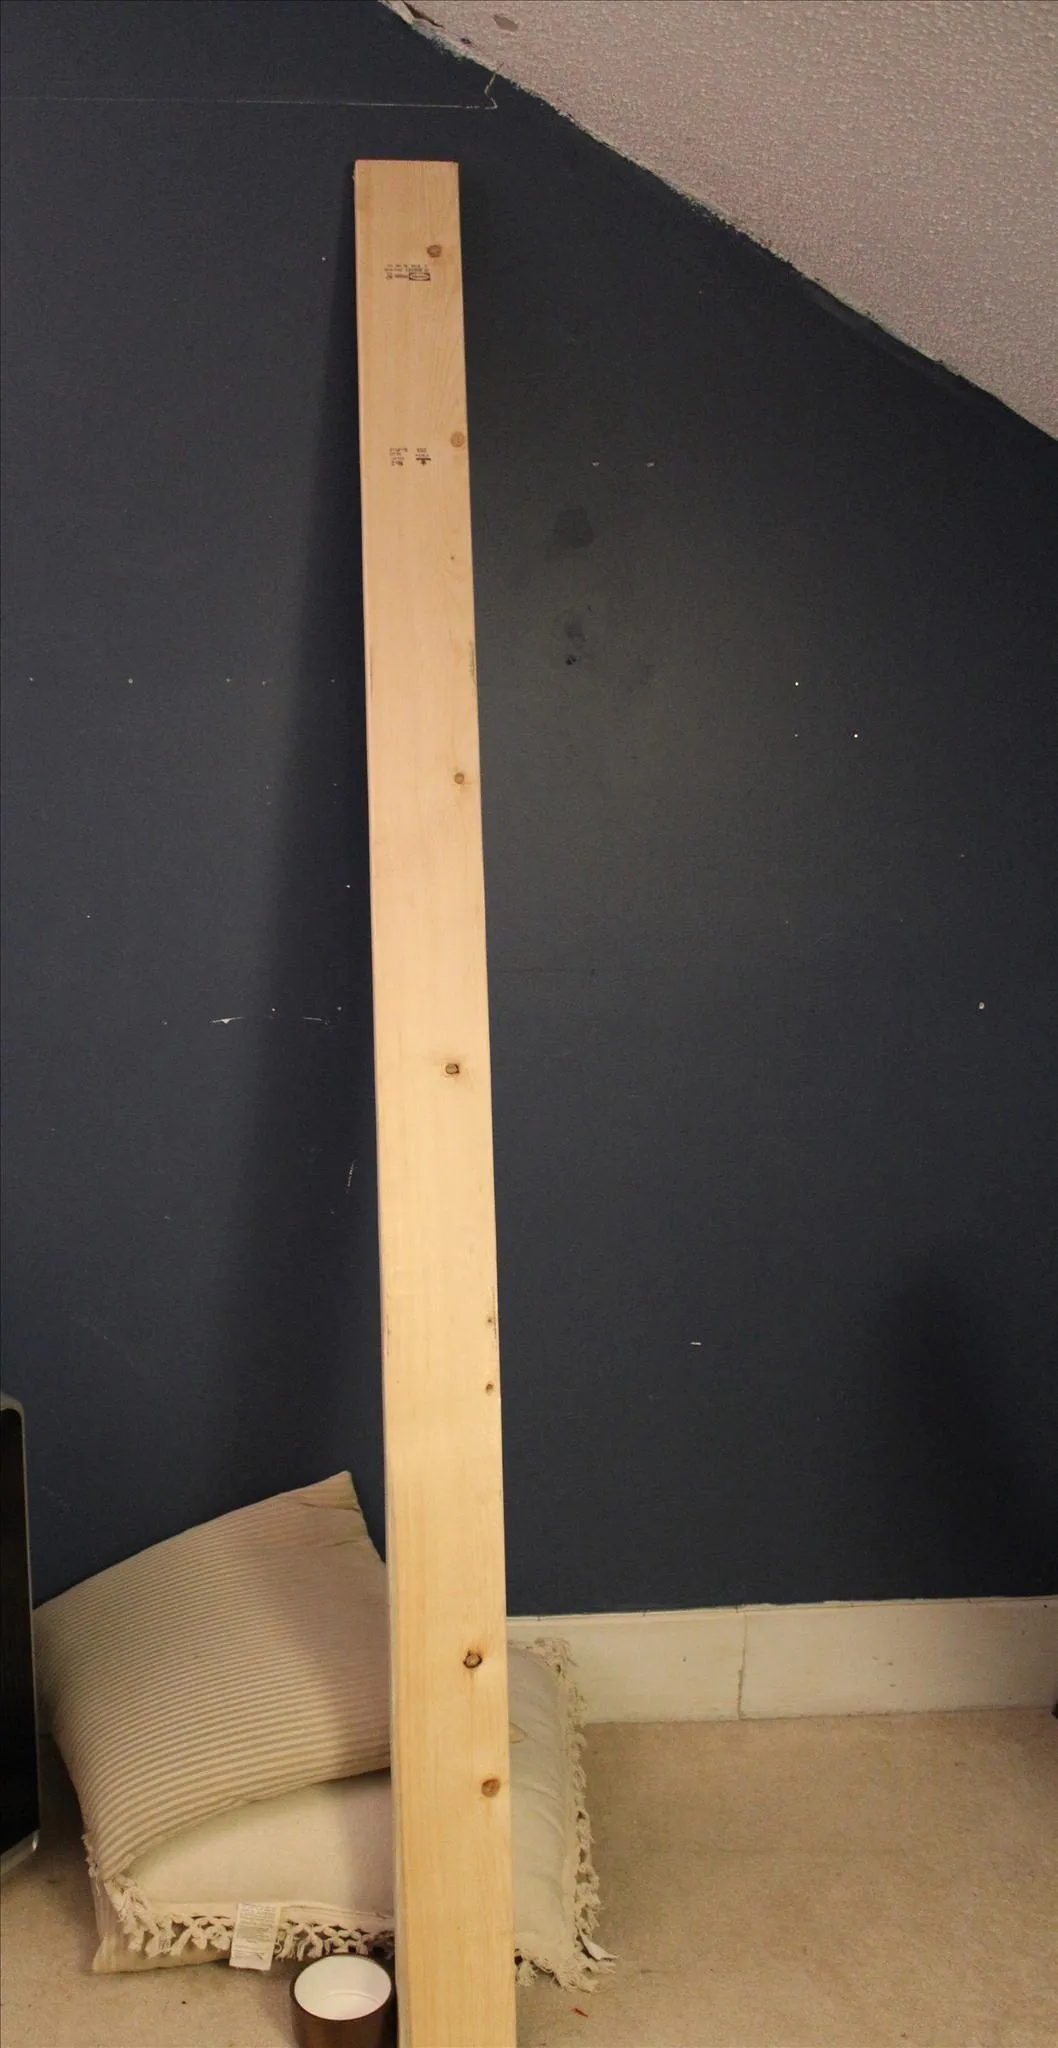
As you can see, it's just a big ol' plank of wood.
Cut It to a Manageable Size
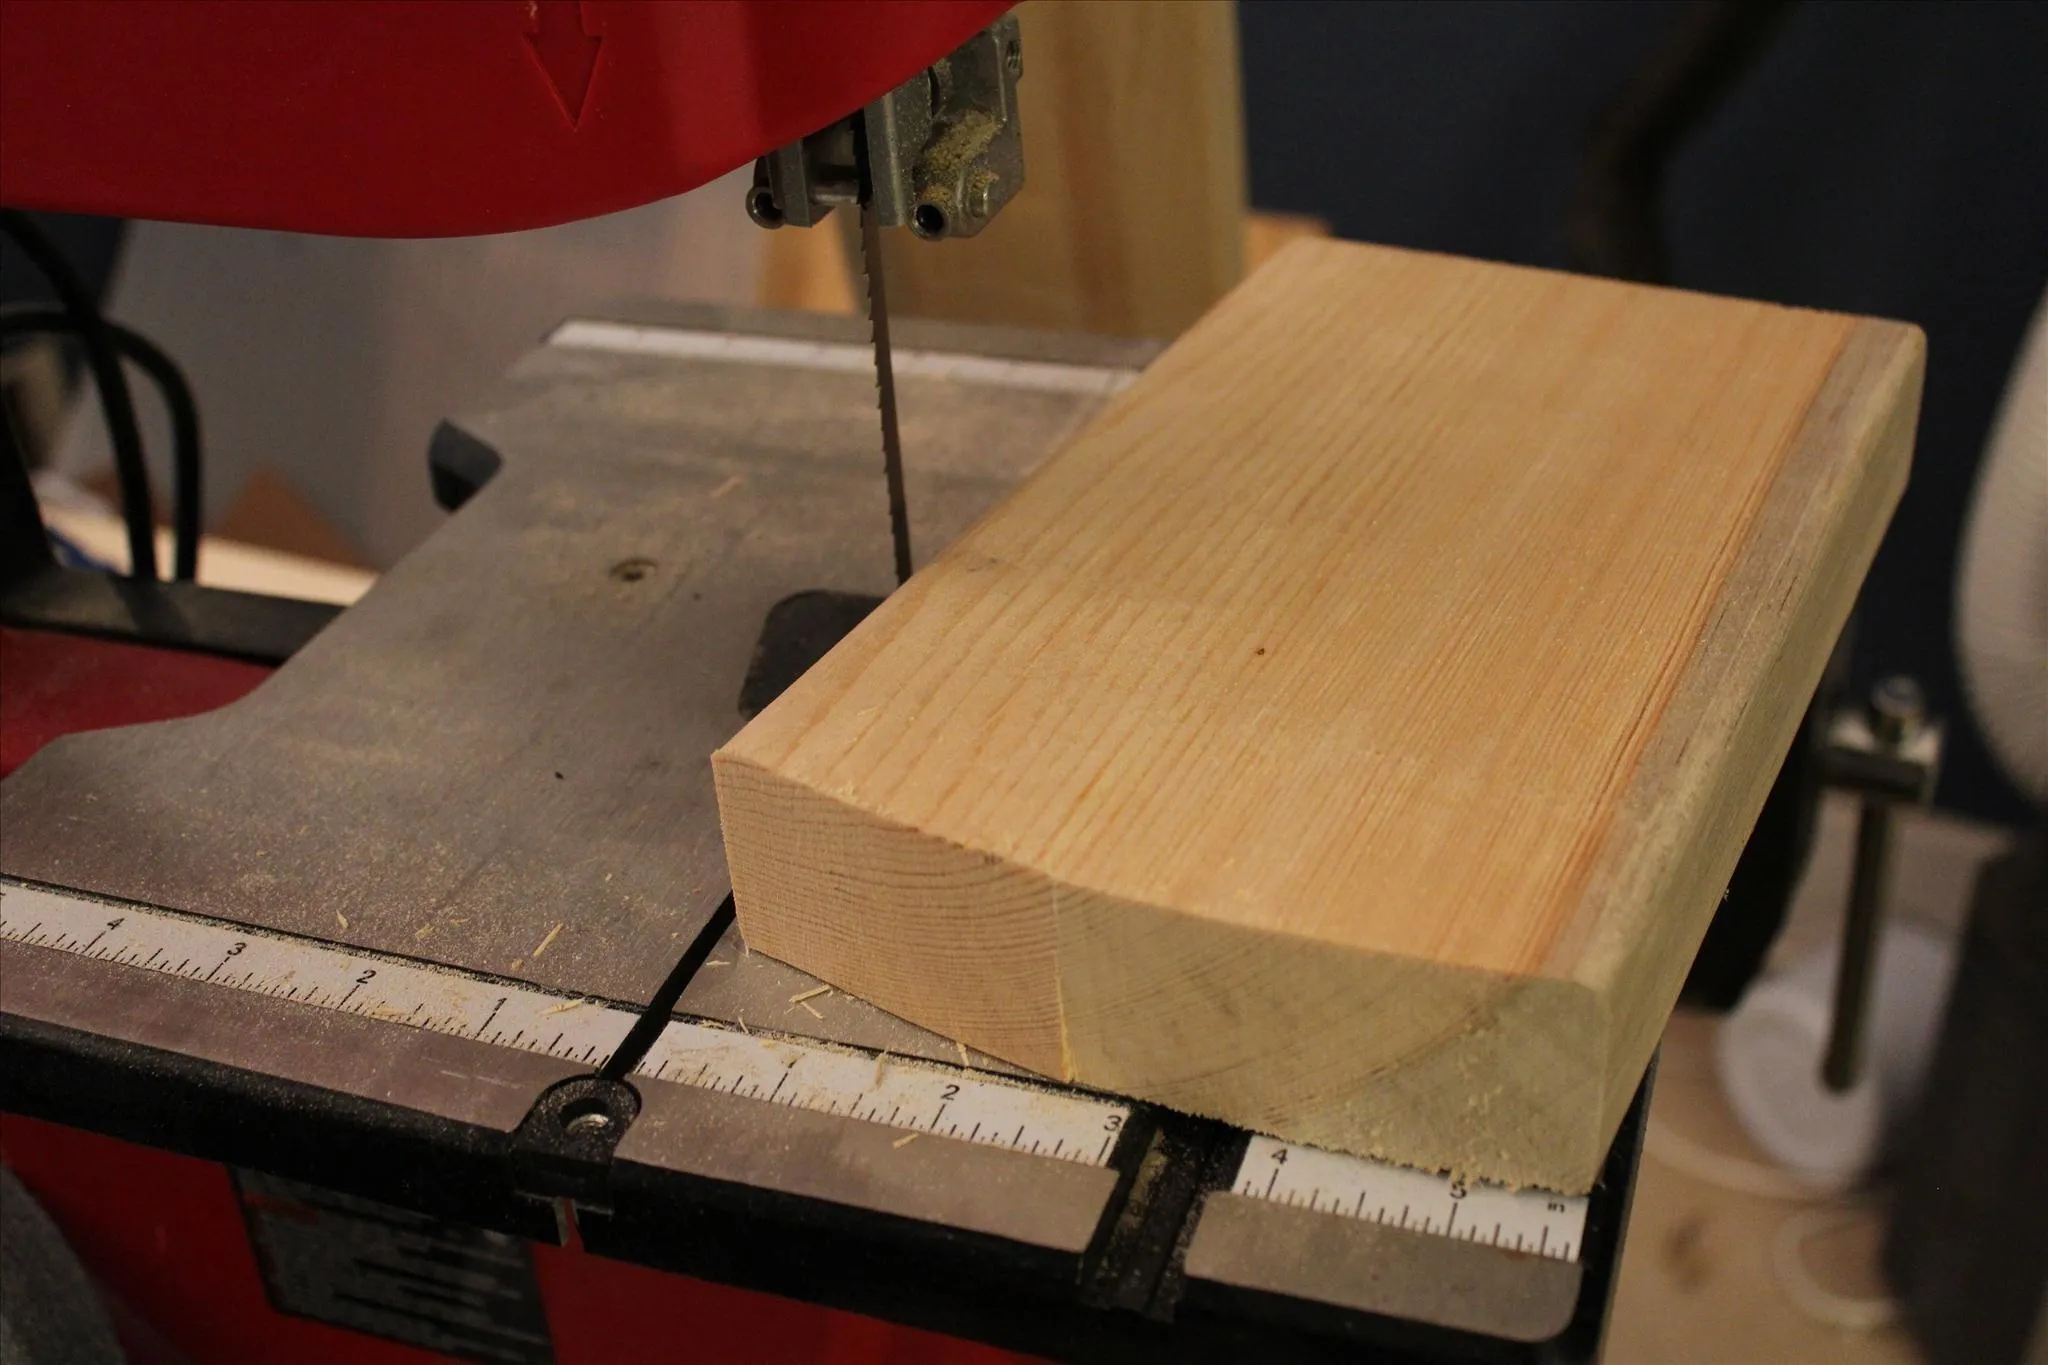
Working on a huge plank like that is ridiculously difficult. Cut it down to size.
I was lucky that I could cut it down to pistol size on my band saw, but otherwise I would have had to use a handsaw. A circular saw works great for this, but I don't have one.
Draw a Pattern
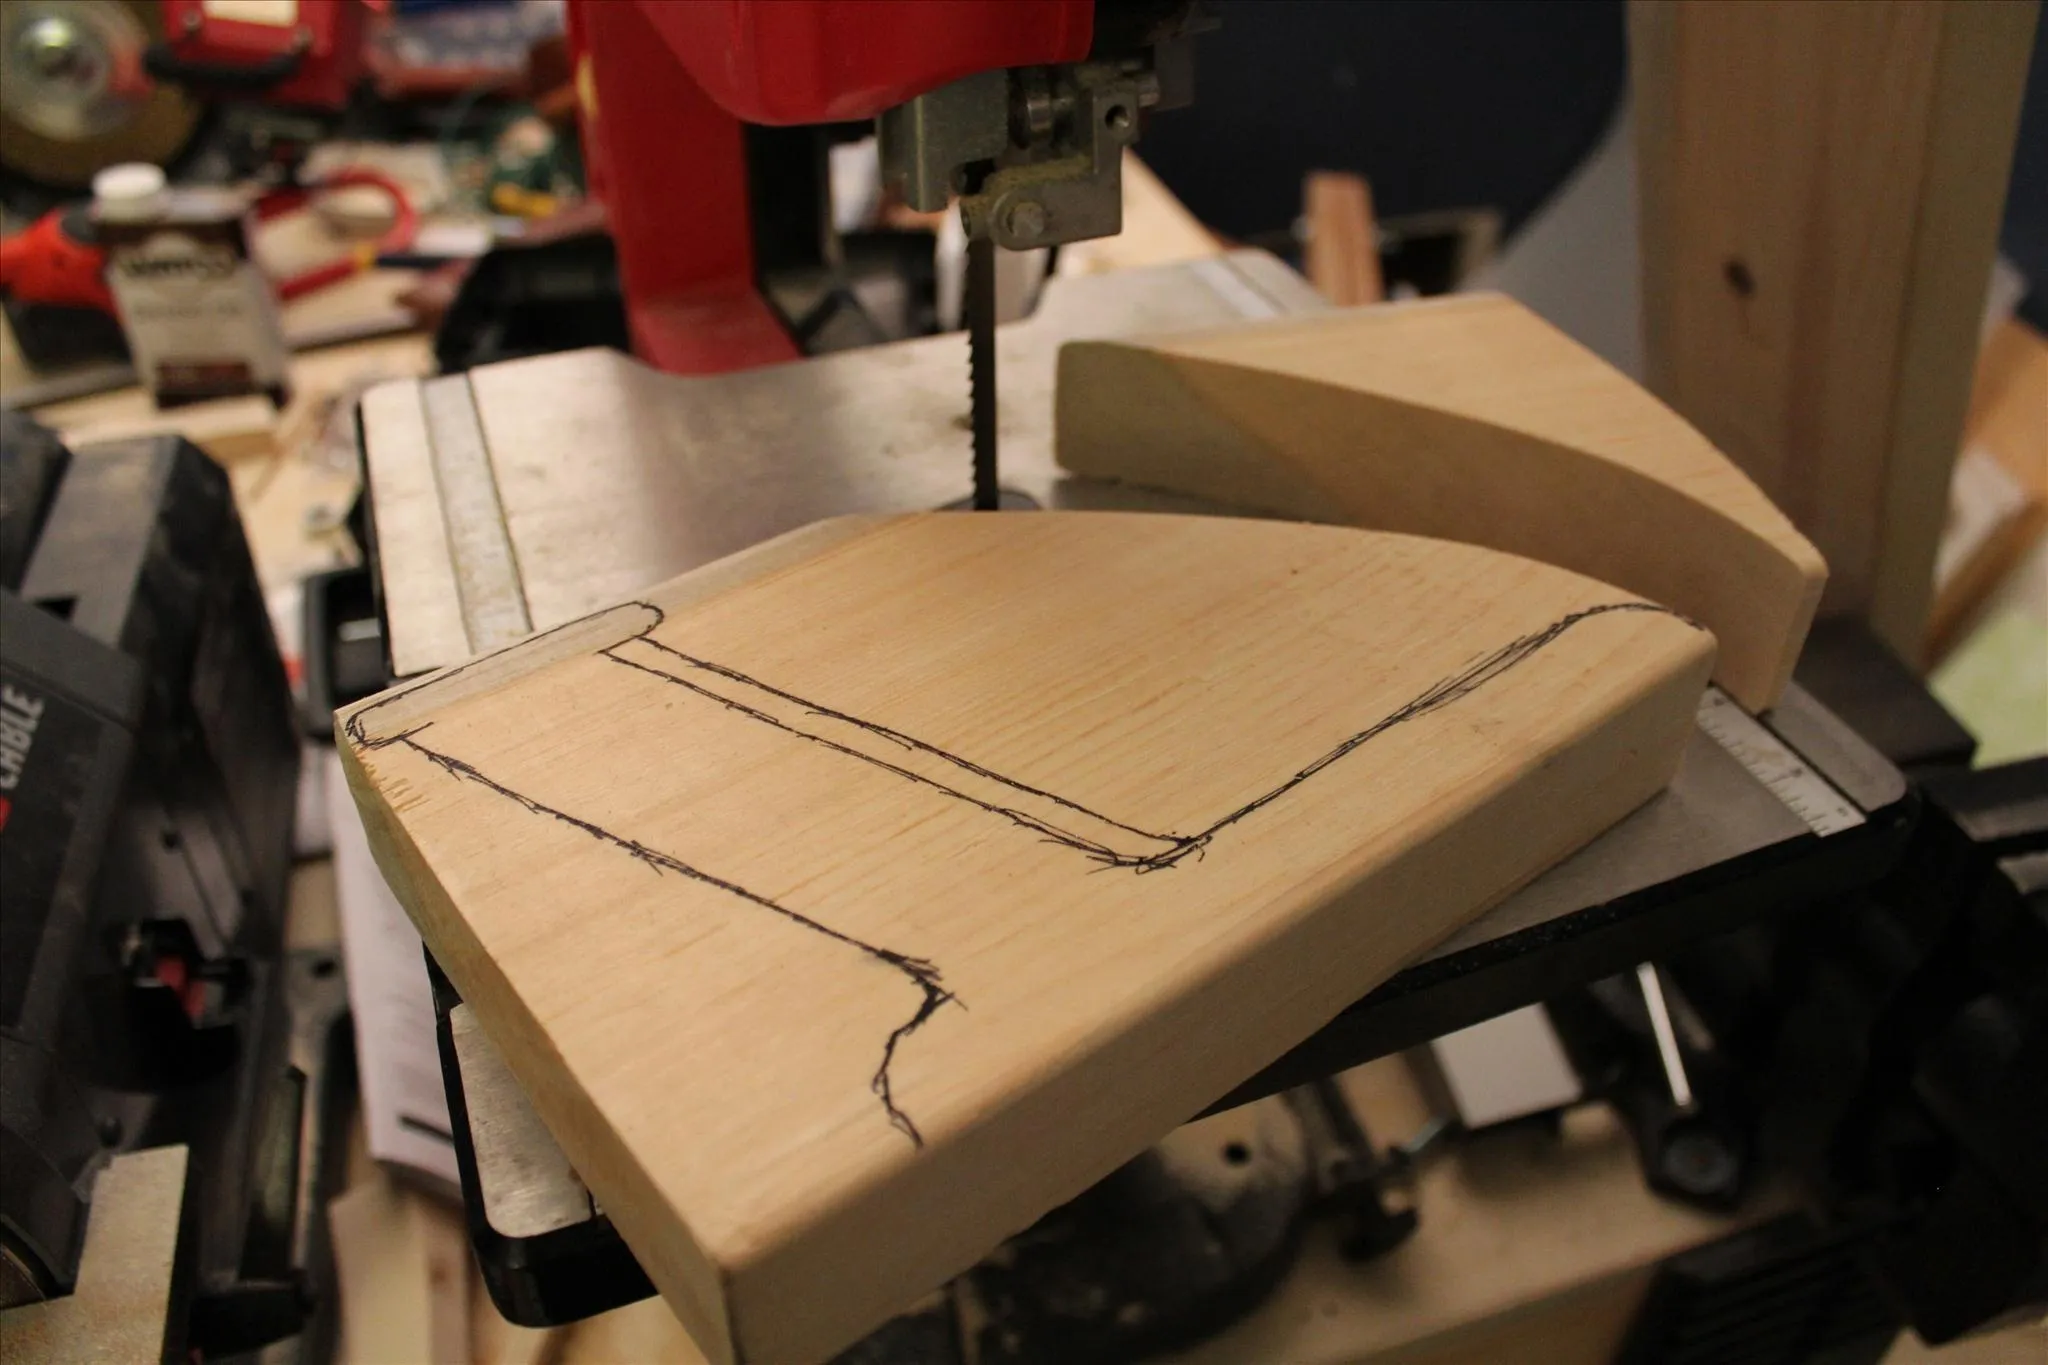
Now it's time to decide exactly what you want your gun to look like. Well, the general shape, at least. I've done this a few times, so I was able to just sketch it out free-form like so:
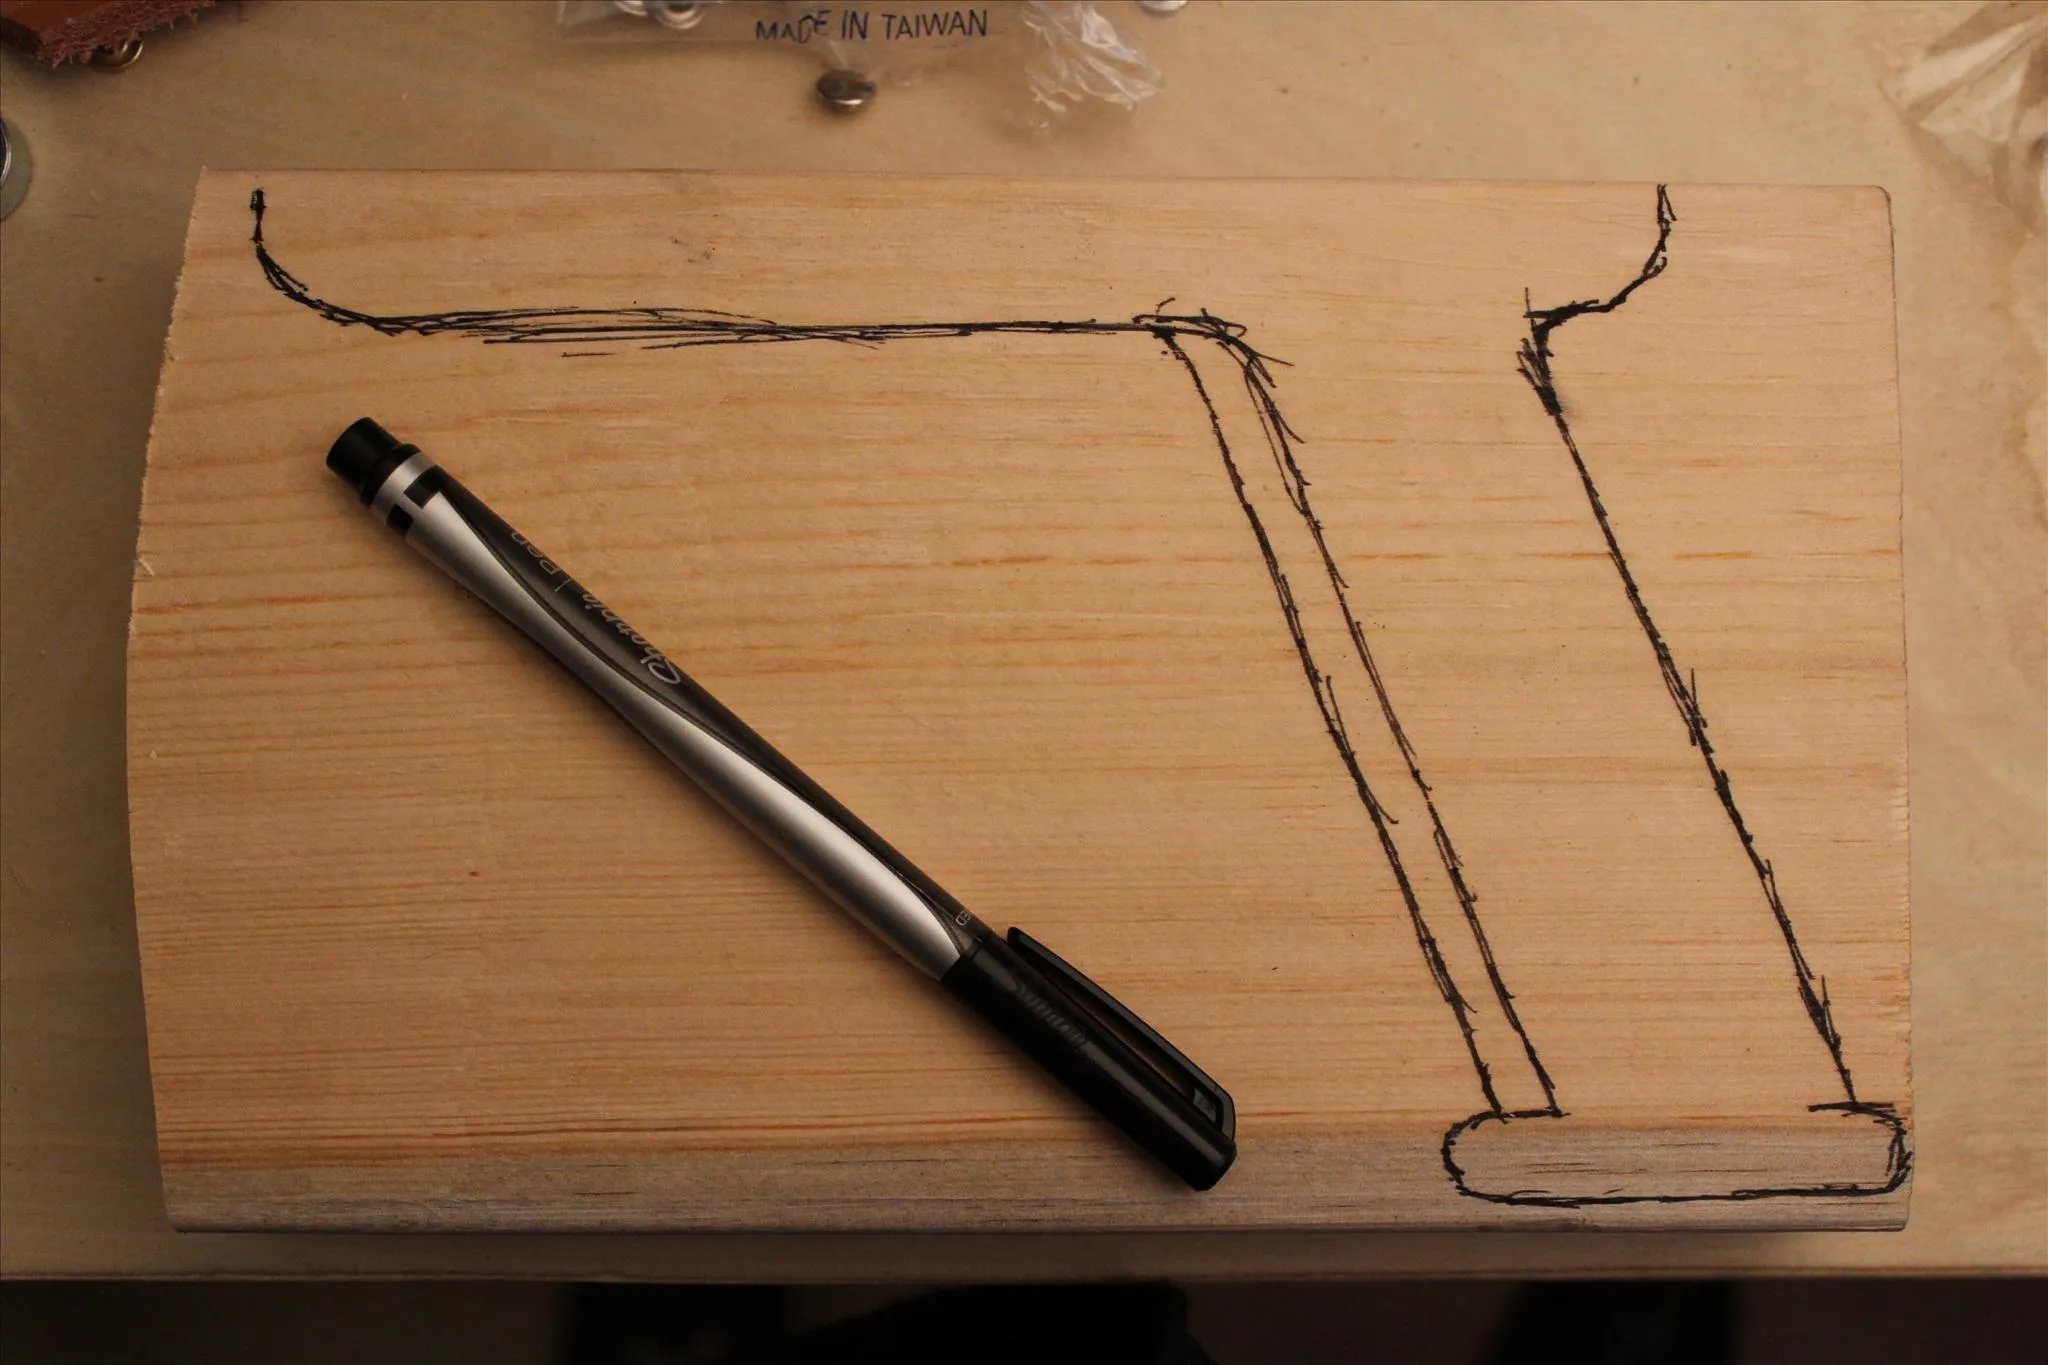
There are a few things worth noting in the above picture. First, it's fine to draw on the wood because we'll be sanding it down soon. Second, you'll notice that it's not a perfect outline. That doesn't matter, because the final shaping will be done in the sanding stage.
Third, you may notice an extra line on the grip. That's because I messed up and made the grip too small. Adding an extra line was no big deal, and you shouldn't be upset if you mess up at this stage.
The real trick to making a gun stock is the grip. That's where the majority of the fine work goes into it, and I'll show you a trick to get a good grip:
just put your hand on it.
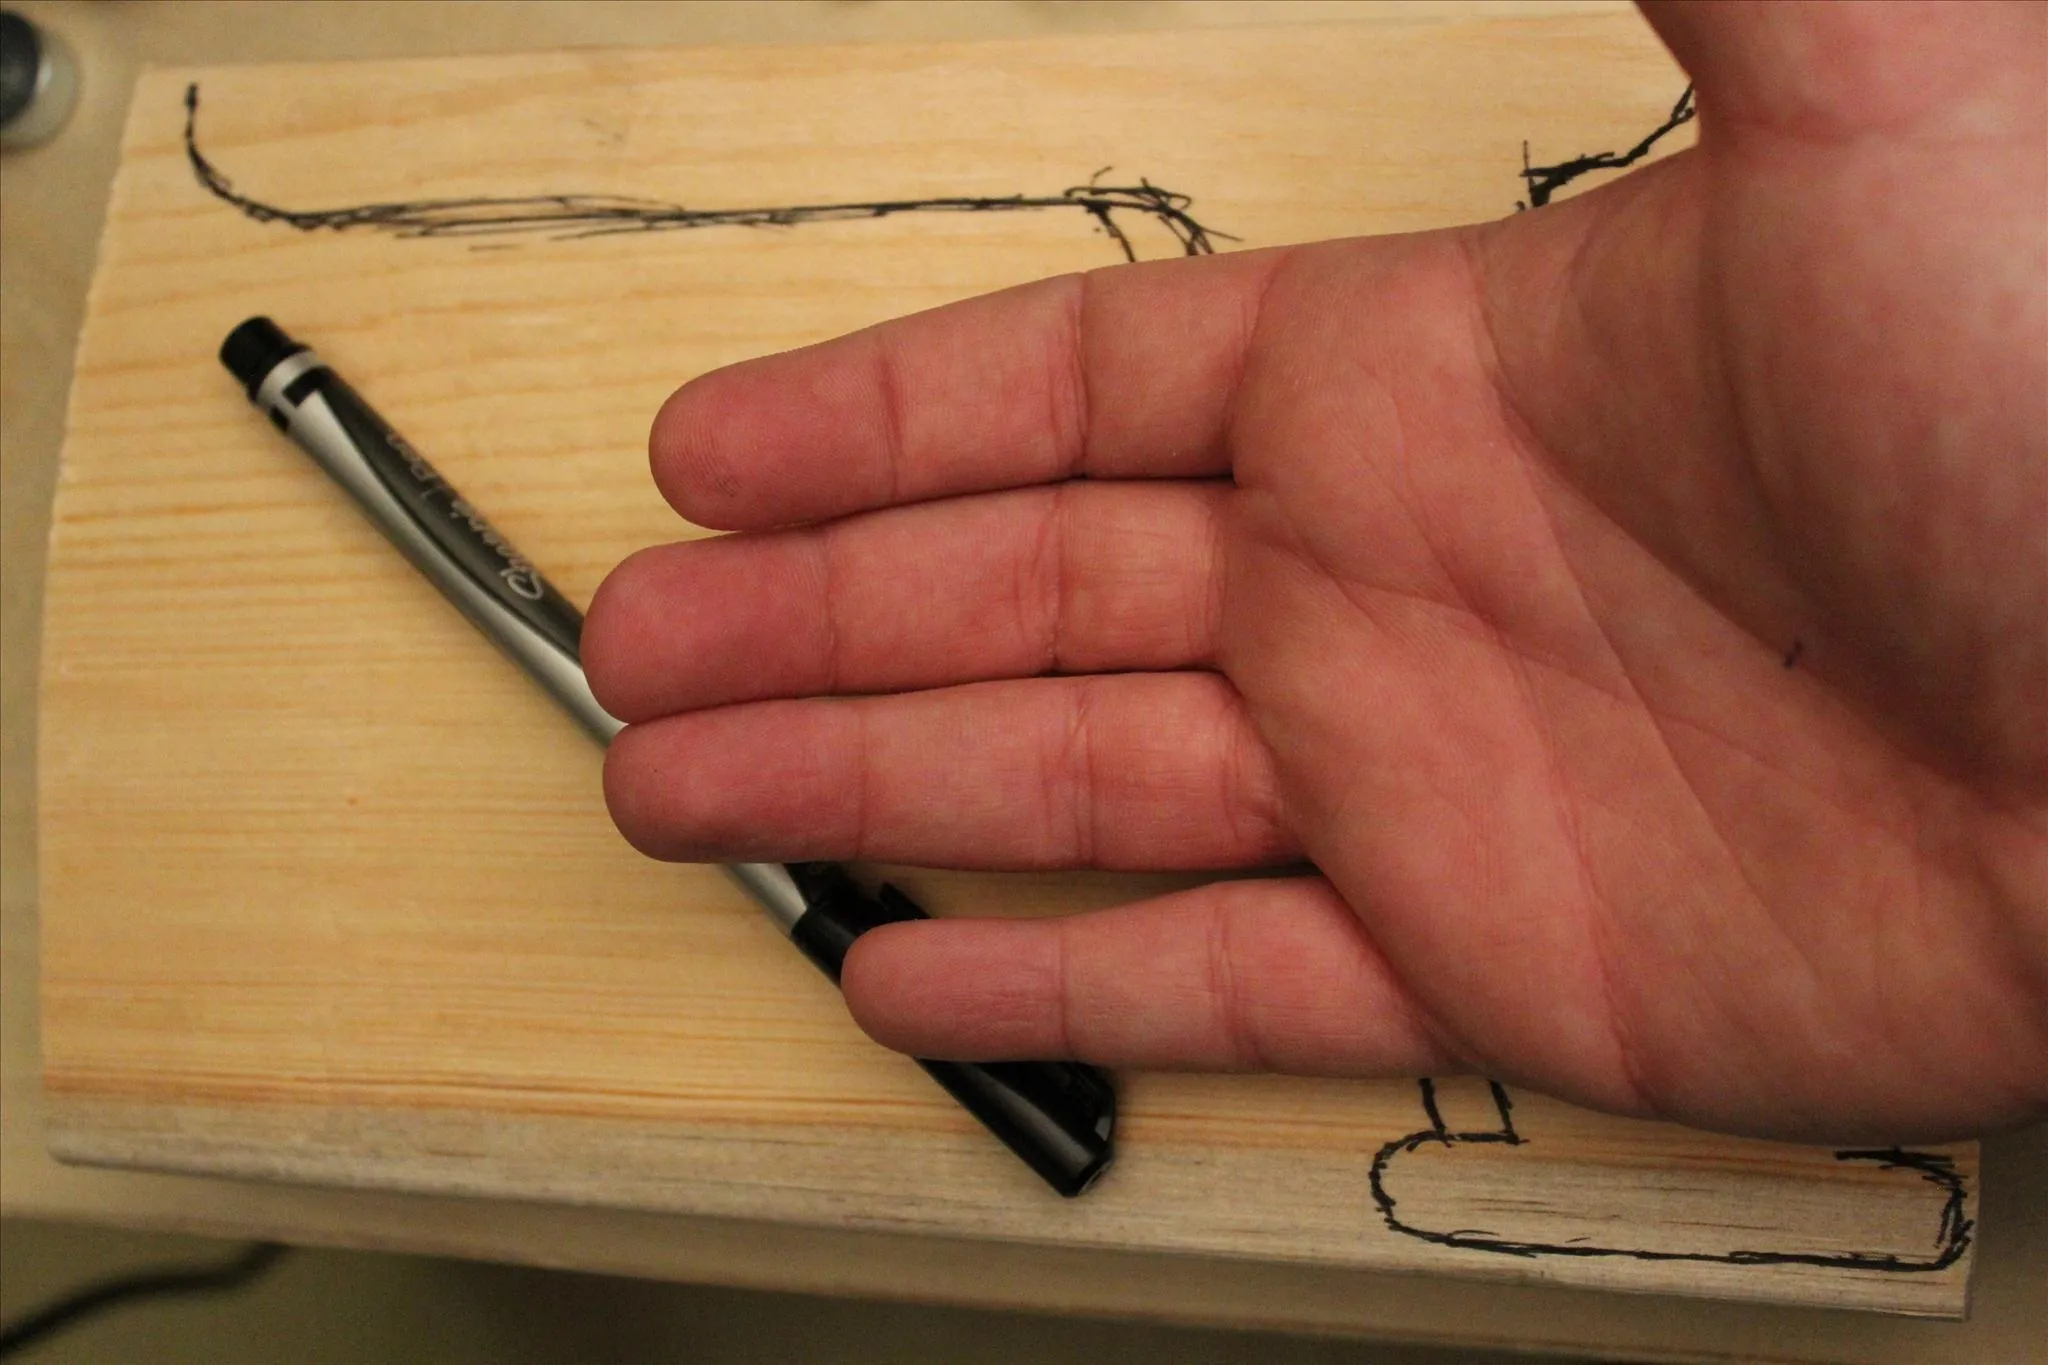
Put your hand over the drawing, and see if it looks right in your hand. Are the proportions right? When you close your fingers, does the grip look too thin? Too thick is fine, because we can sand it down later. But if you make it too thin, you'll have to start from scratch.
I have a few other tips for this section, too.
- Gun grips are never at a right angle to the barrel. Always tilt your grip backward, like I did on this gun. It makes for a very comfortable gun-holding experience.
- Don't just end the grip. I made a little shelf at the bottom on this one, but there are a variety of ways to deal with the bottom of the grip. Make it look nice, and don't just end it in a flat plane.
I don't really have any advice for the stock itself, as that will vary wildly based on your particular design.
Cut It Out!
It's time to cut your design out using the band saw. The blade of a band saw is flexible, so you can make nice curved cuts. However, you can't do sharp curves or right angles, so you may want to go wide at first, to trim off the excess wood that gets in the way.
You can always come back and get spots from different angles.
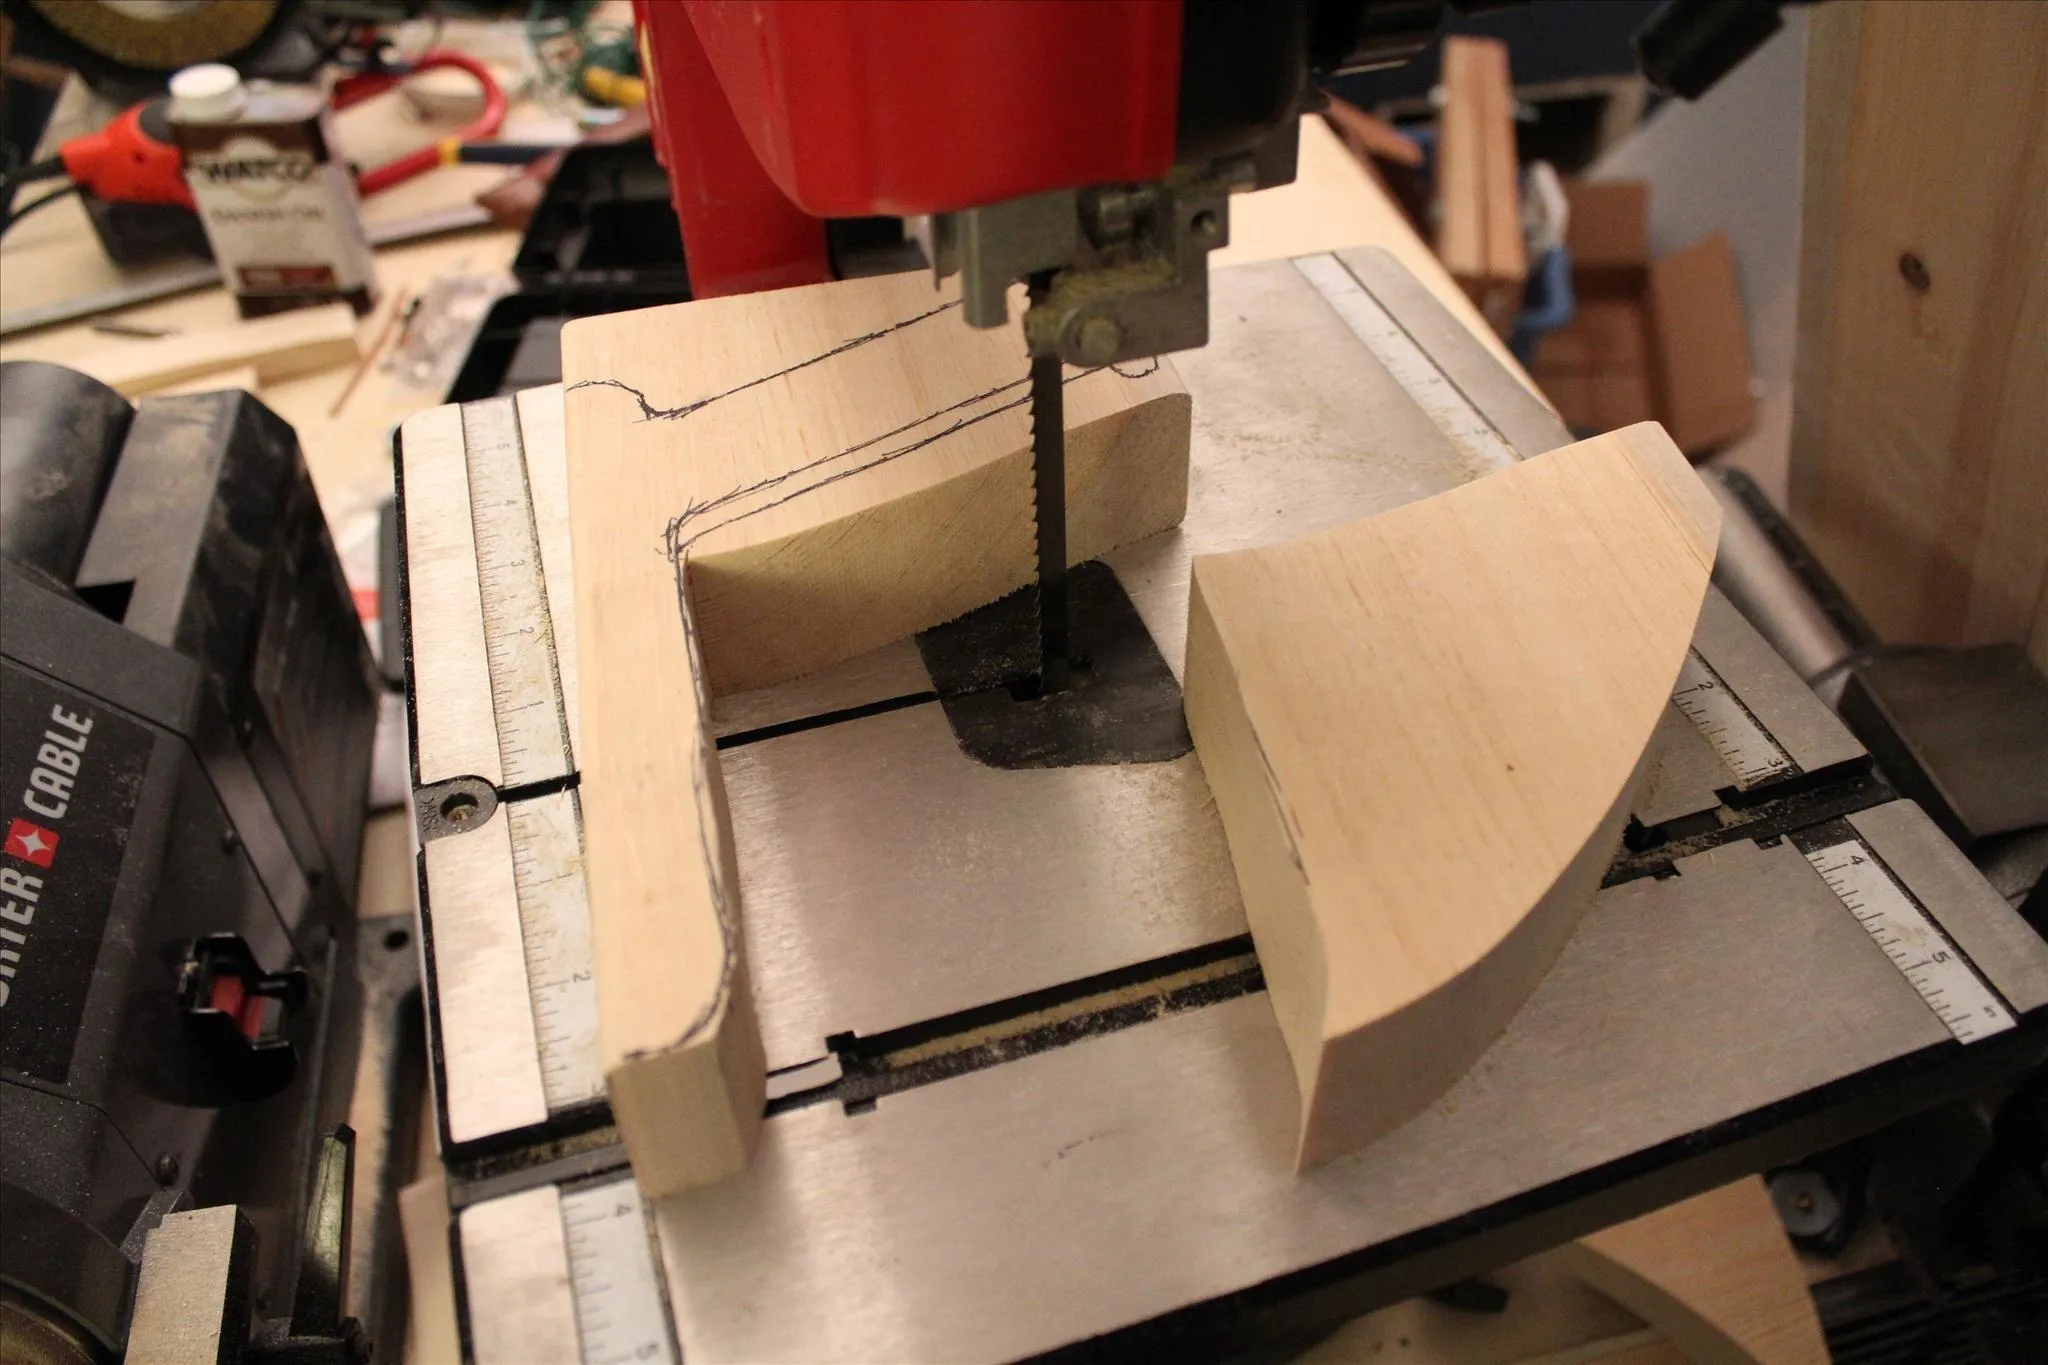
I think you get the idea. This is the most straightforward part, but it can be tricky. My advice is that no matter what, don't cut into the area you marked. If you have to shut the saw off and pull the gun out, that's fine. It's better than cutting the wrong spot and having to start over.
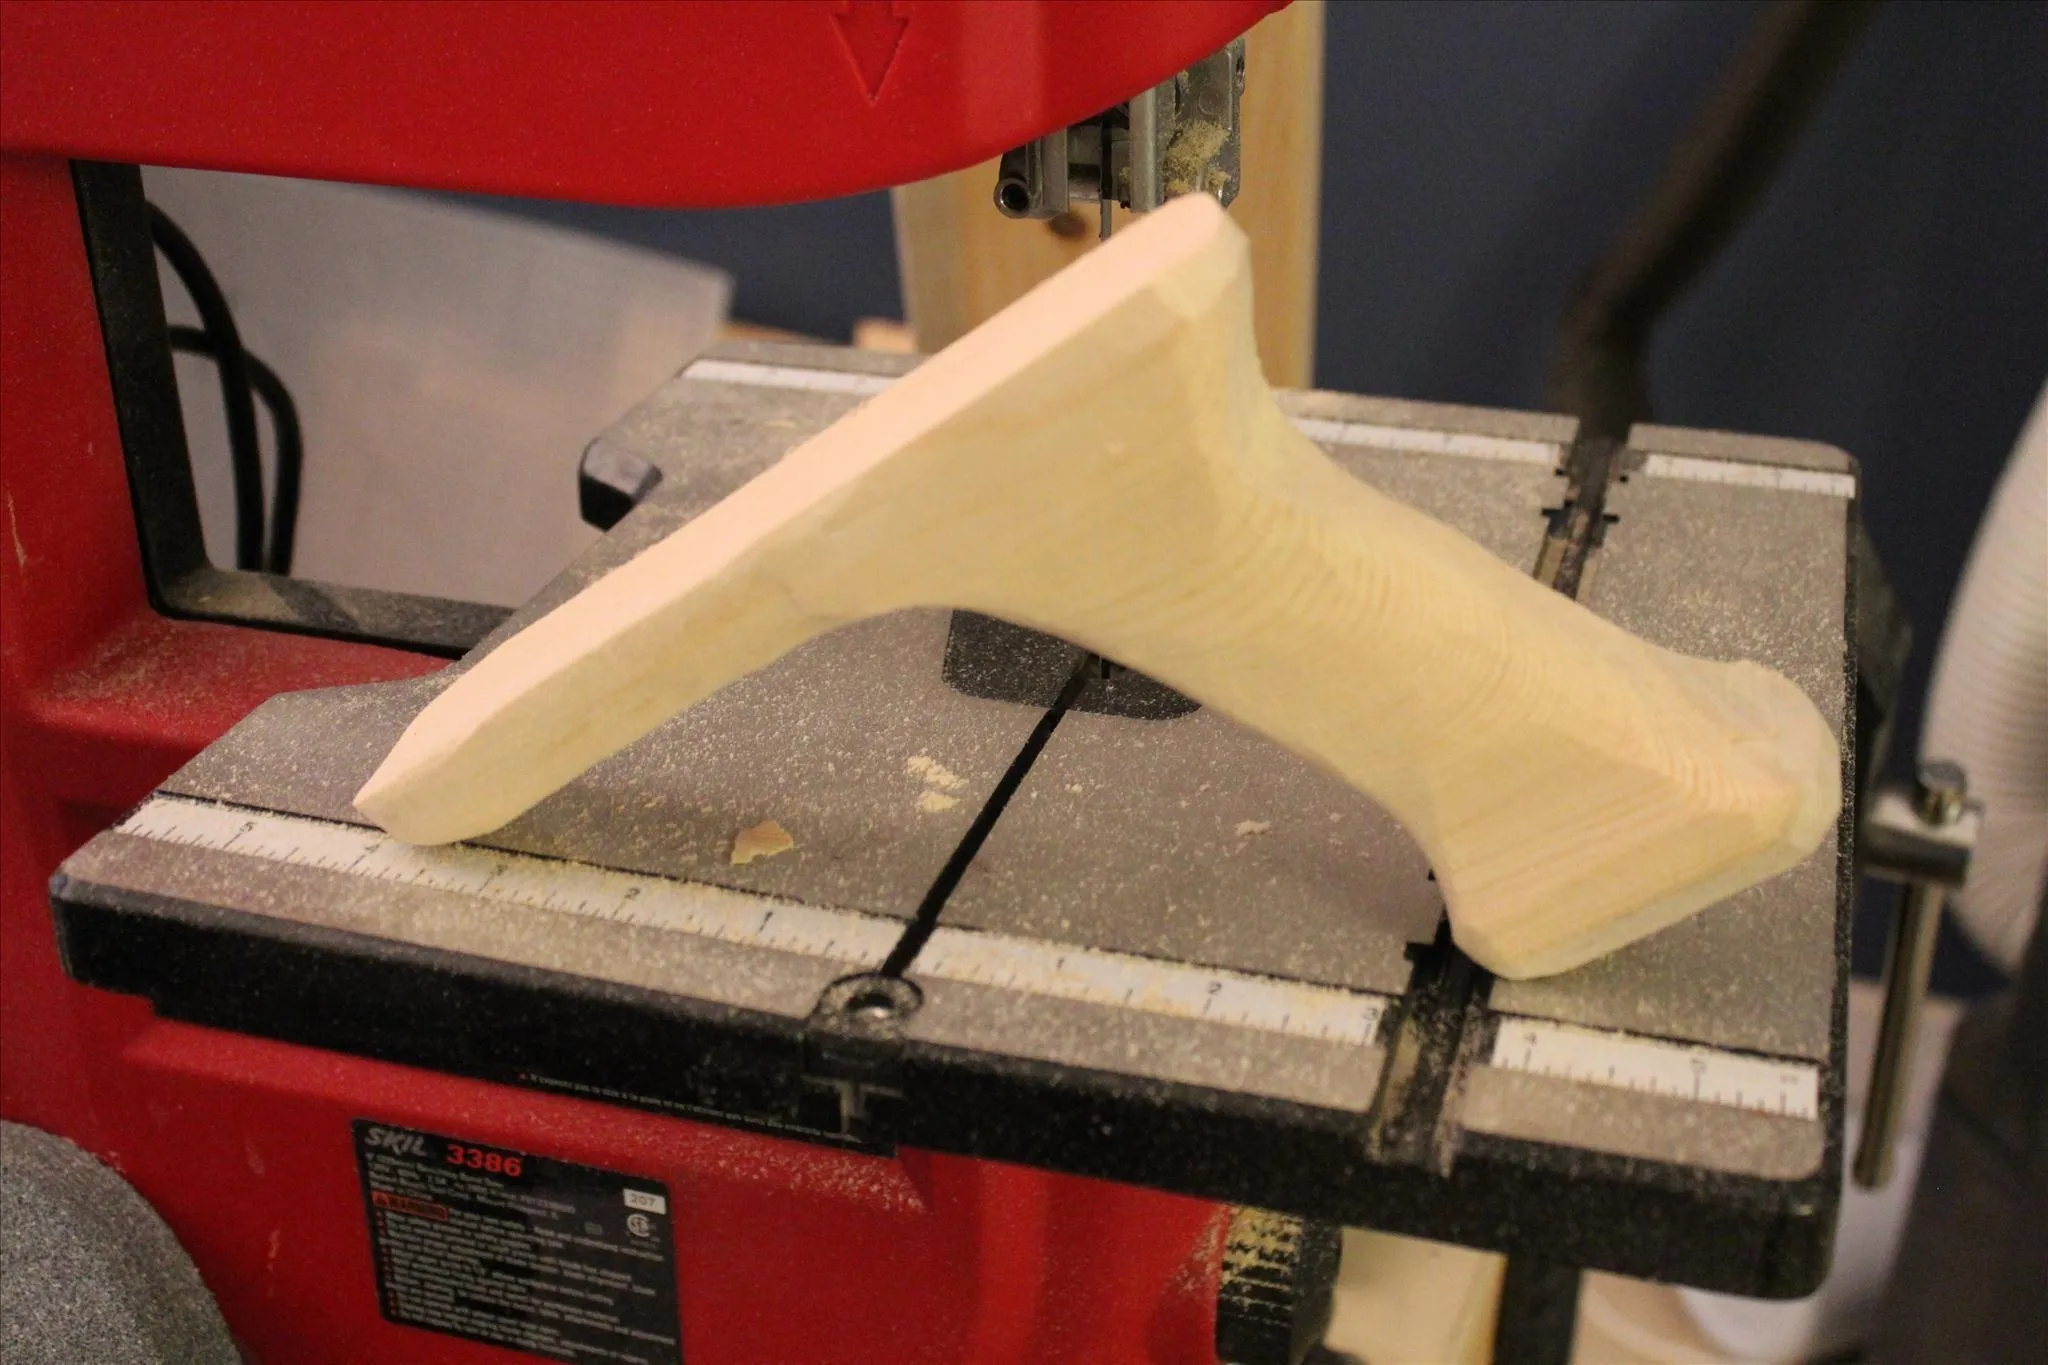
Here's what my stock looks like so far:
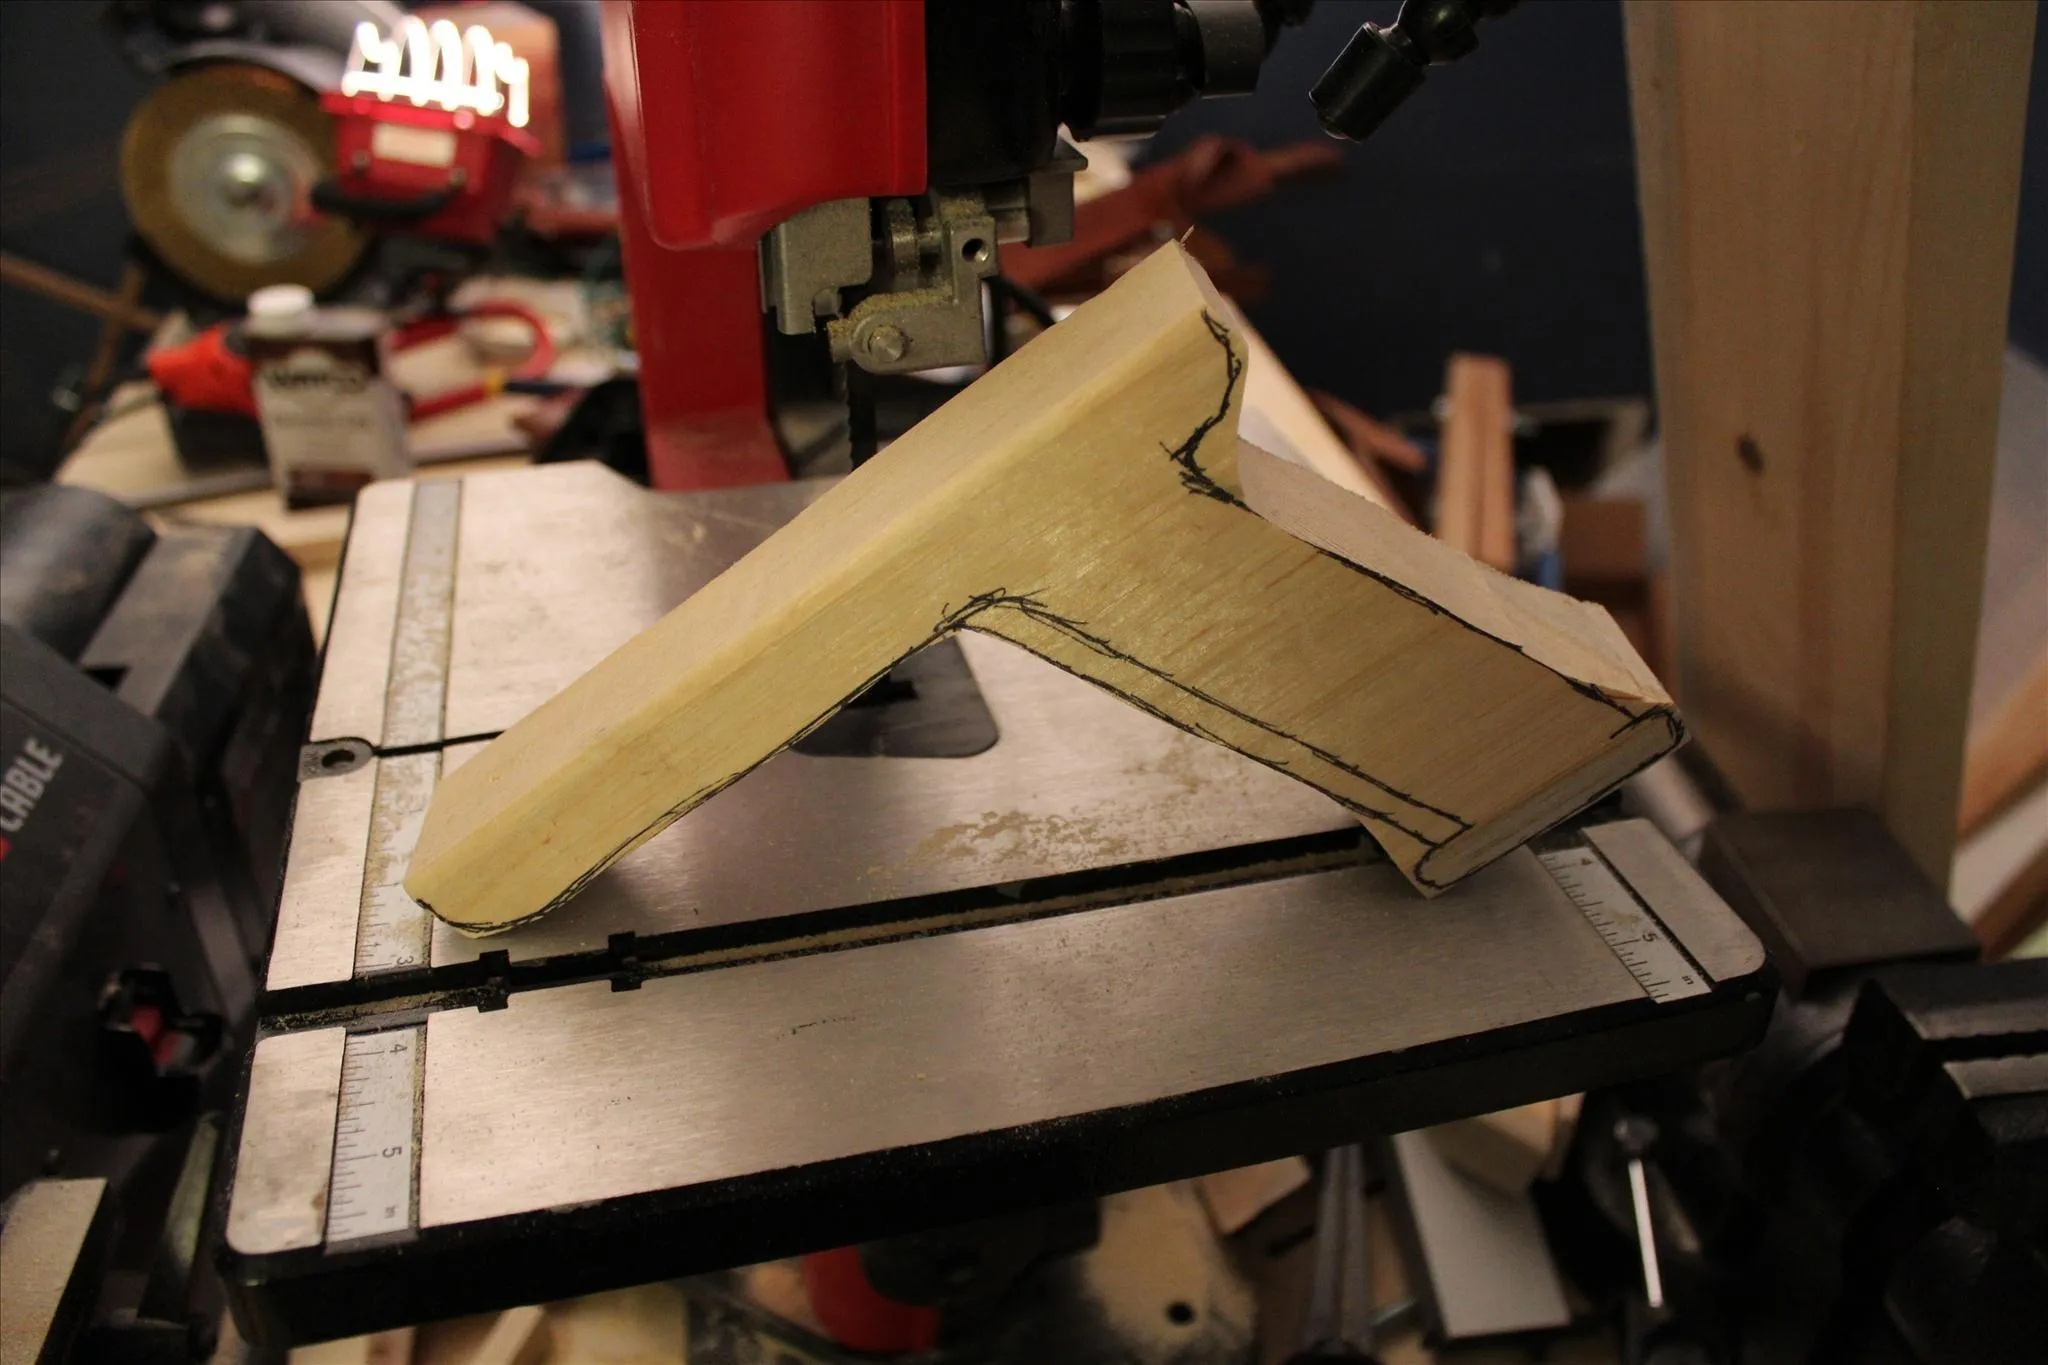
At this stage I find it useful to hold it up next to whatever the barrel will be, so that I can judge size and make sure everything looks okay:
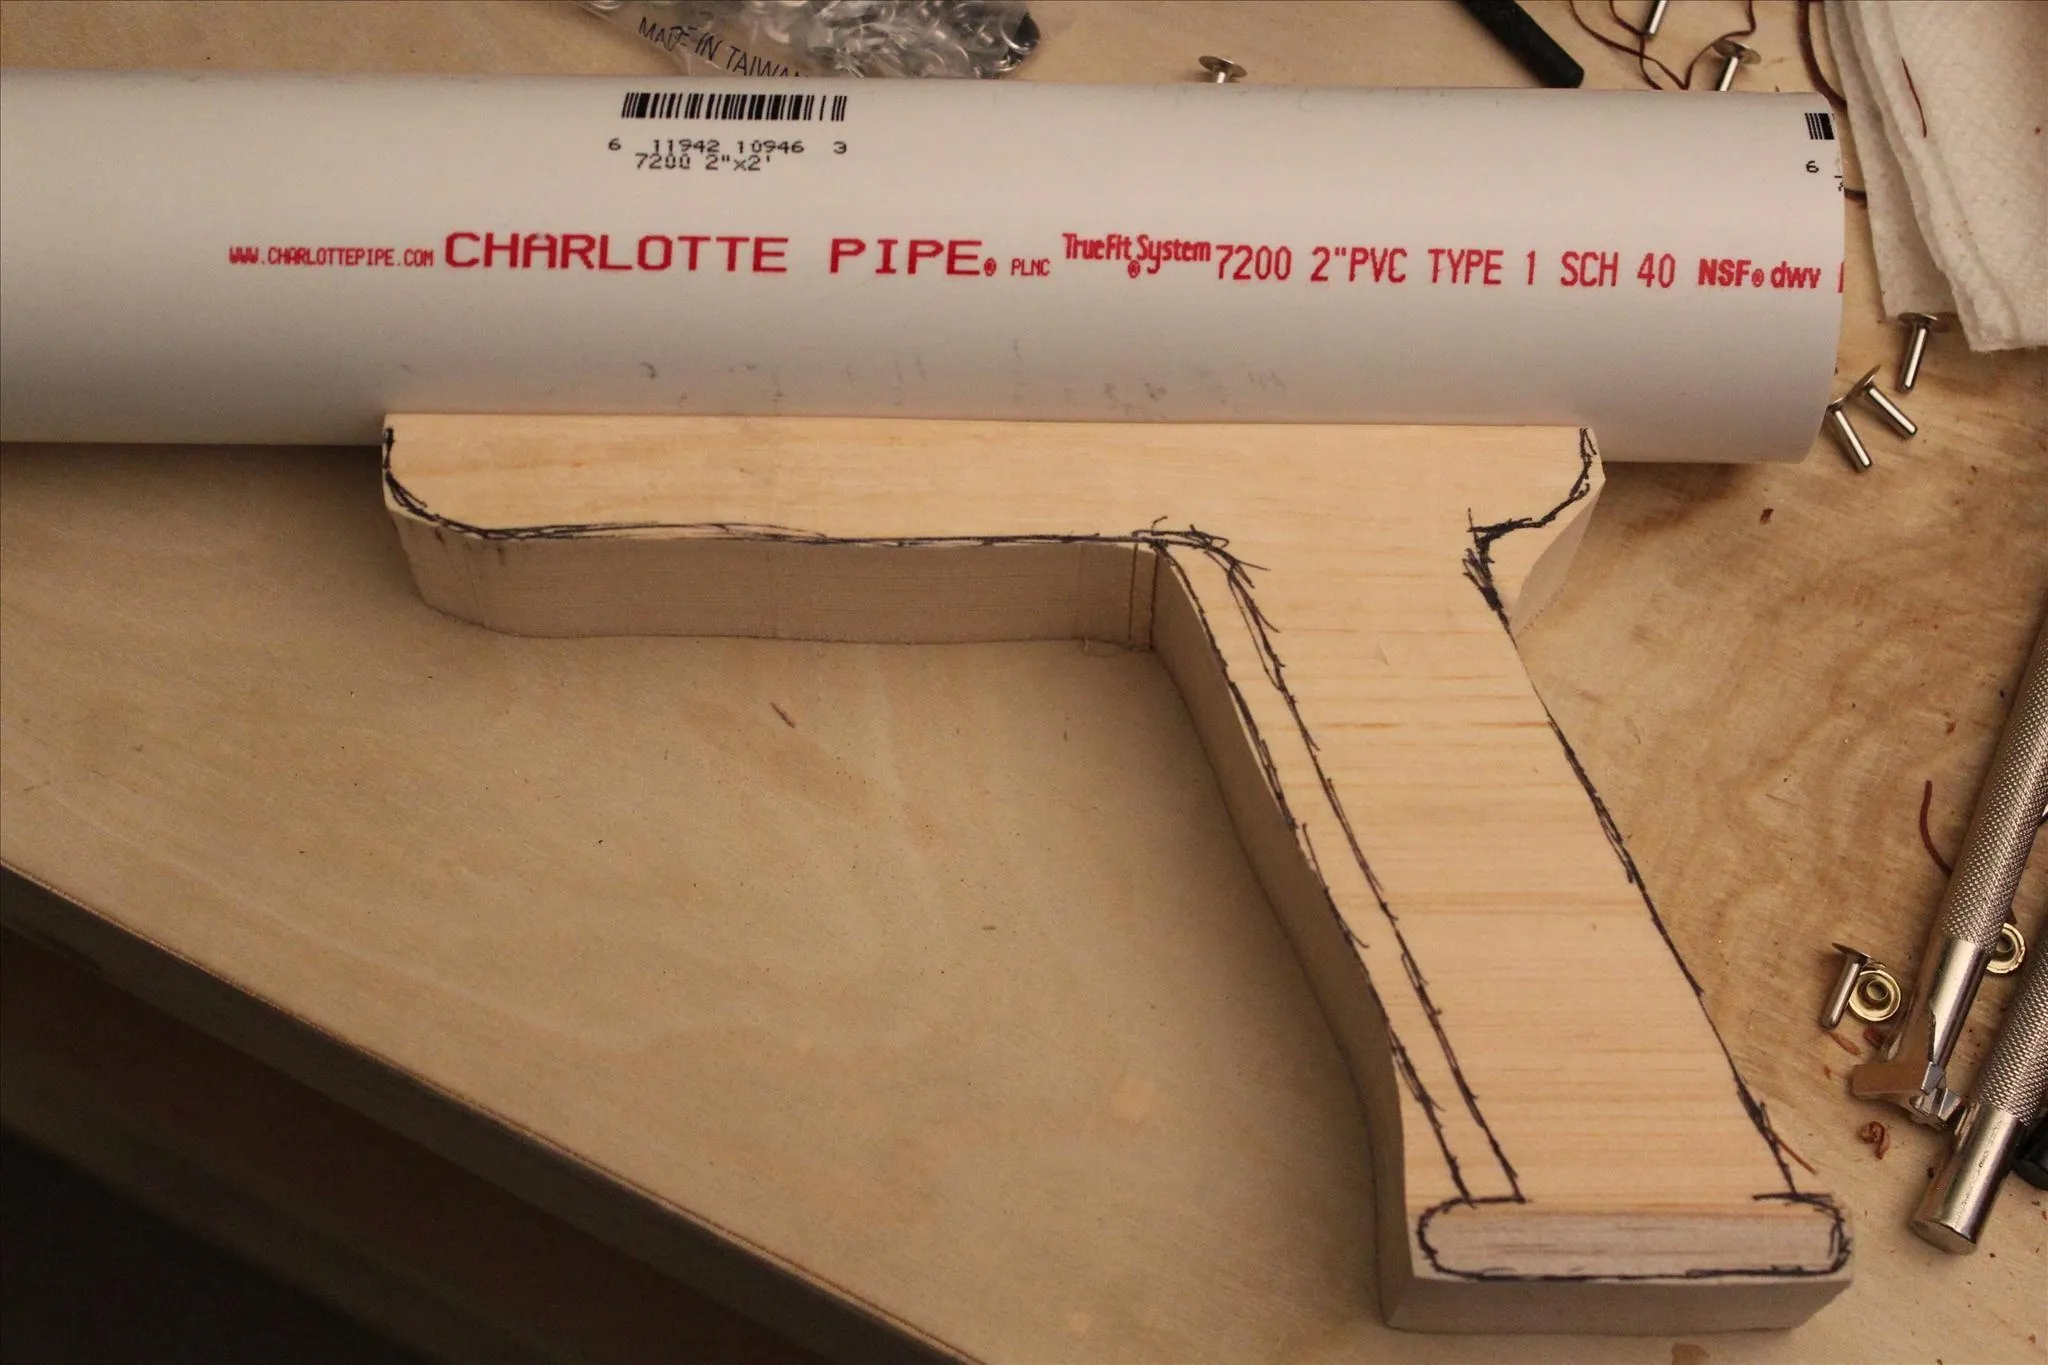
Note in the above picture that there are still some small areas that I wasn't able to get with the band saw. If you have parts like that, don't worry! We'll get them during the sanding.
The Sanding
Prepare for a lot of sanding. This is the hard part, and the fact of the matter is that there's not a ton of advice I can give you, here. While cutting, sketching, staining, etc. are all pretty straightforward, sanding is an art form unto itself. This is where you really bring out the form hidden inside the wood.
I don't mean to intimidate you. Sanding is in many ways really easy, and I'll try to break it down as best as possible. Toward that end, let's bring back that picture of the bench sander from before.
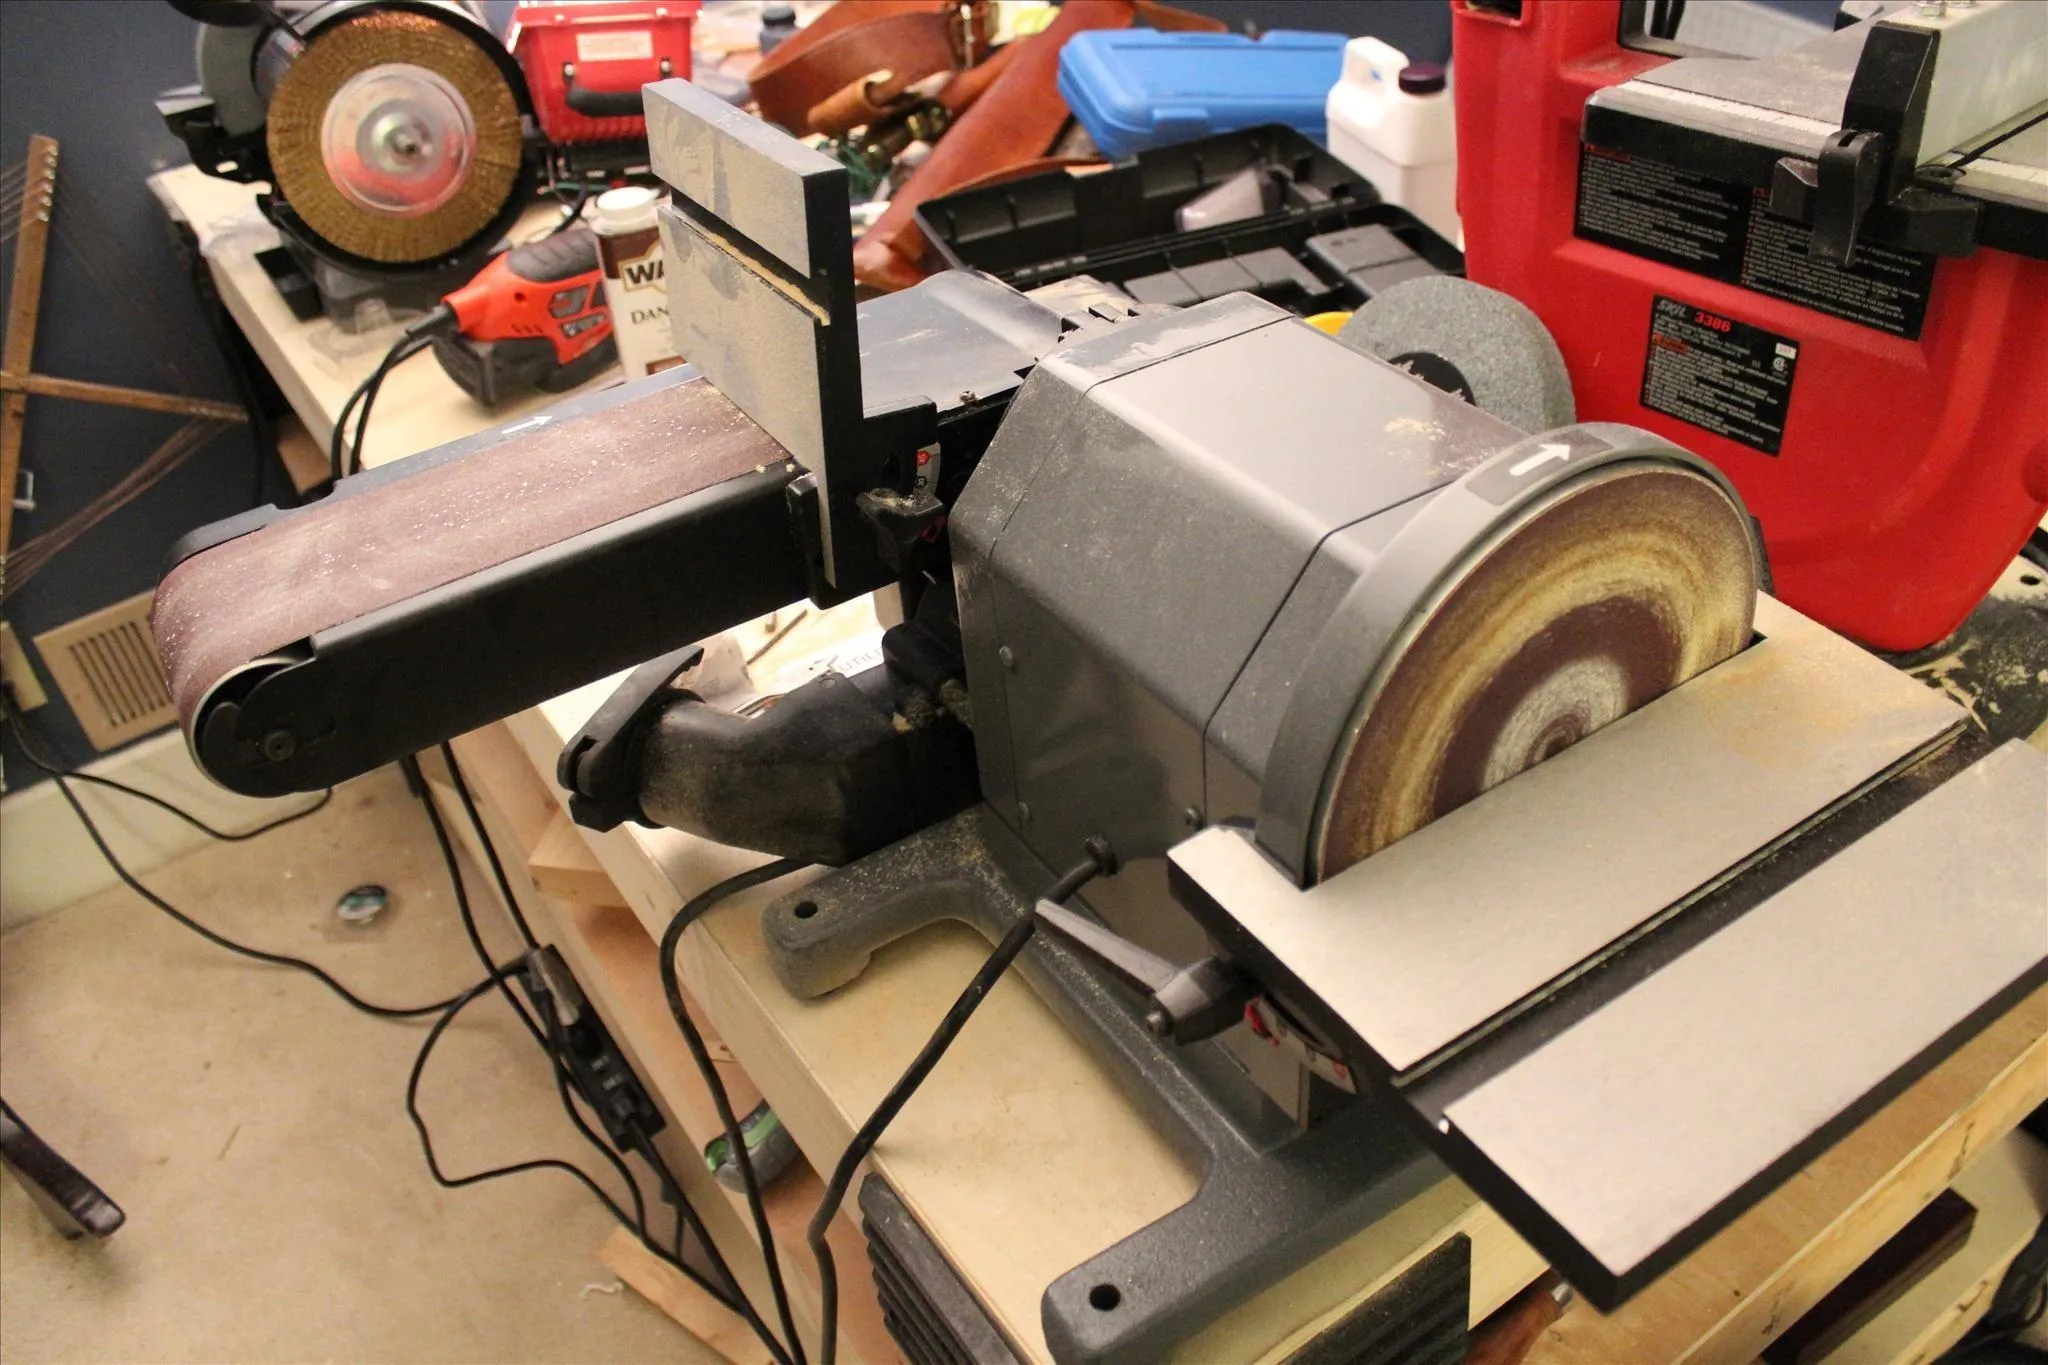
So, we actually have several different sanding surfaces in one. First, we have the disk in the foreground. This is used to get flat surfaces, and can be really helpful in certain circumstances. I used it a few times on this project, but whether or not you use it is, of course, up to you.
Now in the background there's the belt sander, which is actually a few sanding surfaces in one. What's obvious is the big flat part. Less obvious is the curved tip, which can be used to great effect. Even less obvious than that is the straight edge at the very, very tip of the belt. One of the hardest things to do when sanding is to get a straight edge, and you can manage that by using the very edge of the belt.
If you haven't done much sanding before, I recommend just fooling around with some scrap wood to get a feel for it. Beyond that, the best advice I can give you is to always do less than you want. Once you sand wood off, you can't put it back on, so go slowly. You can always sand more, later.
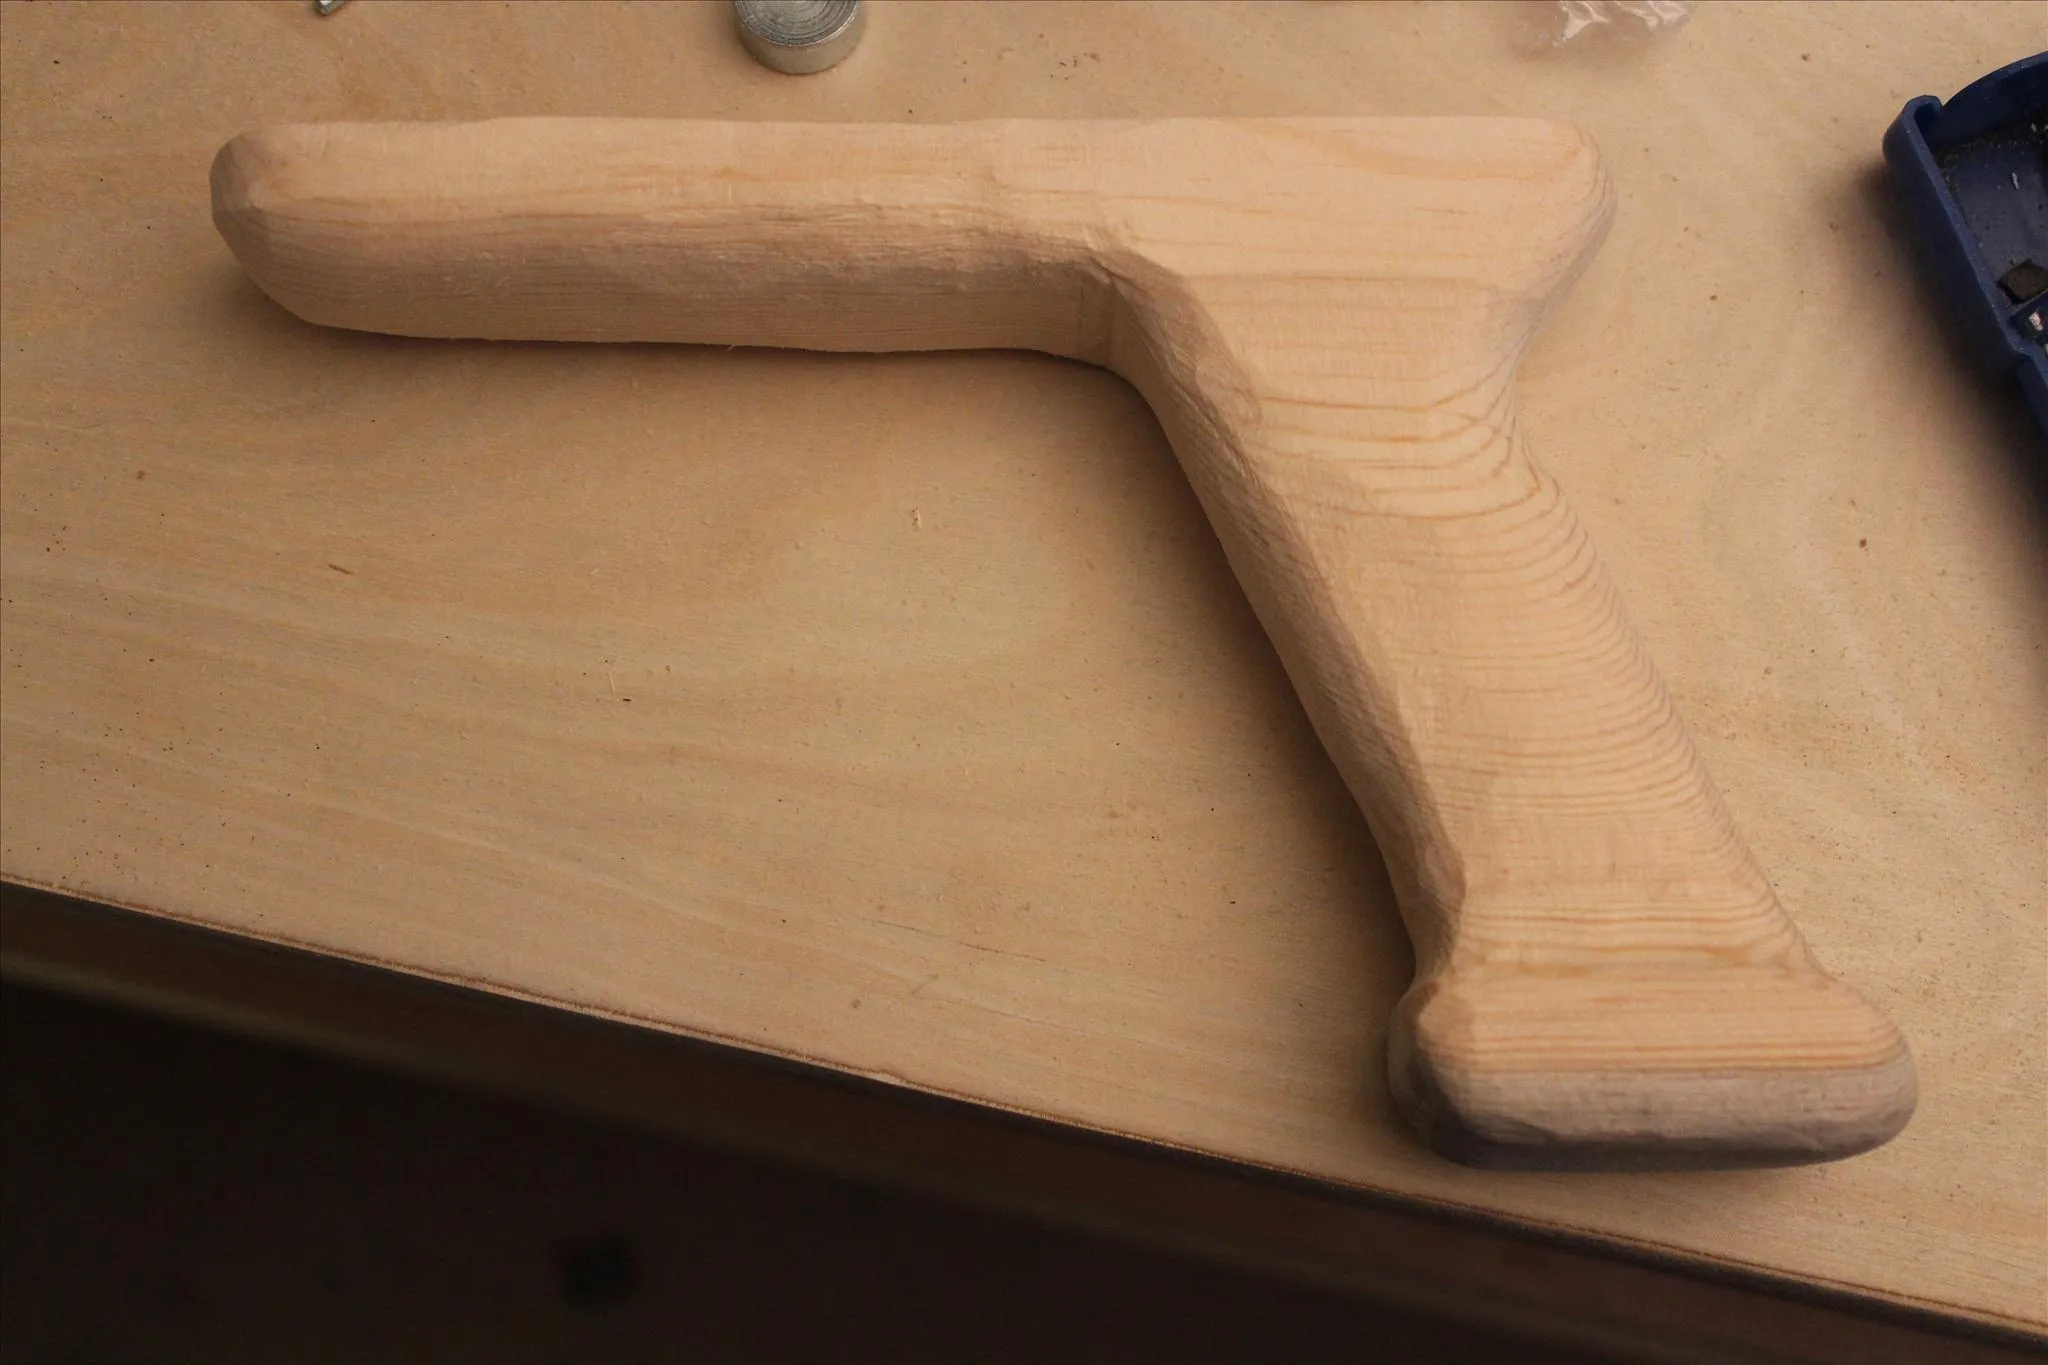
What you want to do is round off all of the edges, and make everything look as smooth and symmetrical as possible. Don't worry about detailing, as we'll do that with the Dremel. Here's about what you want it to look like after using the bench sander:
Notice that there's still a lot of fine work left to be done, because the bench sander doesn't have sharp enough corners to get into all the little nooks.
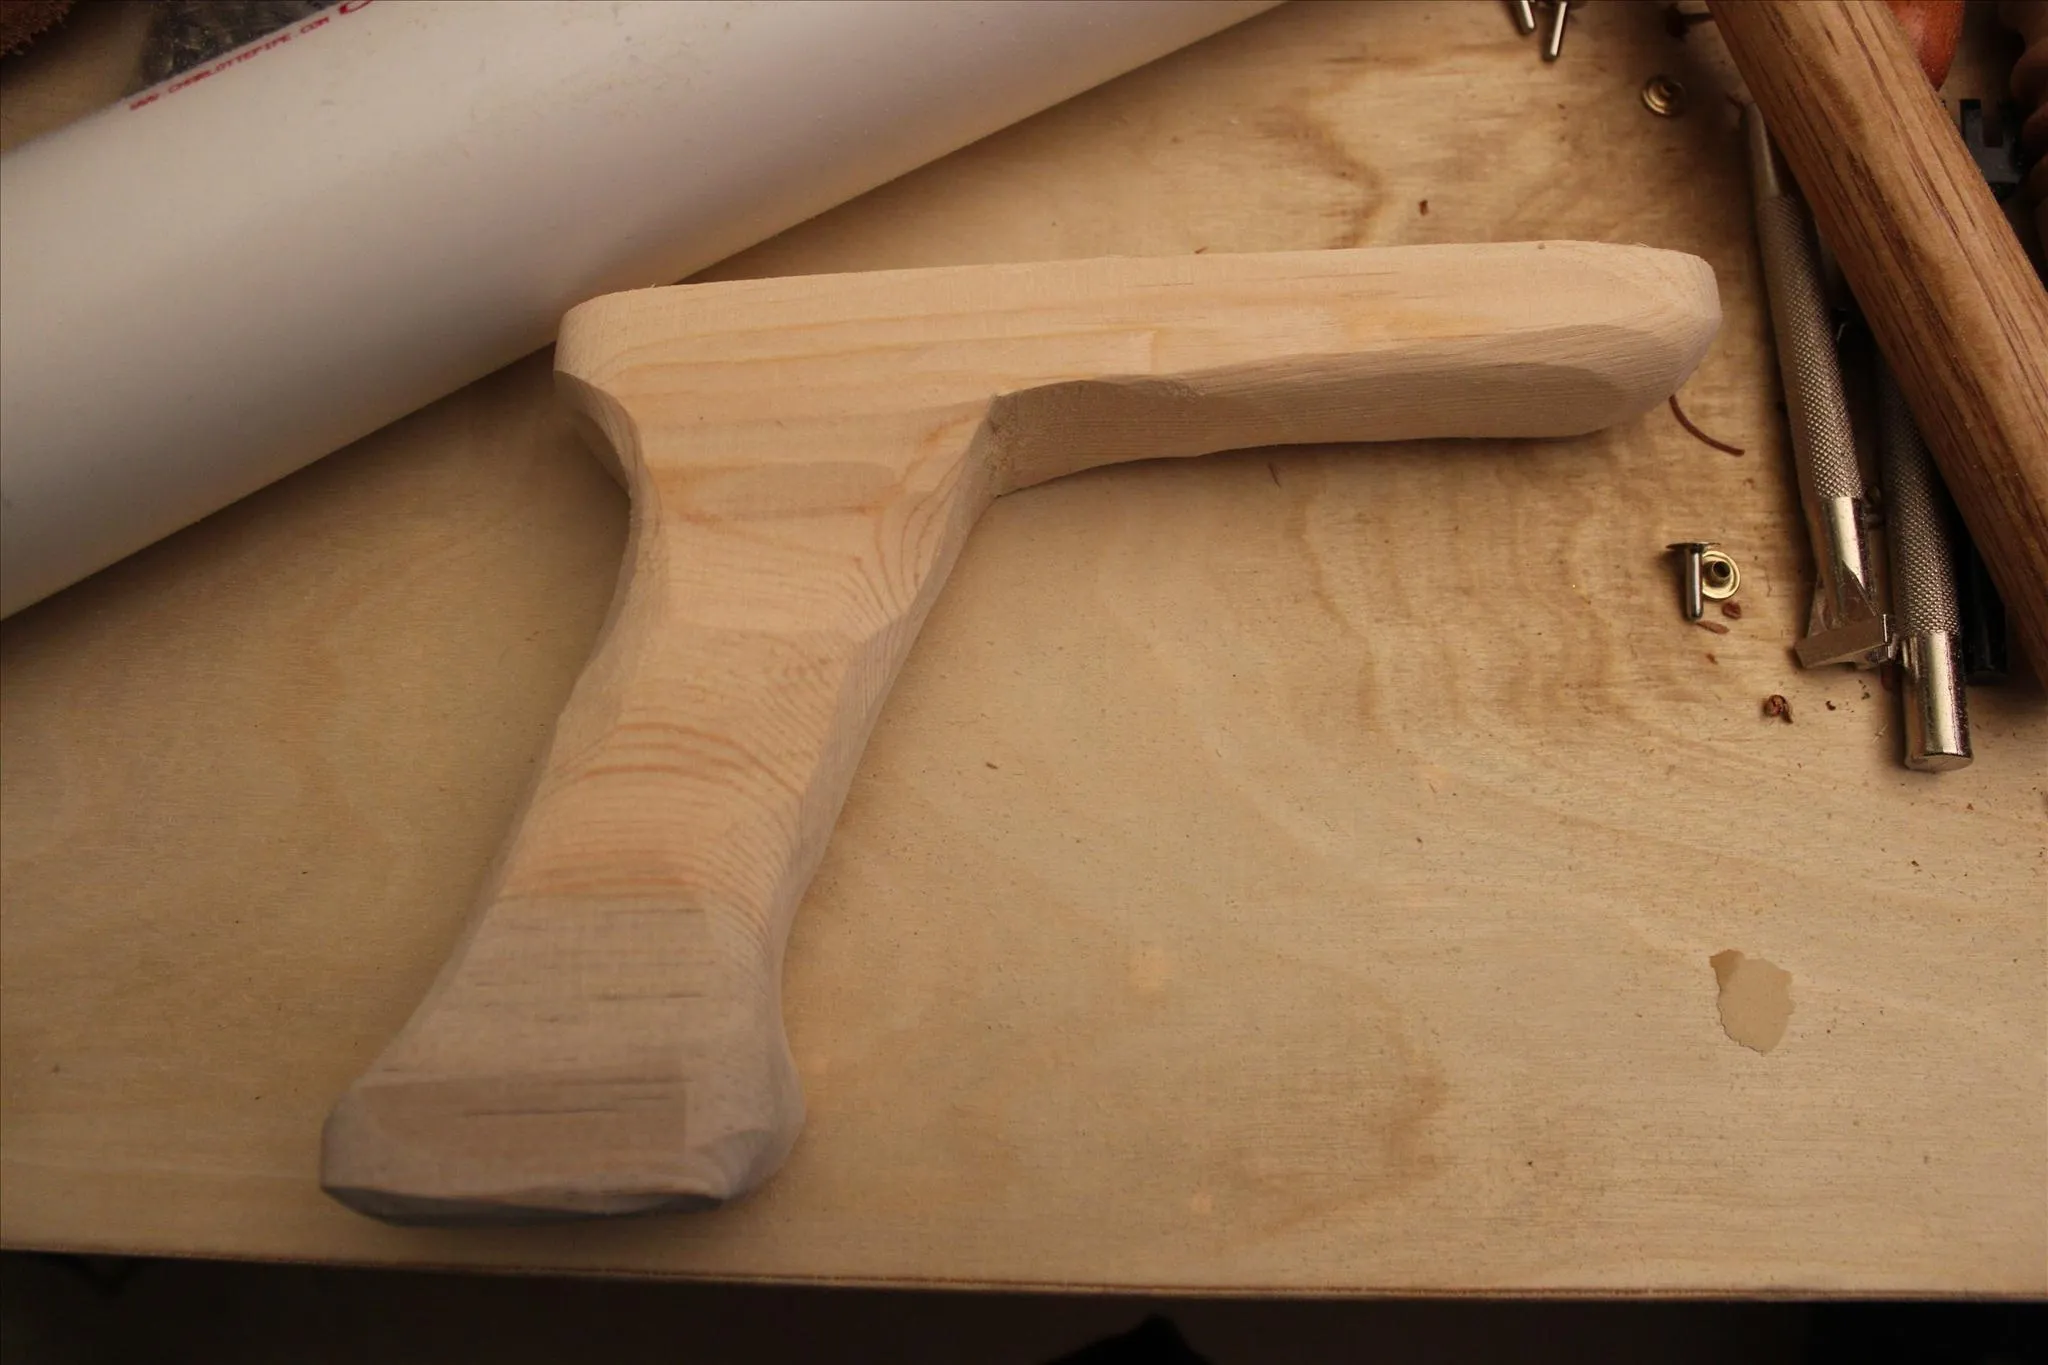
You can see how rough it still is.
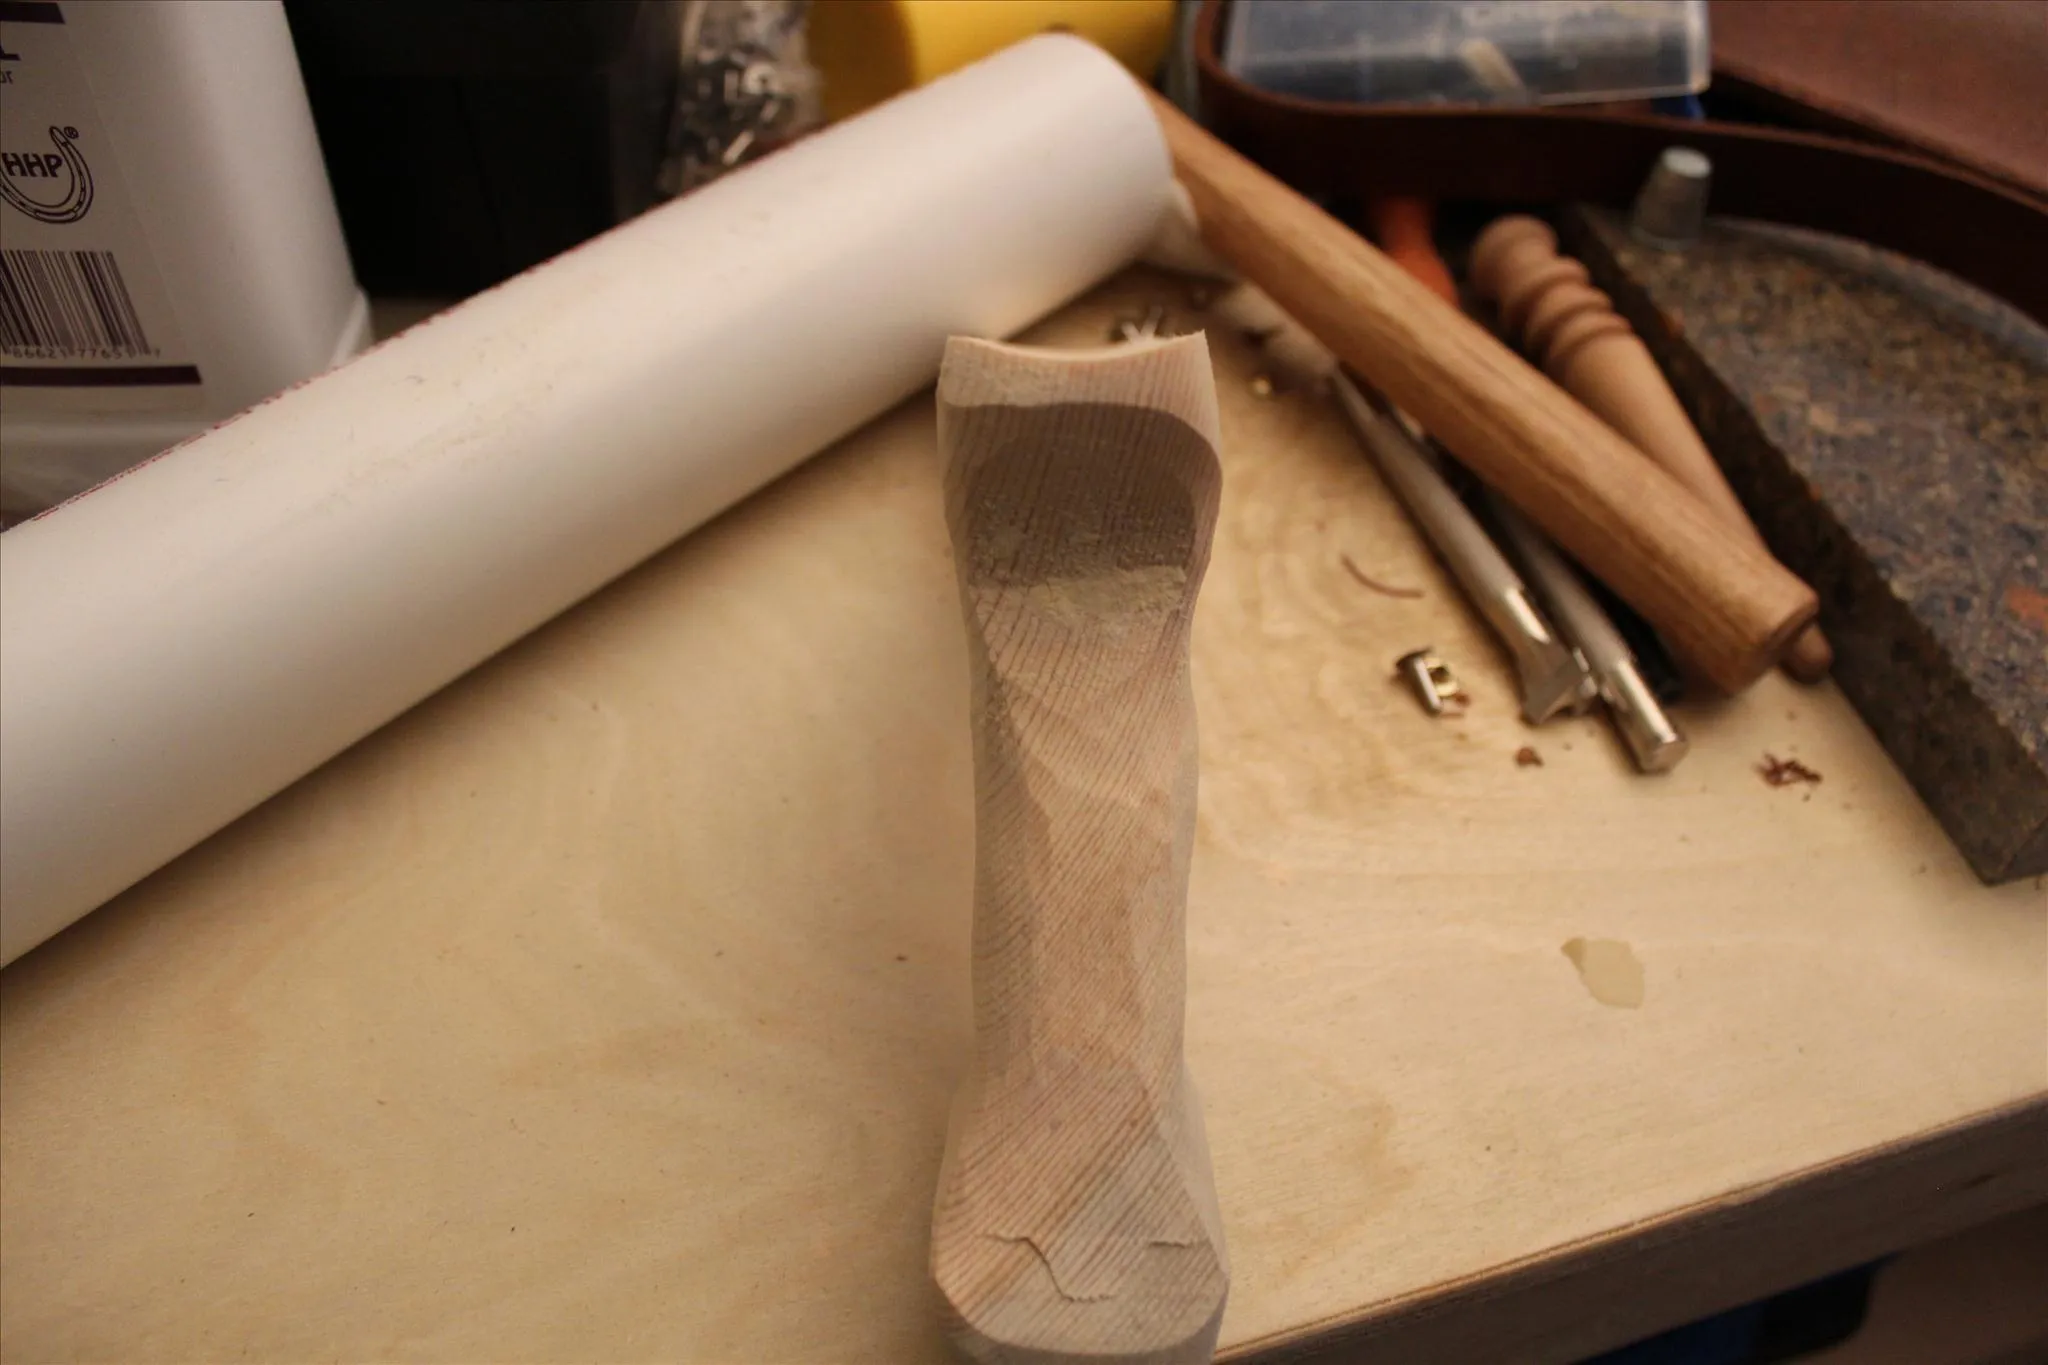
There are a few important things in the above picture. In this shot, we're looking at the back of the gun. At the bottom of the grip, you can see that there's still a rough portion where the band saw cuts were. It's in a curve, so I'll get it with the Dremel.
However, most importantly, you can see that I've sanded a groove into the top of the gun. This is where the barrel will sit. Because the barrel (a PVC pipe) is so wide, I was able to make a smooth, straight groove using the curve at the end of the belt sander. It's not very deep, but it doesn't have to be.
You can also see that on the right side of the grip, near the top, there's an indentation. That's for my pointer finger. I recommend making a groove like that anytime you make a grip for a gun. It makes holding it so much more comfortable. You can also make a groove a little bit lower down on the left side, for your thumb. Obviously this would be reversed if you're left-handed.
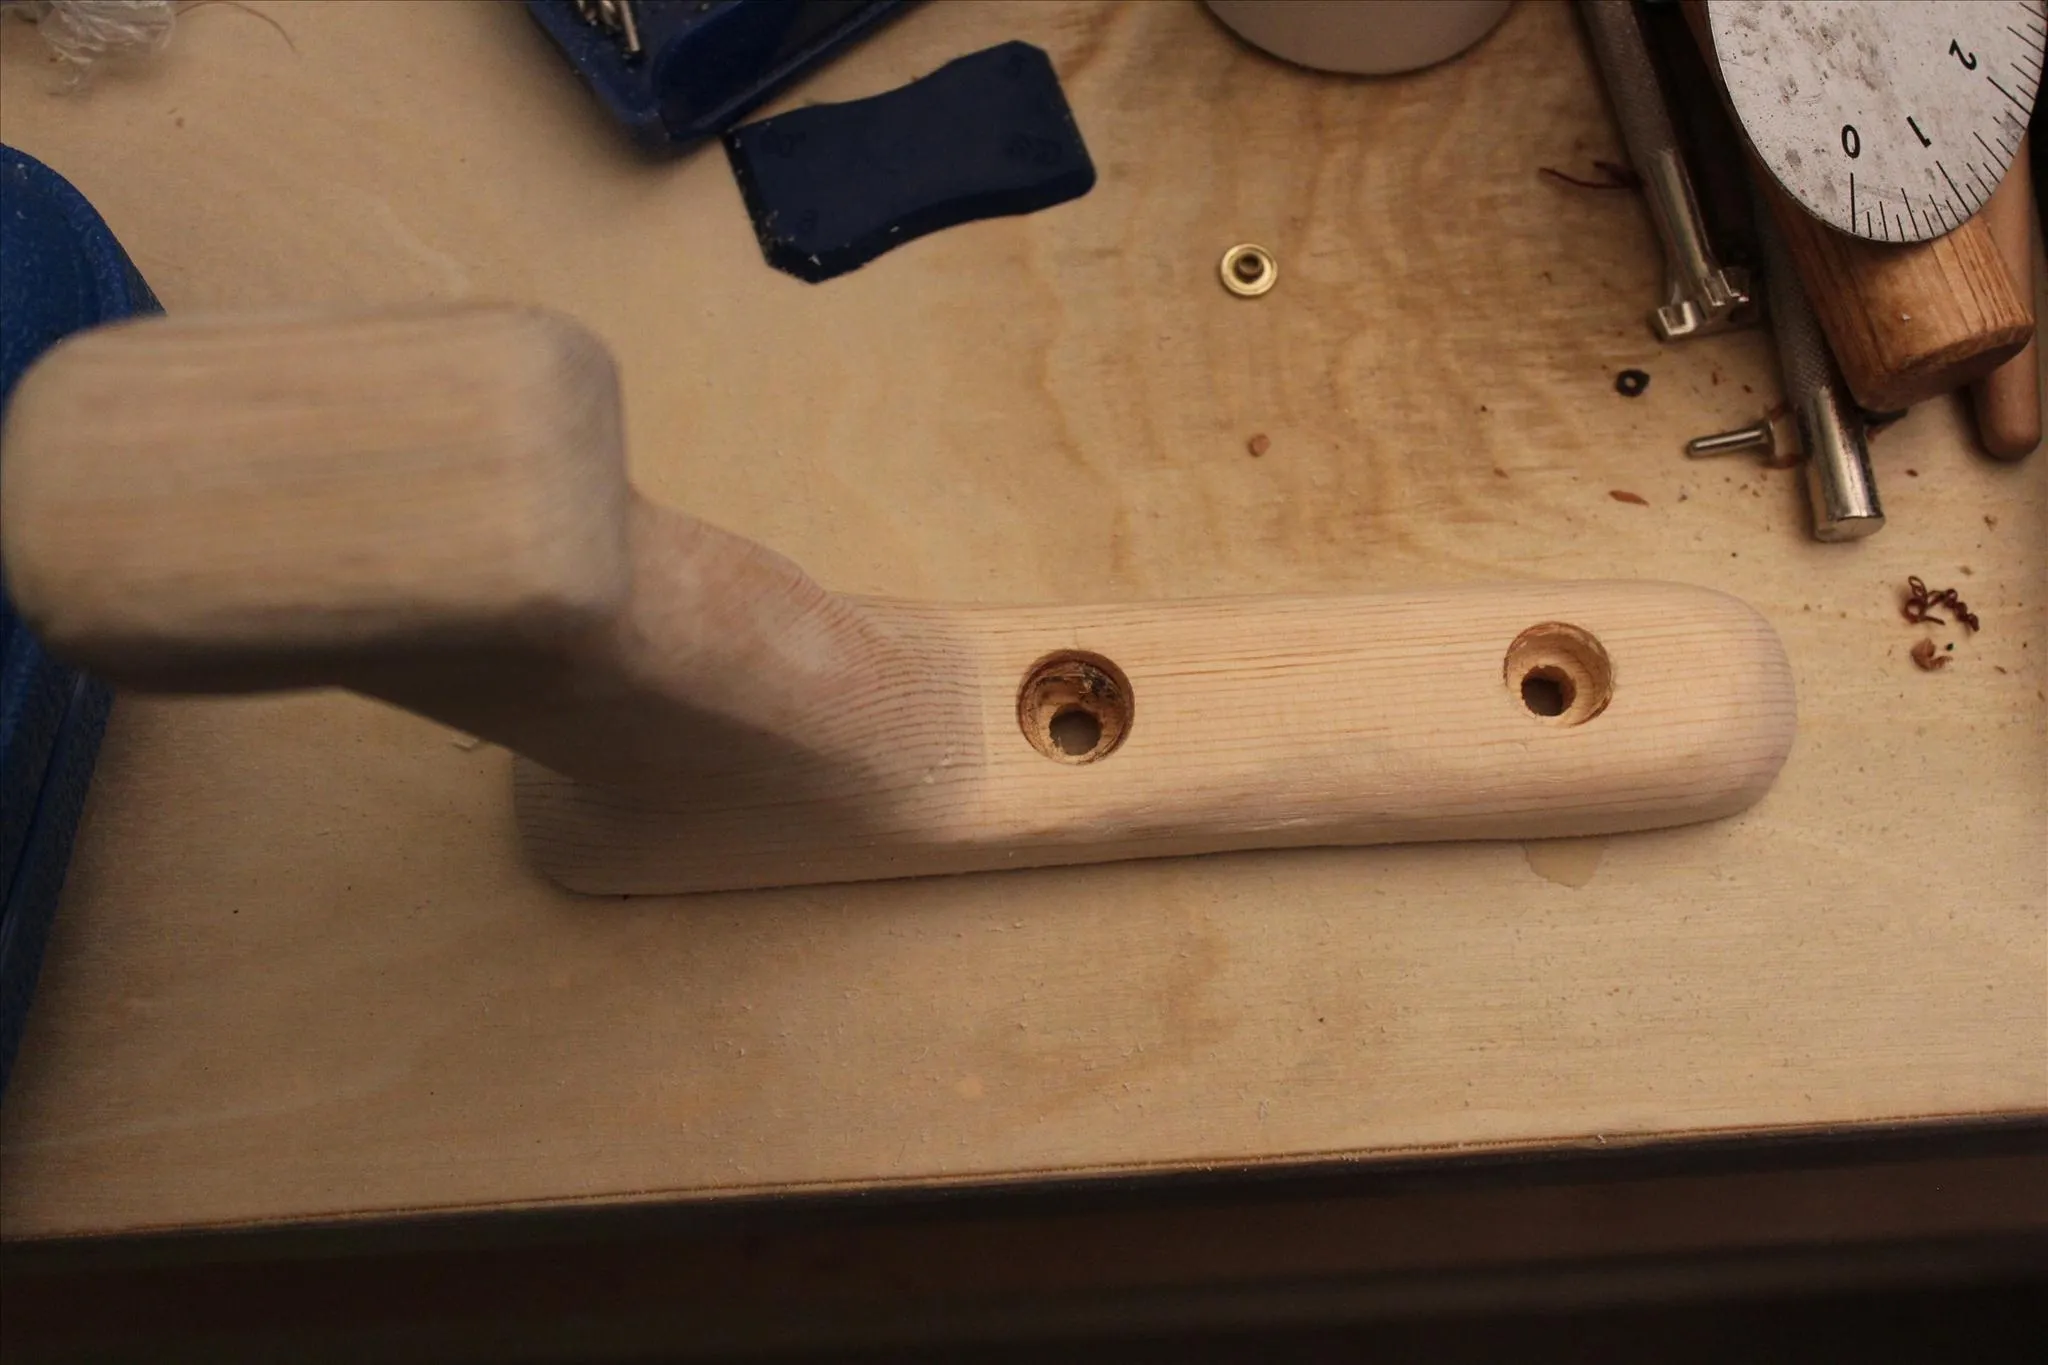
So, here's what it looks like after I'm used the Dremel (with the sanding attachment).
Much smoother now, and with better definition. Still a little rough, though, but that's because the Dremel wasn't our last step!
Personally, I use a handheld vibrating sander for this last step, but some regular sandpaper with elbow grease will also suffice. Use a finishing grit between 180 and 220 and just go at it. All you want to do at this stage is make it nice and smooth. If there are any bumps or unevenness, just attack them.
Also, at this stage, I drilled my holes where I'll attach my barrel. Once I drilled the holes, I smoothed them out.
Once your stock is smooth, it's time for the next step.
Dying
Okay, it's actually staining. But dying sounds so much more dramatic, doesn't it?
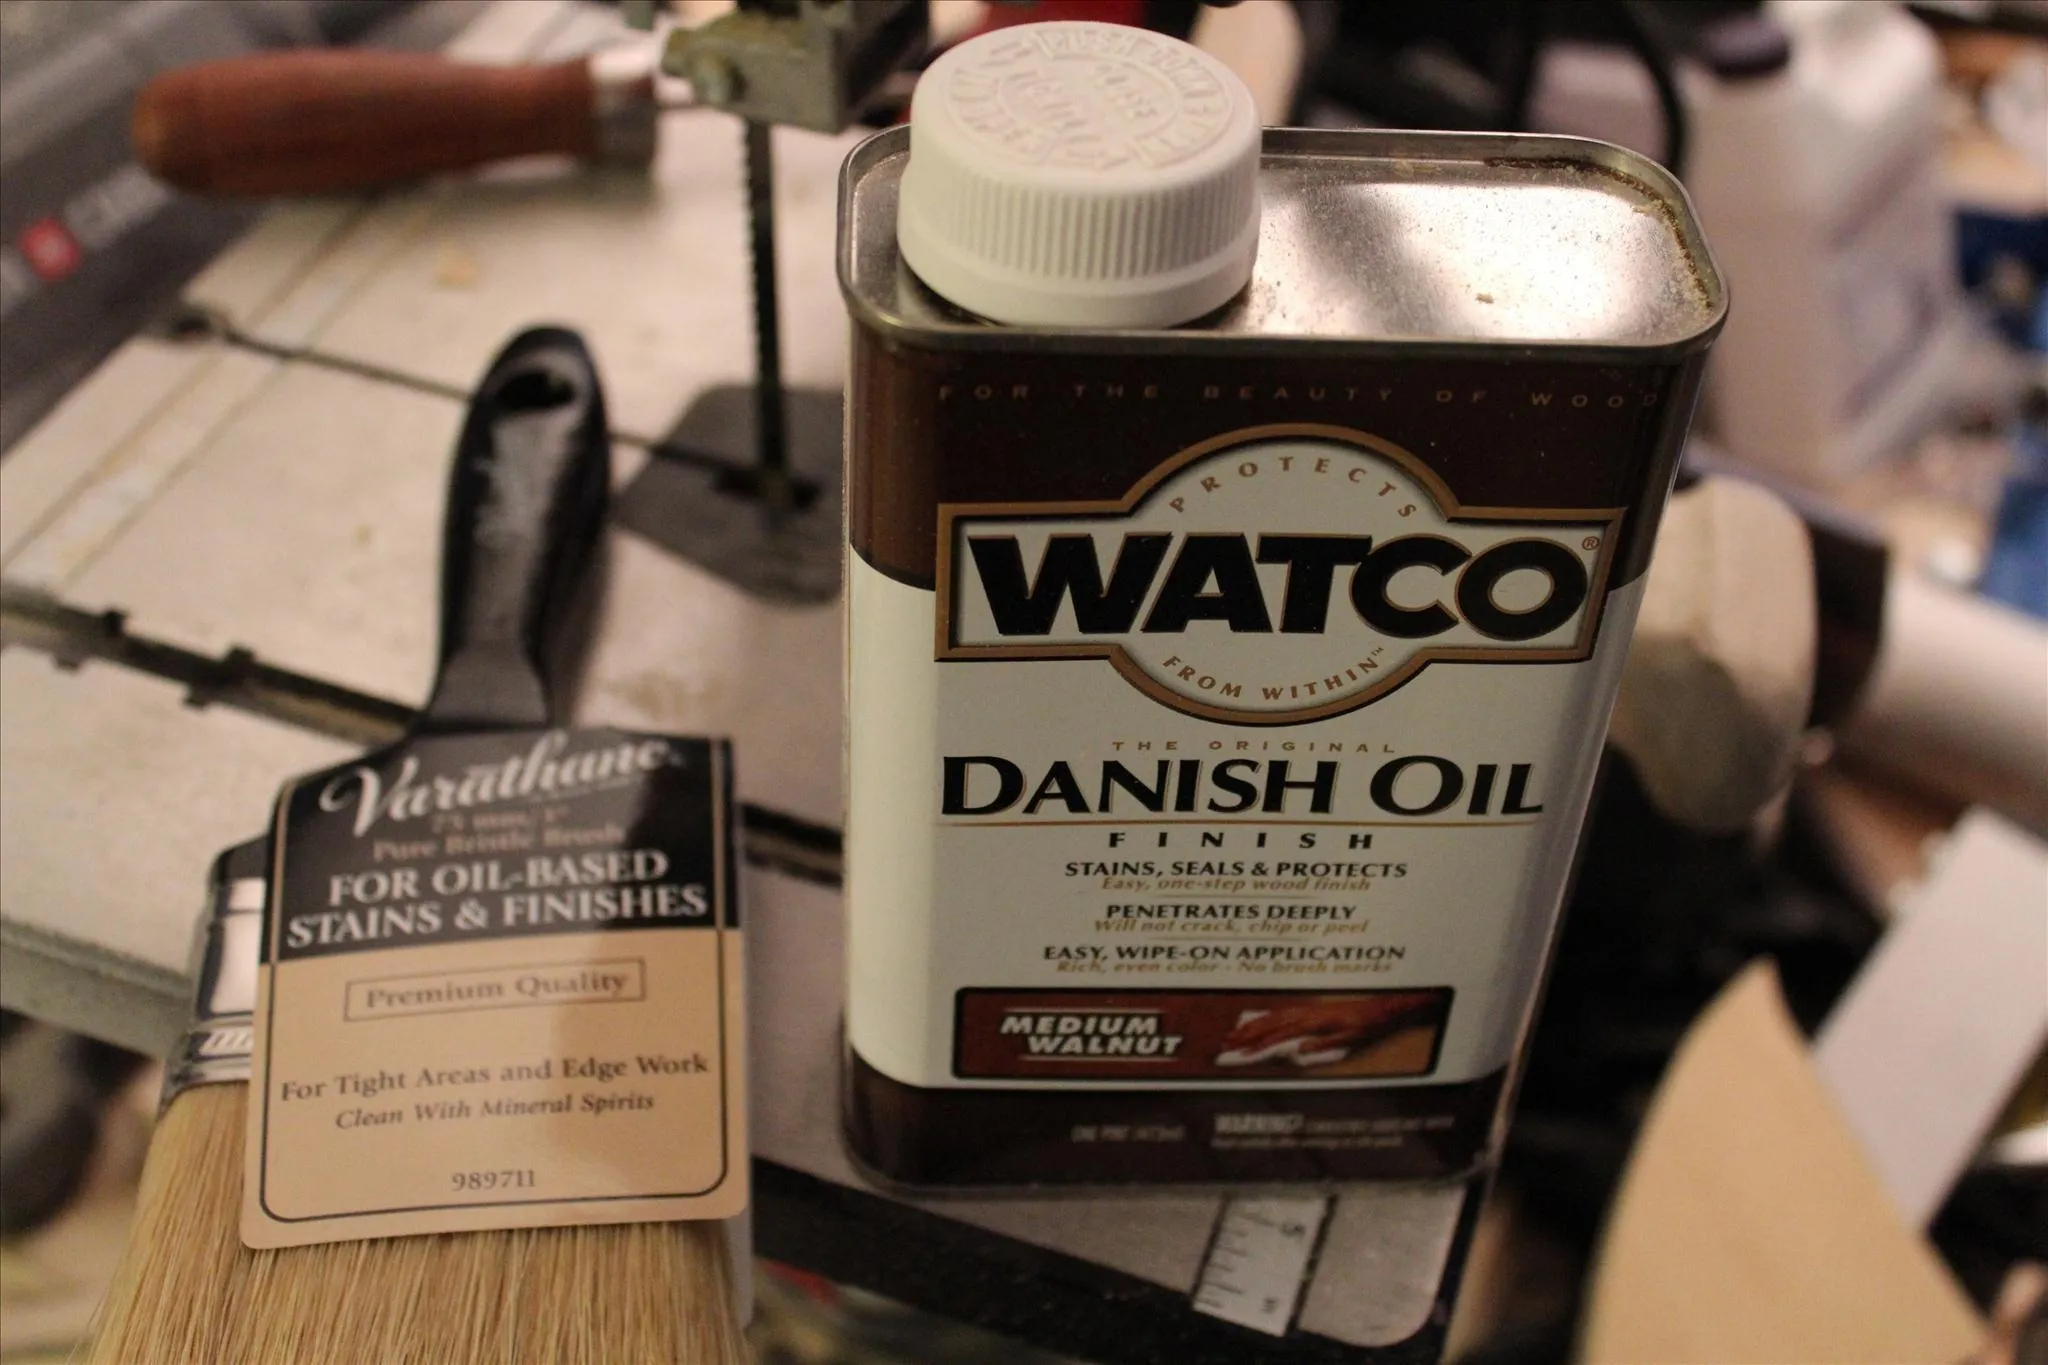
This is what I used for staining. I like danish oil, but there are a lot of other products on the market. Also, make sure you use a brush that's specifically for oil-based things. Otherwise it'll get gross pretty quick.
You should follow the directions on the back of the can, but generally speaking, you should just brush an even coat onto the wood, wait for it to dry, then repeat as necessary.
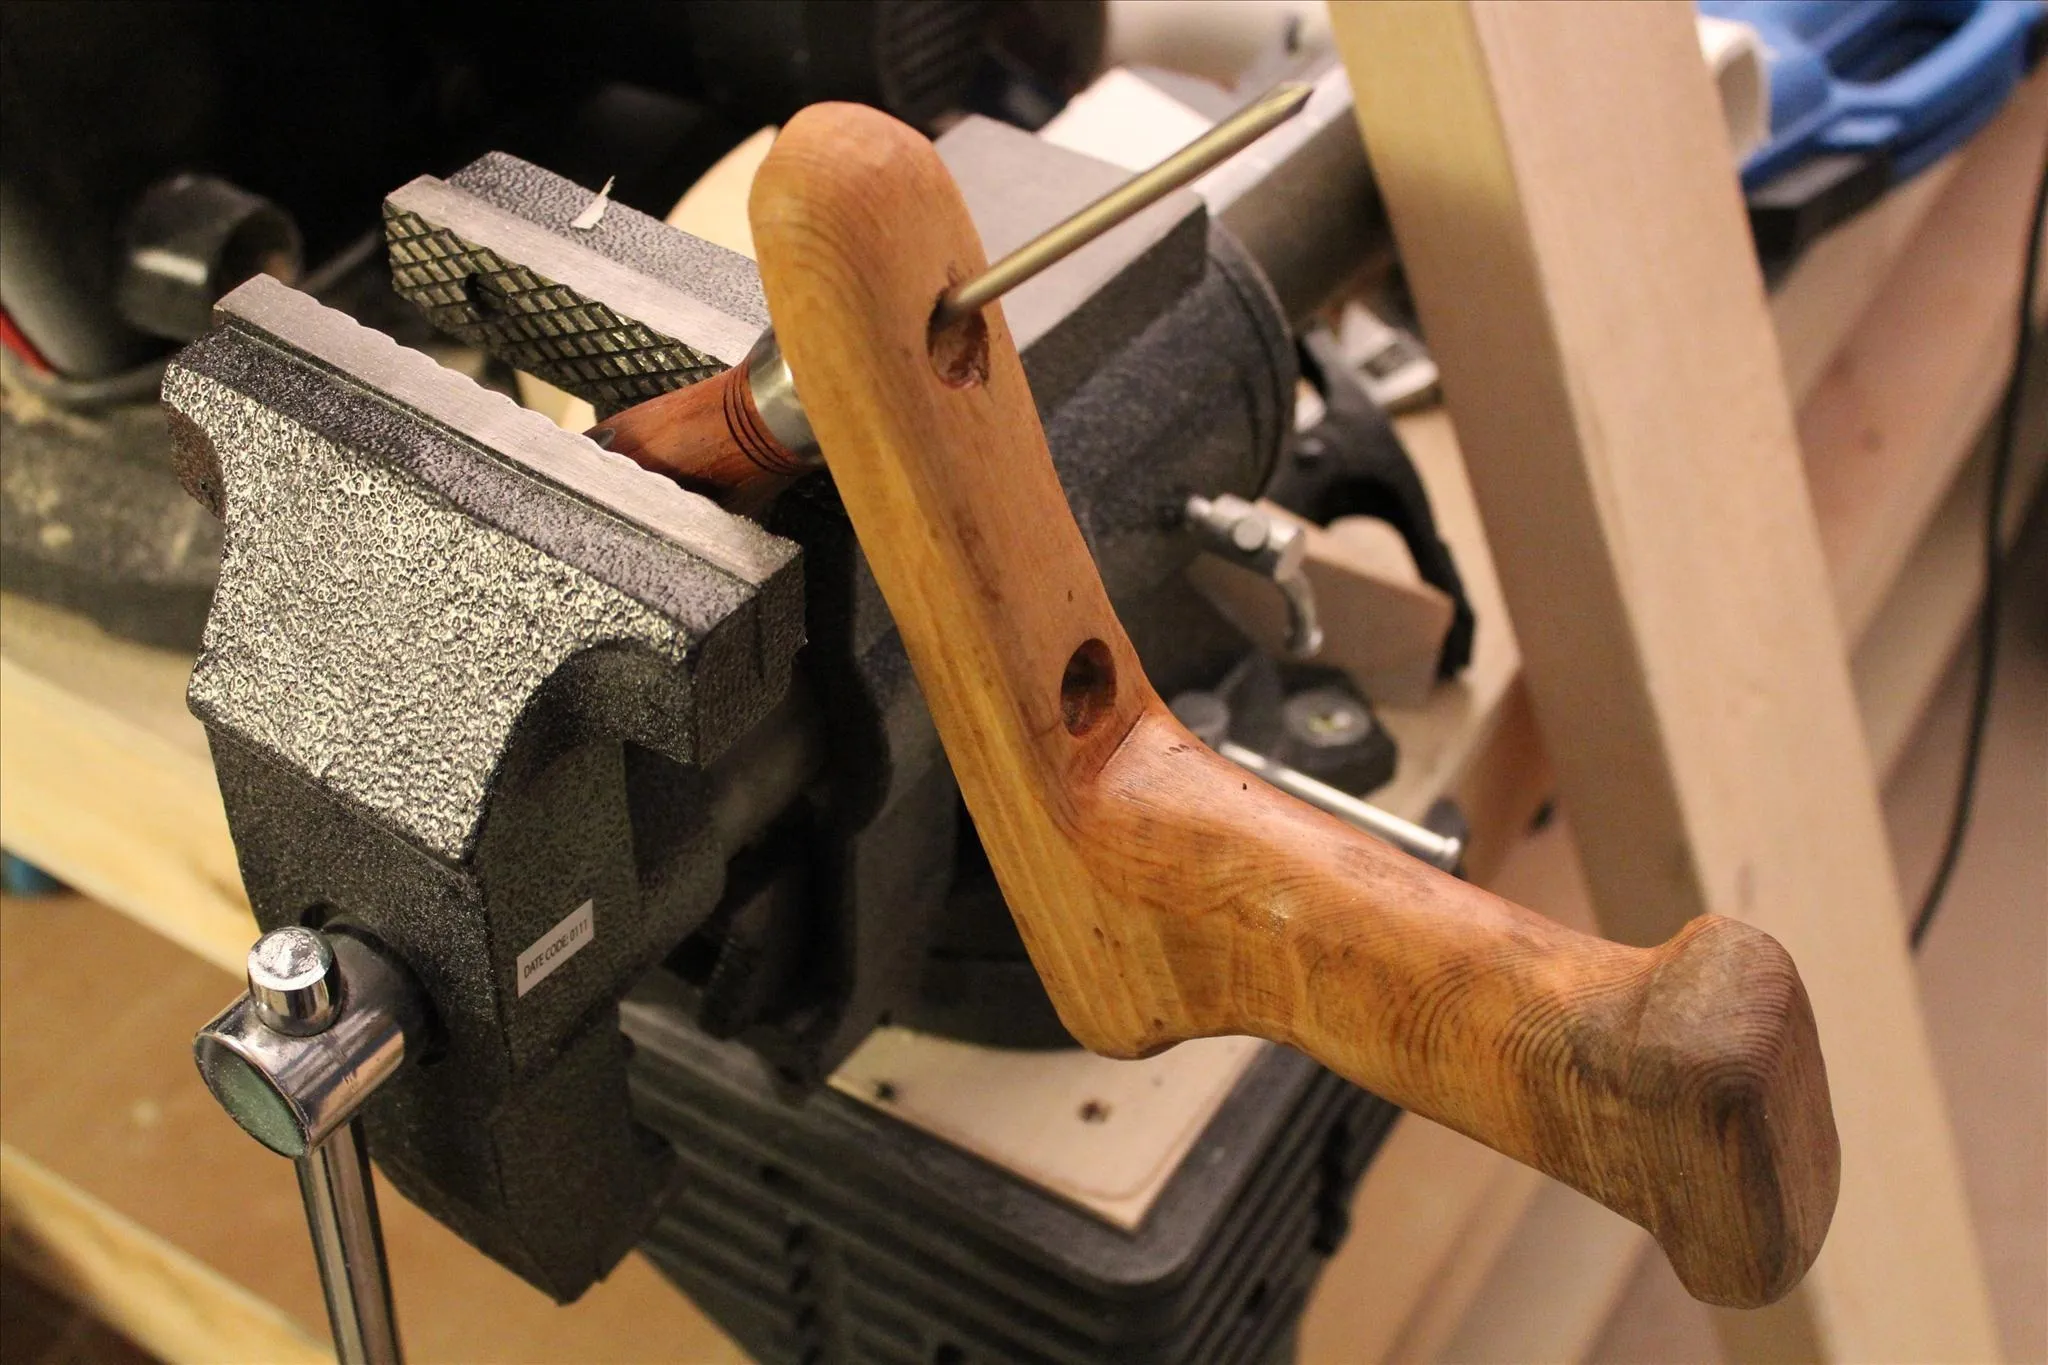
By hanging it on a screwdriver, I could stain the whole thing at once and not have to worry about doing one side at a time. It's a good time-saving trick!
Sealant
After the staining is done, you want to seal it with a sealant of some variety. I like using polyurethane, personally, but again, there are a bunch of different products on the market.
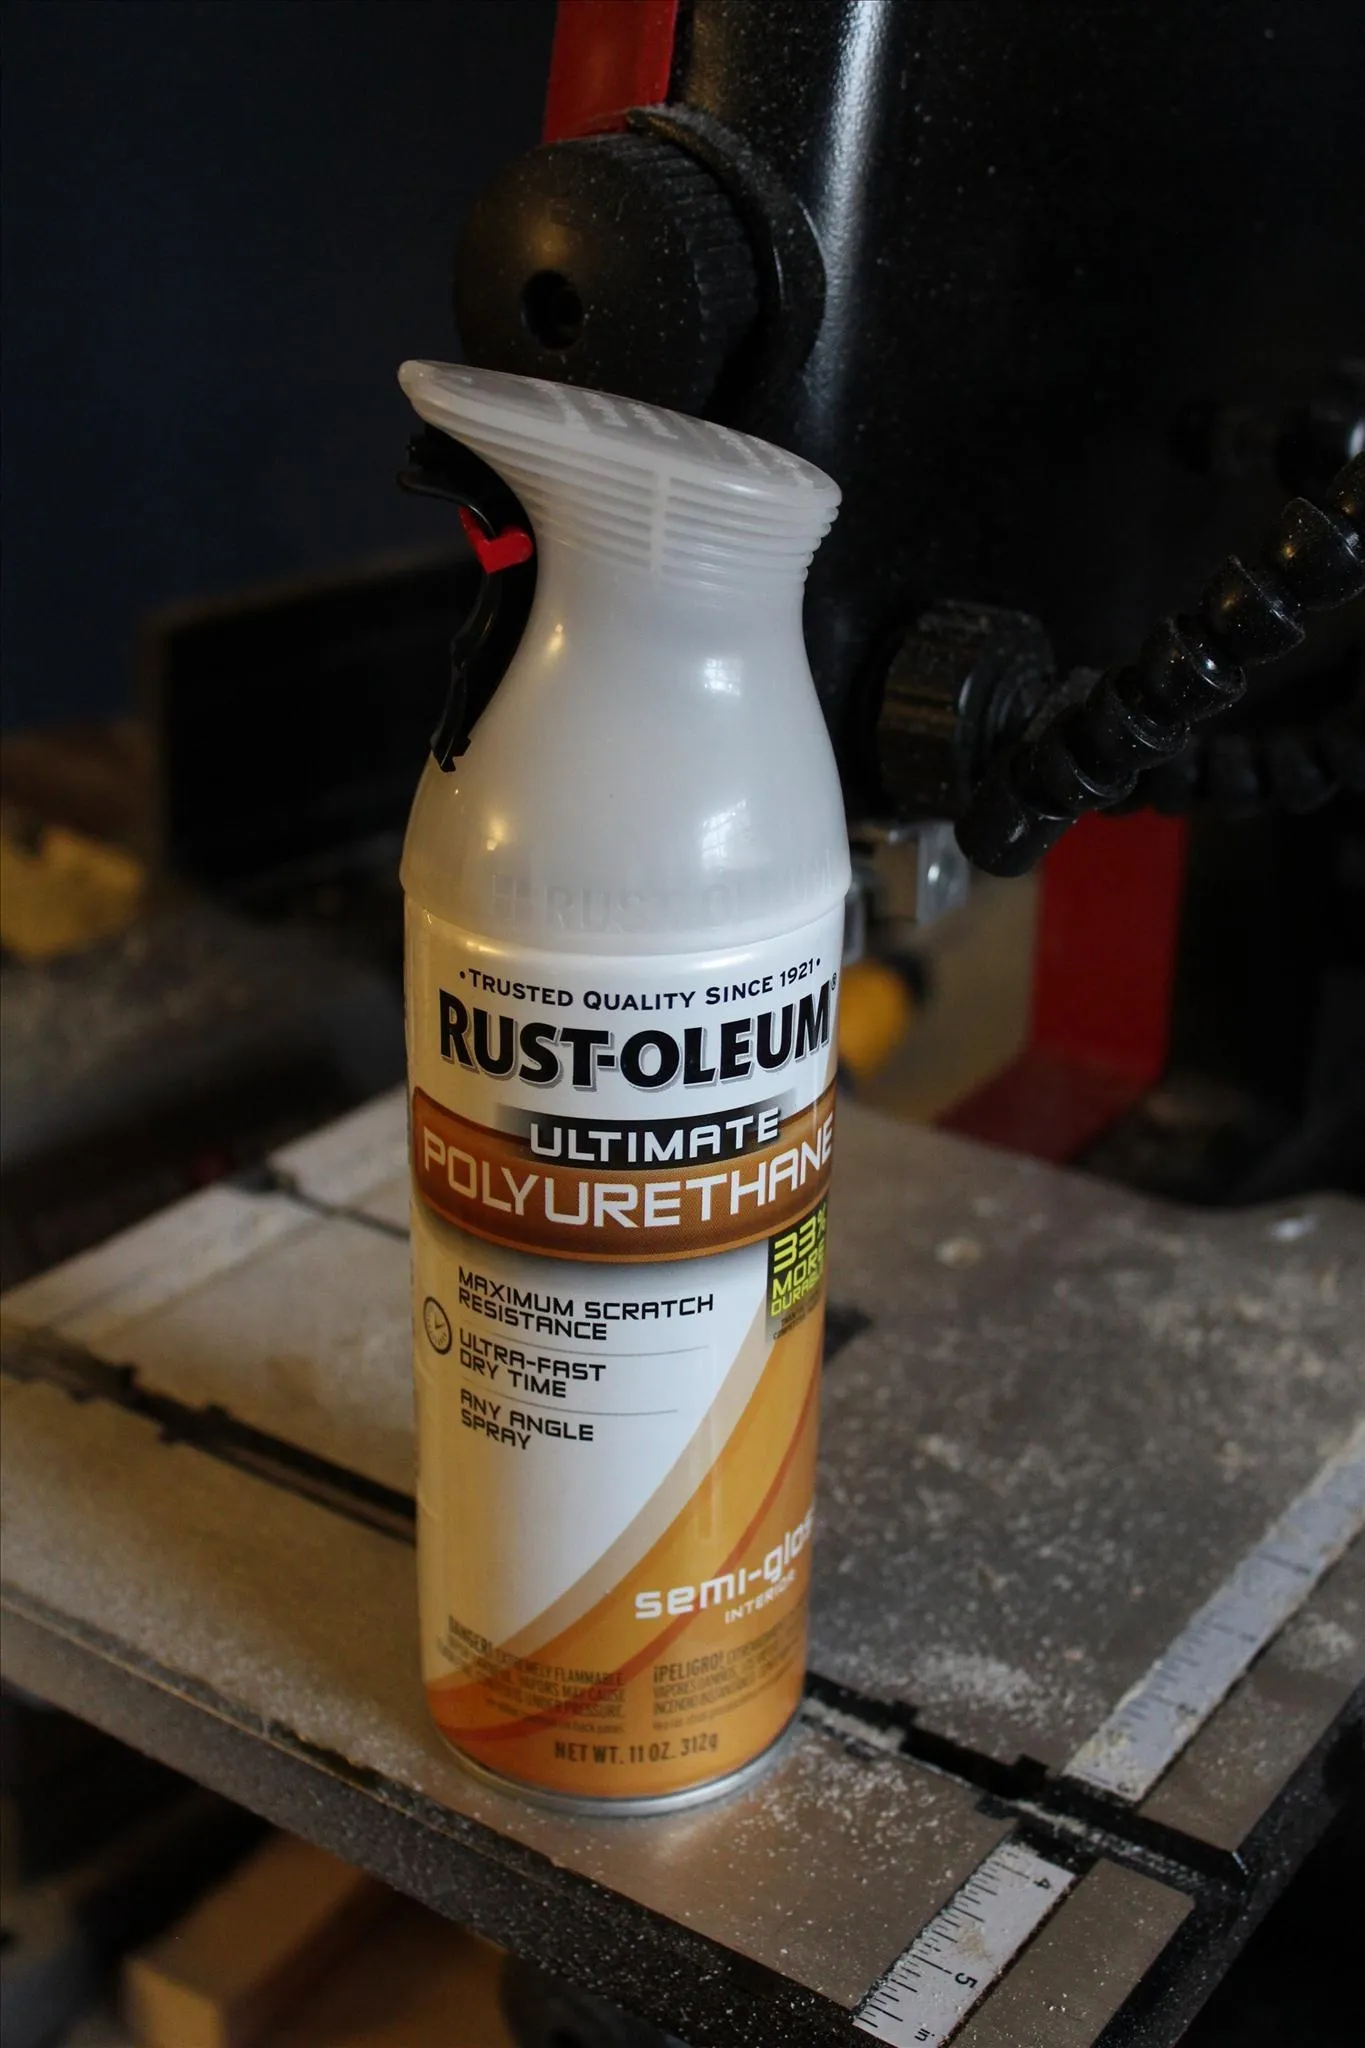
This will finish your wood, and help it keep that nice, smooth feeling. It will also give it a nice shine, depending on what type you use. I just sprayed it on, but most sealants will need to be brushed on just like the stain. Unlike the stain, most polyurethane will need to be wiped off a few minutes after application. Then another coat can be applied after a few hours.
Here's the finished stock. It's not my most amazing masterpiece, but it's a perfectly serviceable gun stock!
Now, it's time to move on to the second part to this cannon... the PVC barrel.


Comments
Be the first, drop a comment!