
If you want to make clothes for your cat, you're on your own. As I recently said in this article, cats will just totally flip out if you make them wear things. Your dog may also flip out, but I've found them to be more tolerant, personally.
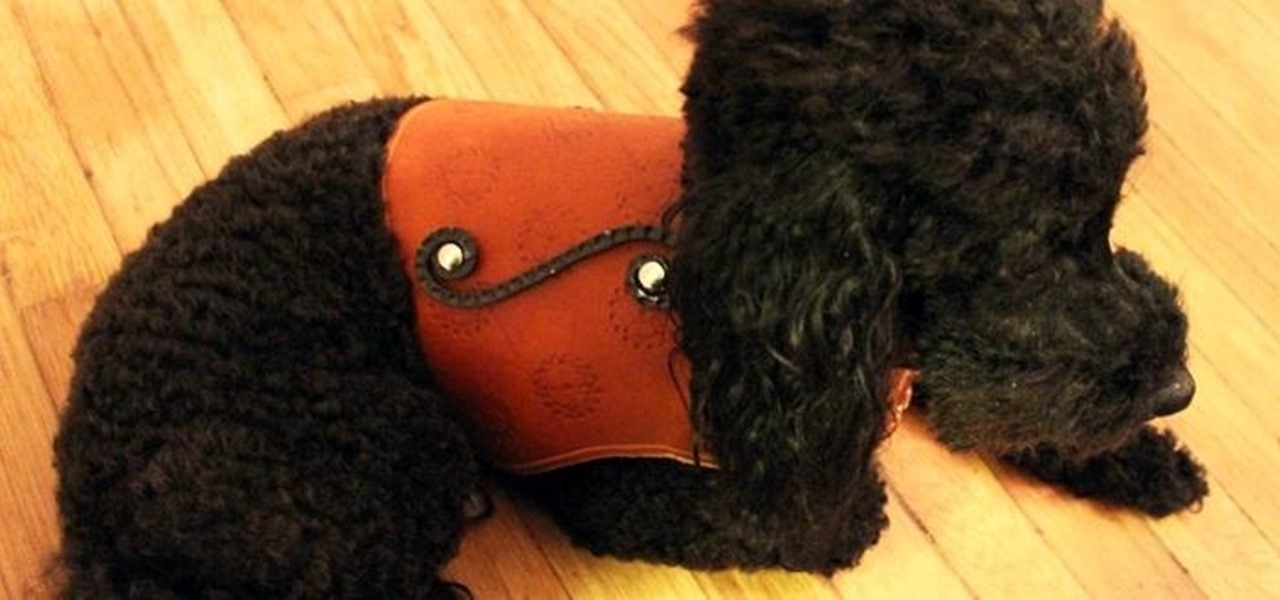
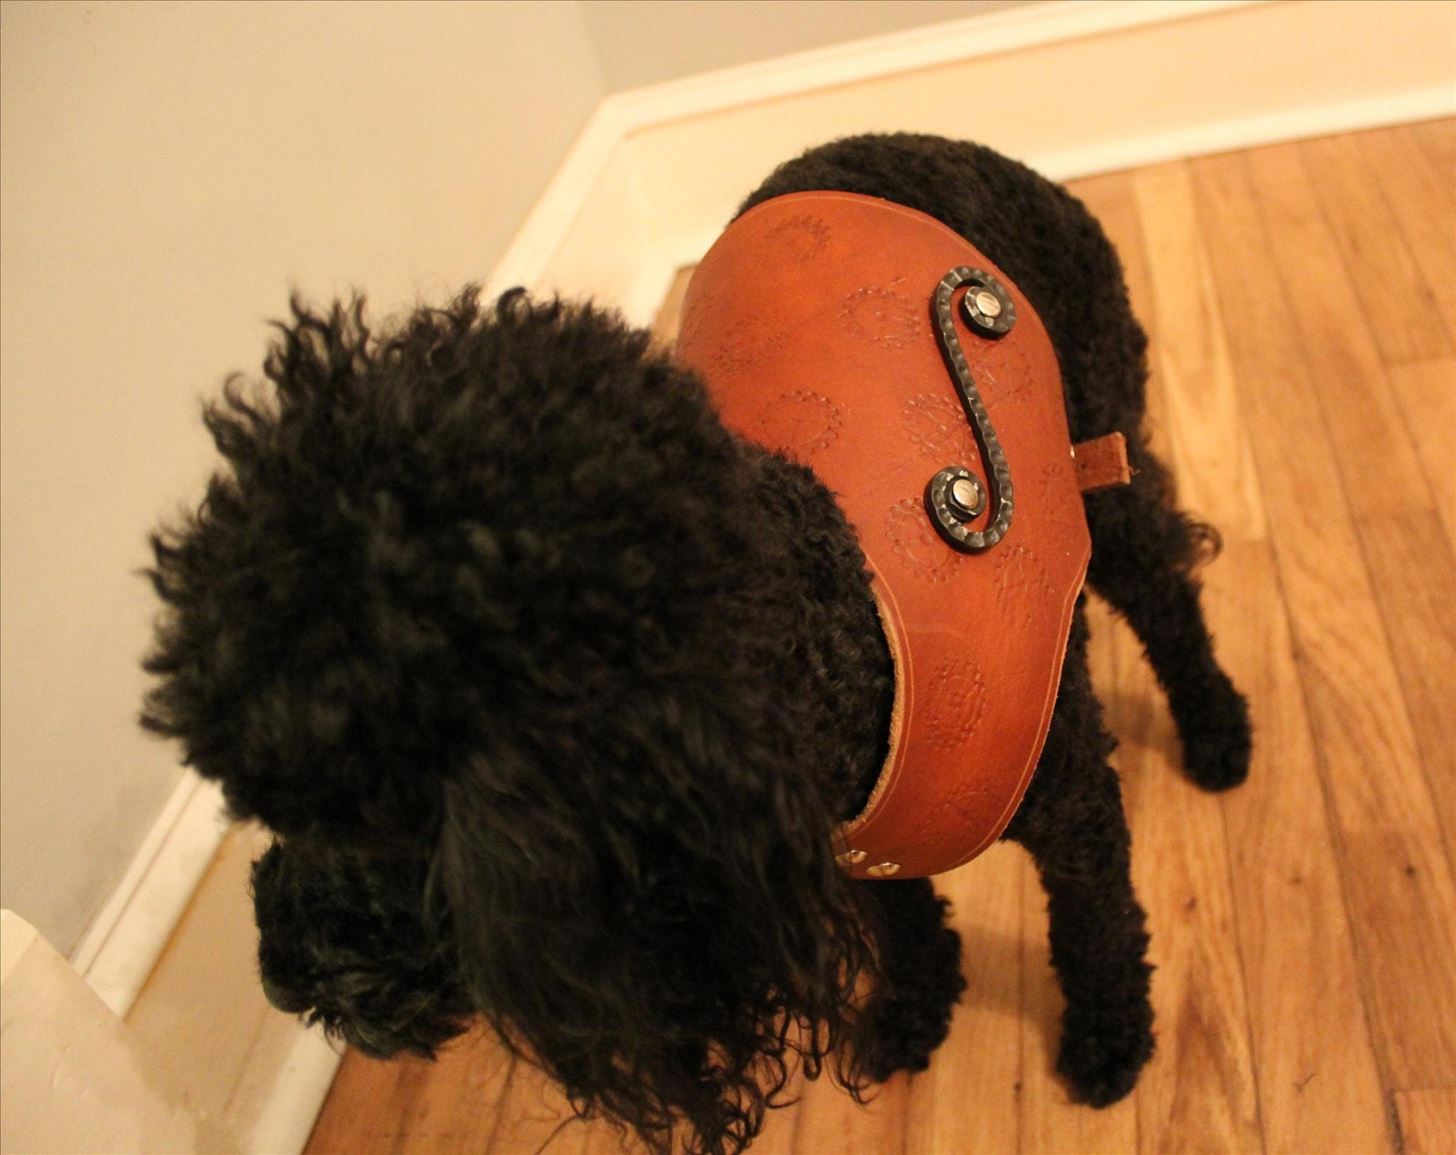
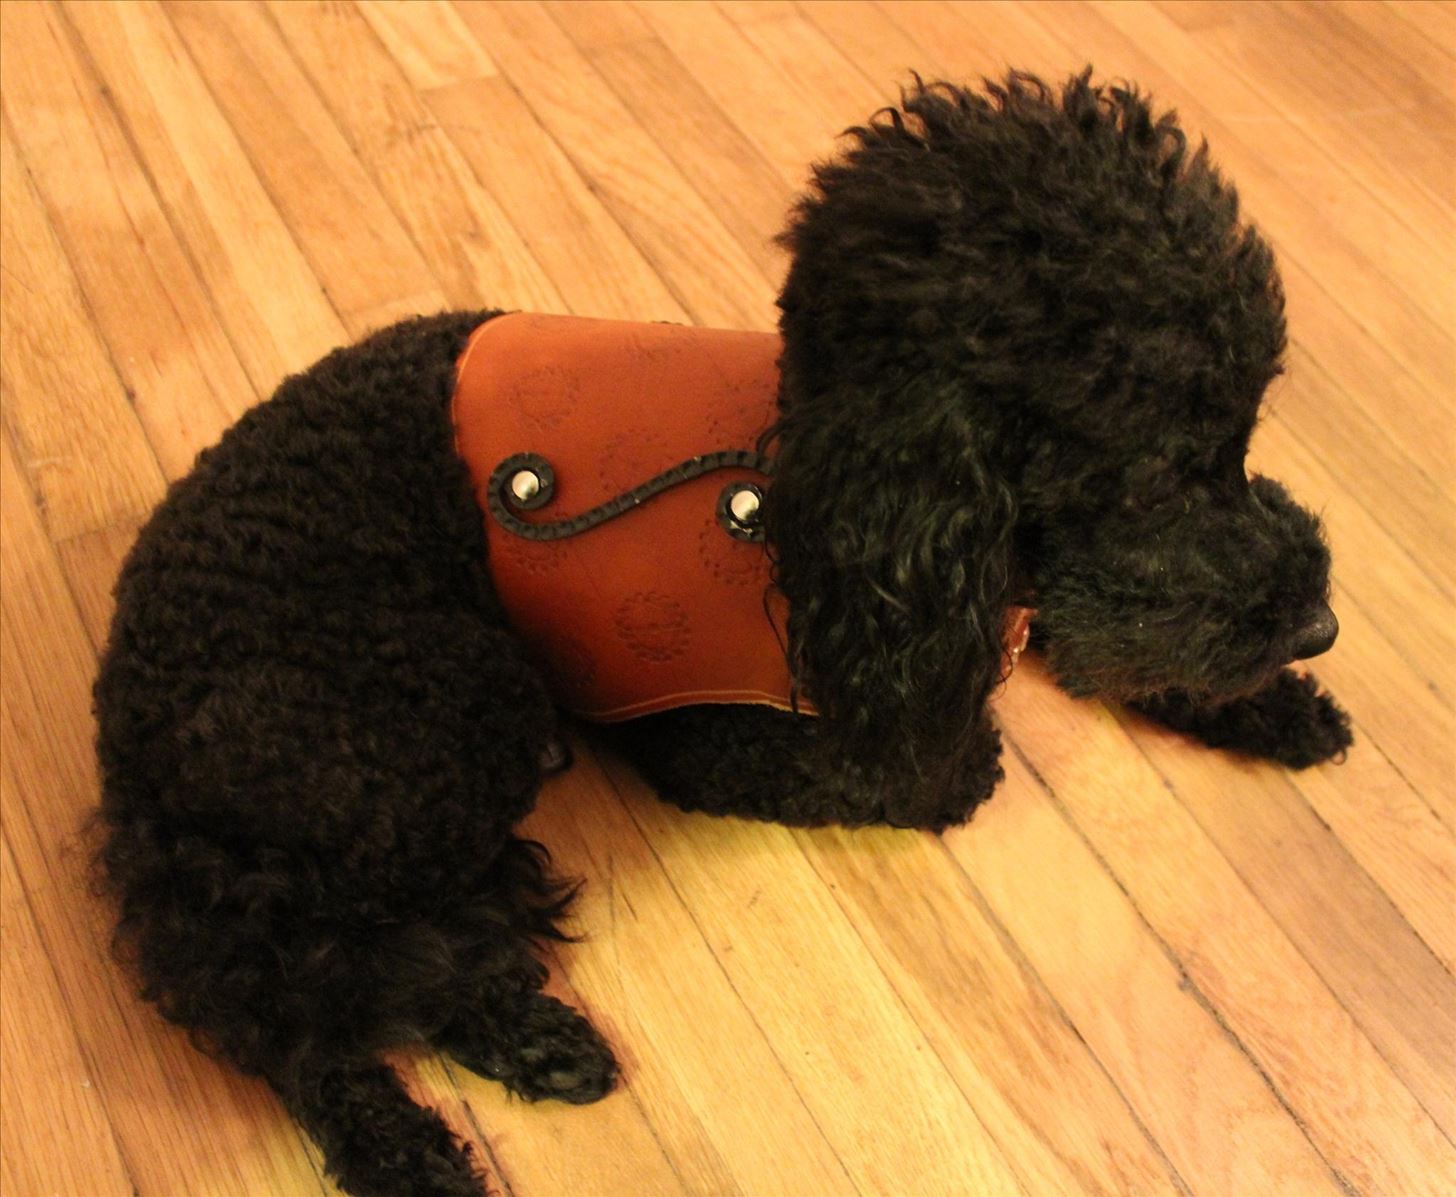
Anyway, here are the pictures of the finished harness that I just made for my dog, whose name is not Sparky, but Colonel Augustus "The Shadow of Death" Fink-Nottle (or Gus, for short).
Materials:
There aren't too many materials that you'll need for this project, but here they are.
- Veg-tanned leather
- A box-cutter
- Leather screws or rivets
- A metal gear (not the video game)
- A hammer or mallet
- A leather punch
- A beveler
- A groover
- A buckle
- Neatsfoot oil
For extra information on the specific leather tools such as the beveler or groover, see this earlier post on tools. I also have pictures of many of these tools in the tutorial below.
Step 1: Cutting Surface
I use a sheet of plywood as my cutting surface. When I work with thicker leather, I like to put it on the floor so that I can bear down on it pretty hard. When I work with thinner leather, I can put it on a table.
As you can see, it's just a big piece of untreated wood.
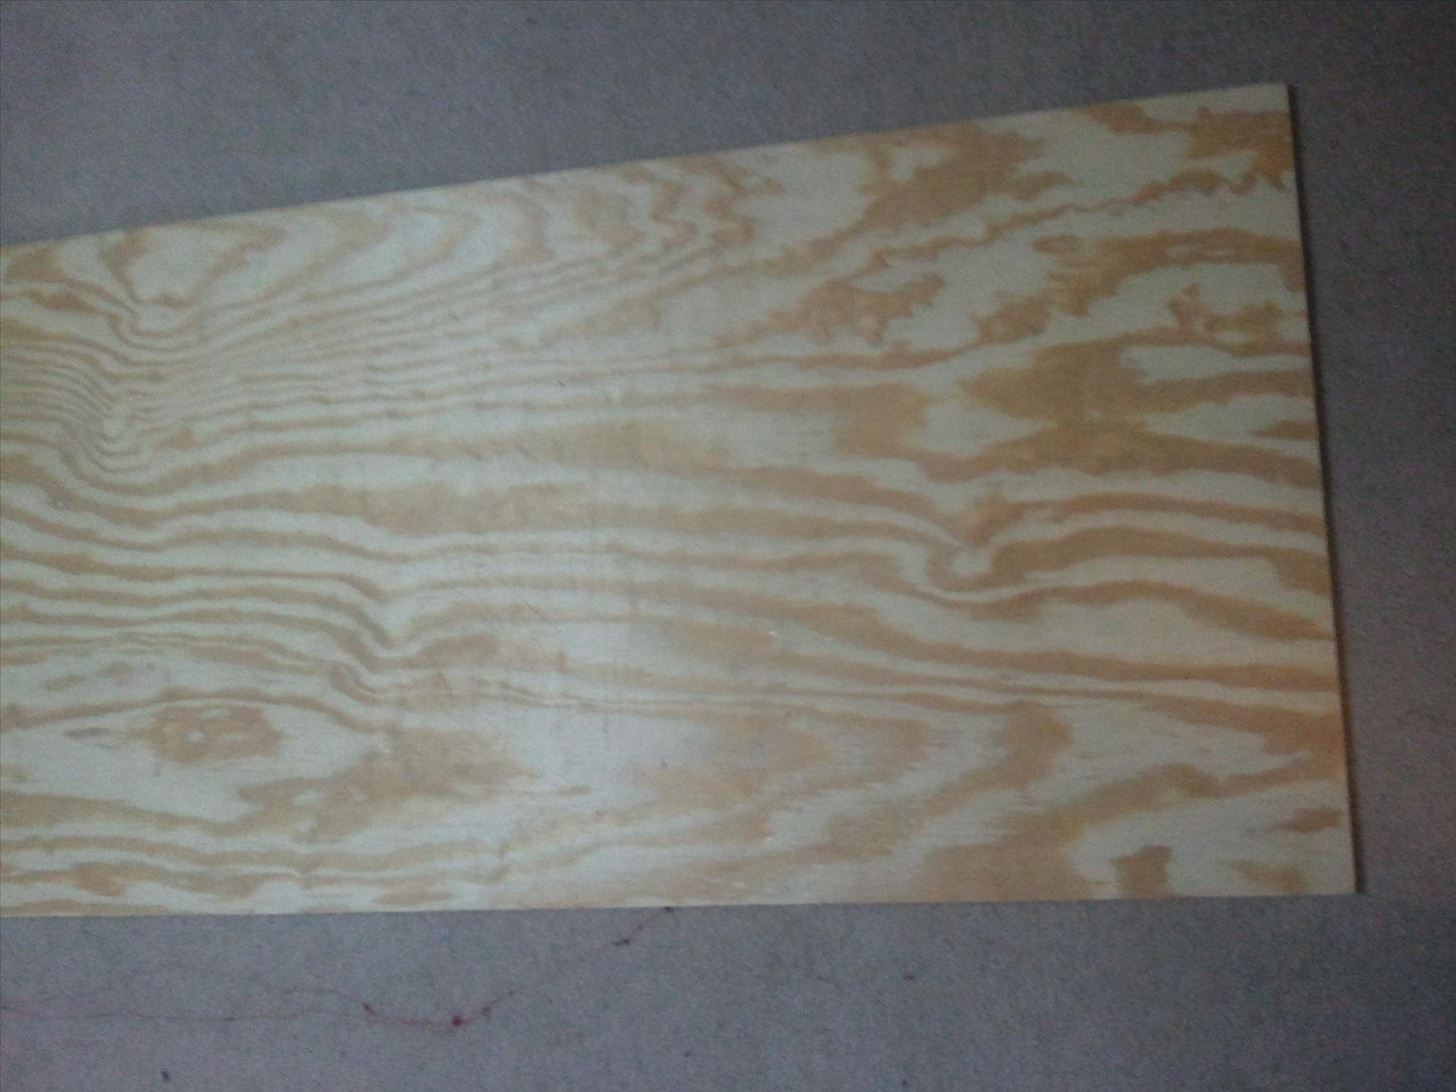
You can use whatever you want, but just make sure it's something you can make big scratches on.
Step 2: Get Your Leather
You can use leather of pretty much any thickness for this project, but if you make it too thin, you won't really be able to tool it or add neat things to it. In this case, I used 8 oz. leather, but that ended up being way thicker than was necessary, given how small my dog is. In the future, I'd consider using maybe a 4 oz. leather.
As you can see, it's just plain leather.
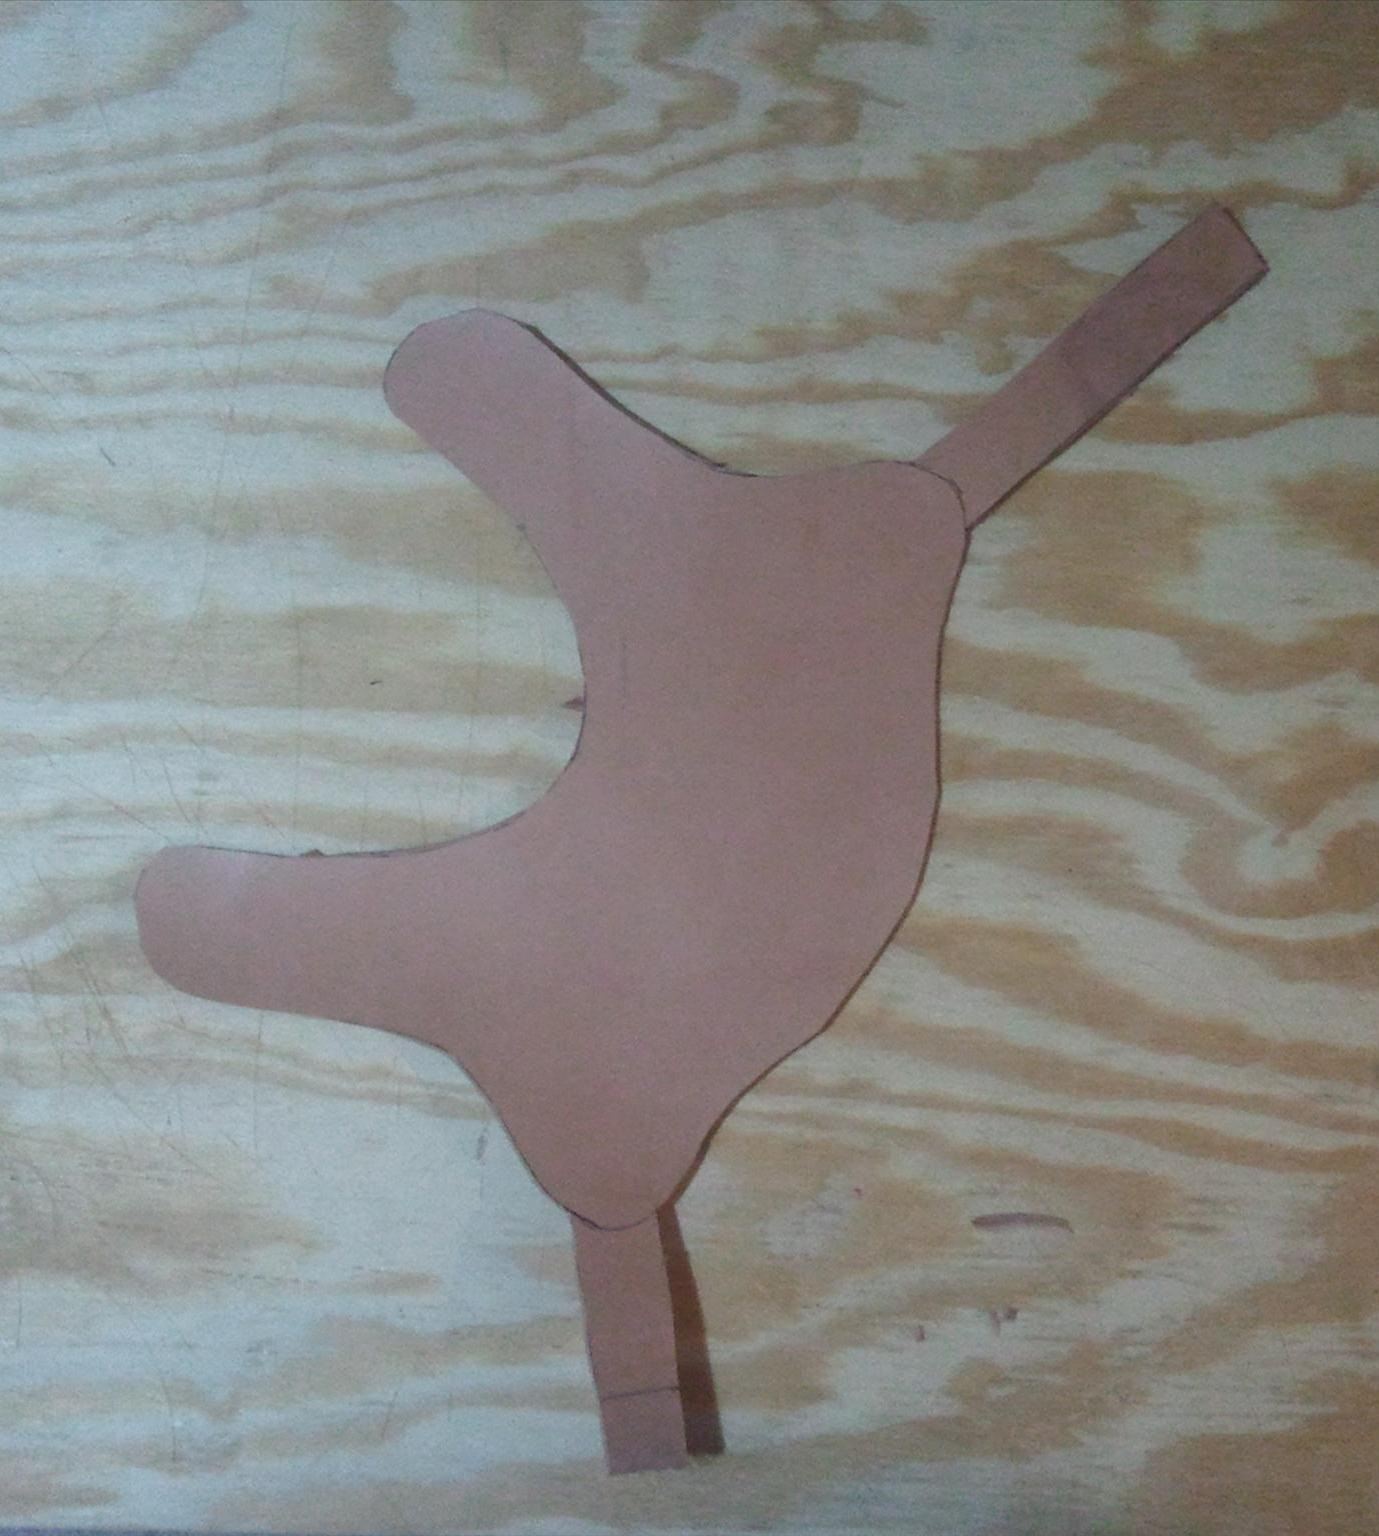
Step 3: Make a Pattern
Now, pattern-making could be its own tutorial. It's complicated, and there's something of an art to it. However, you can see in the picture below more or less what the shape should be. This shape will fit pretty much any dog, provided that you scale it properly for their size.
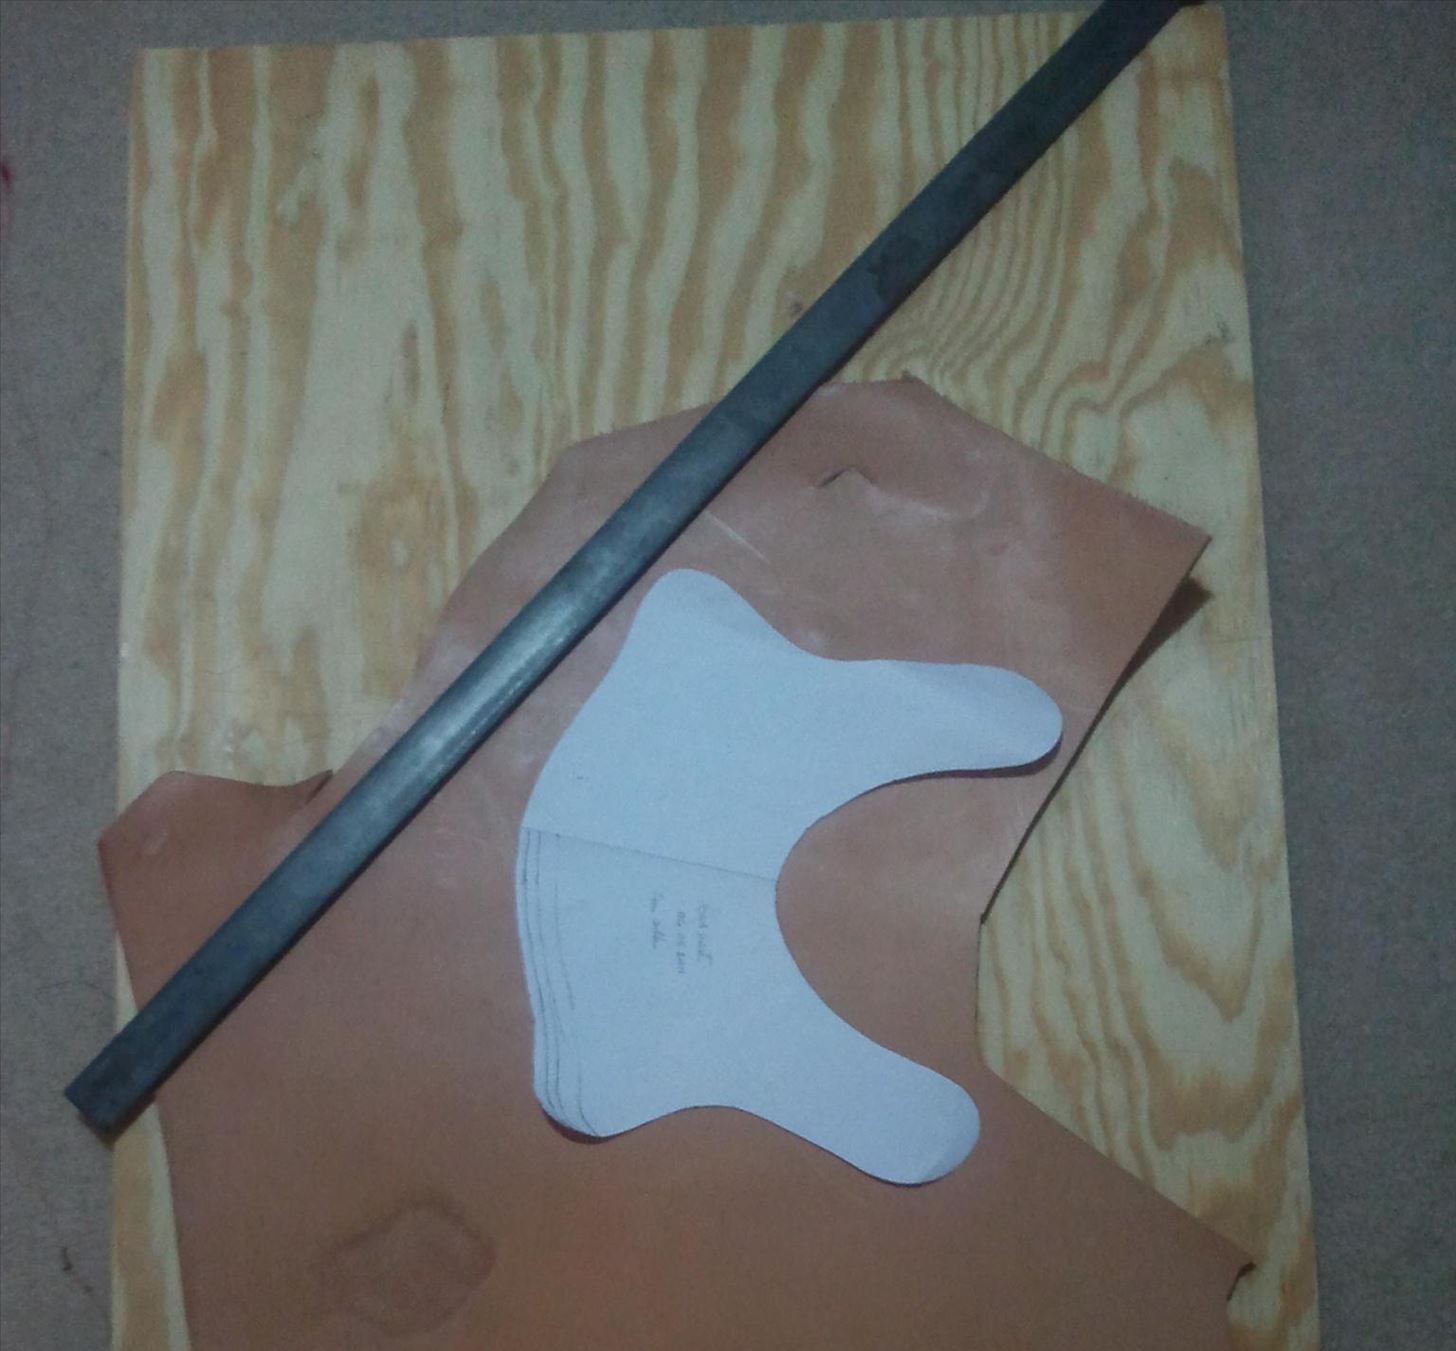
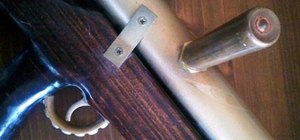
The metal bar in this photo I use to hold the leather down, so that it doesn't curl. You can use anything, or nothing, depending on your needs.
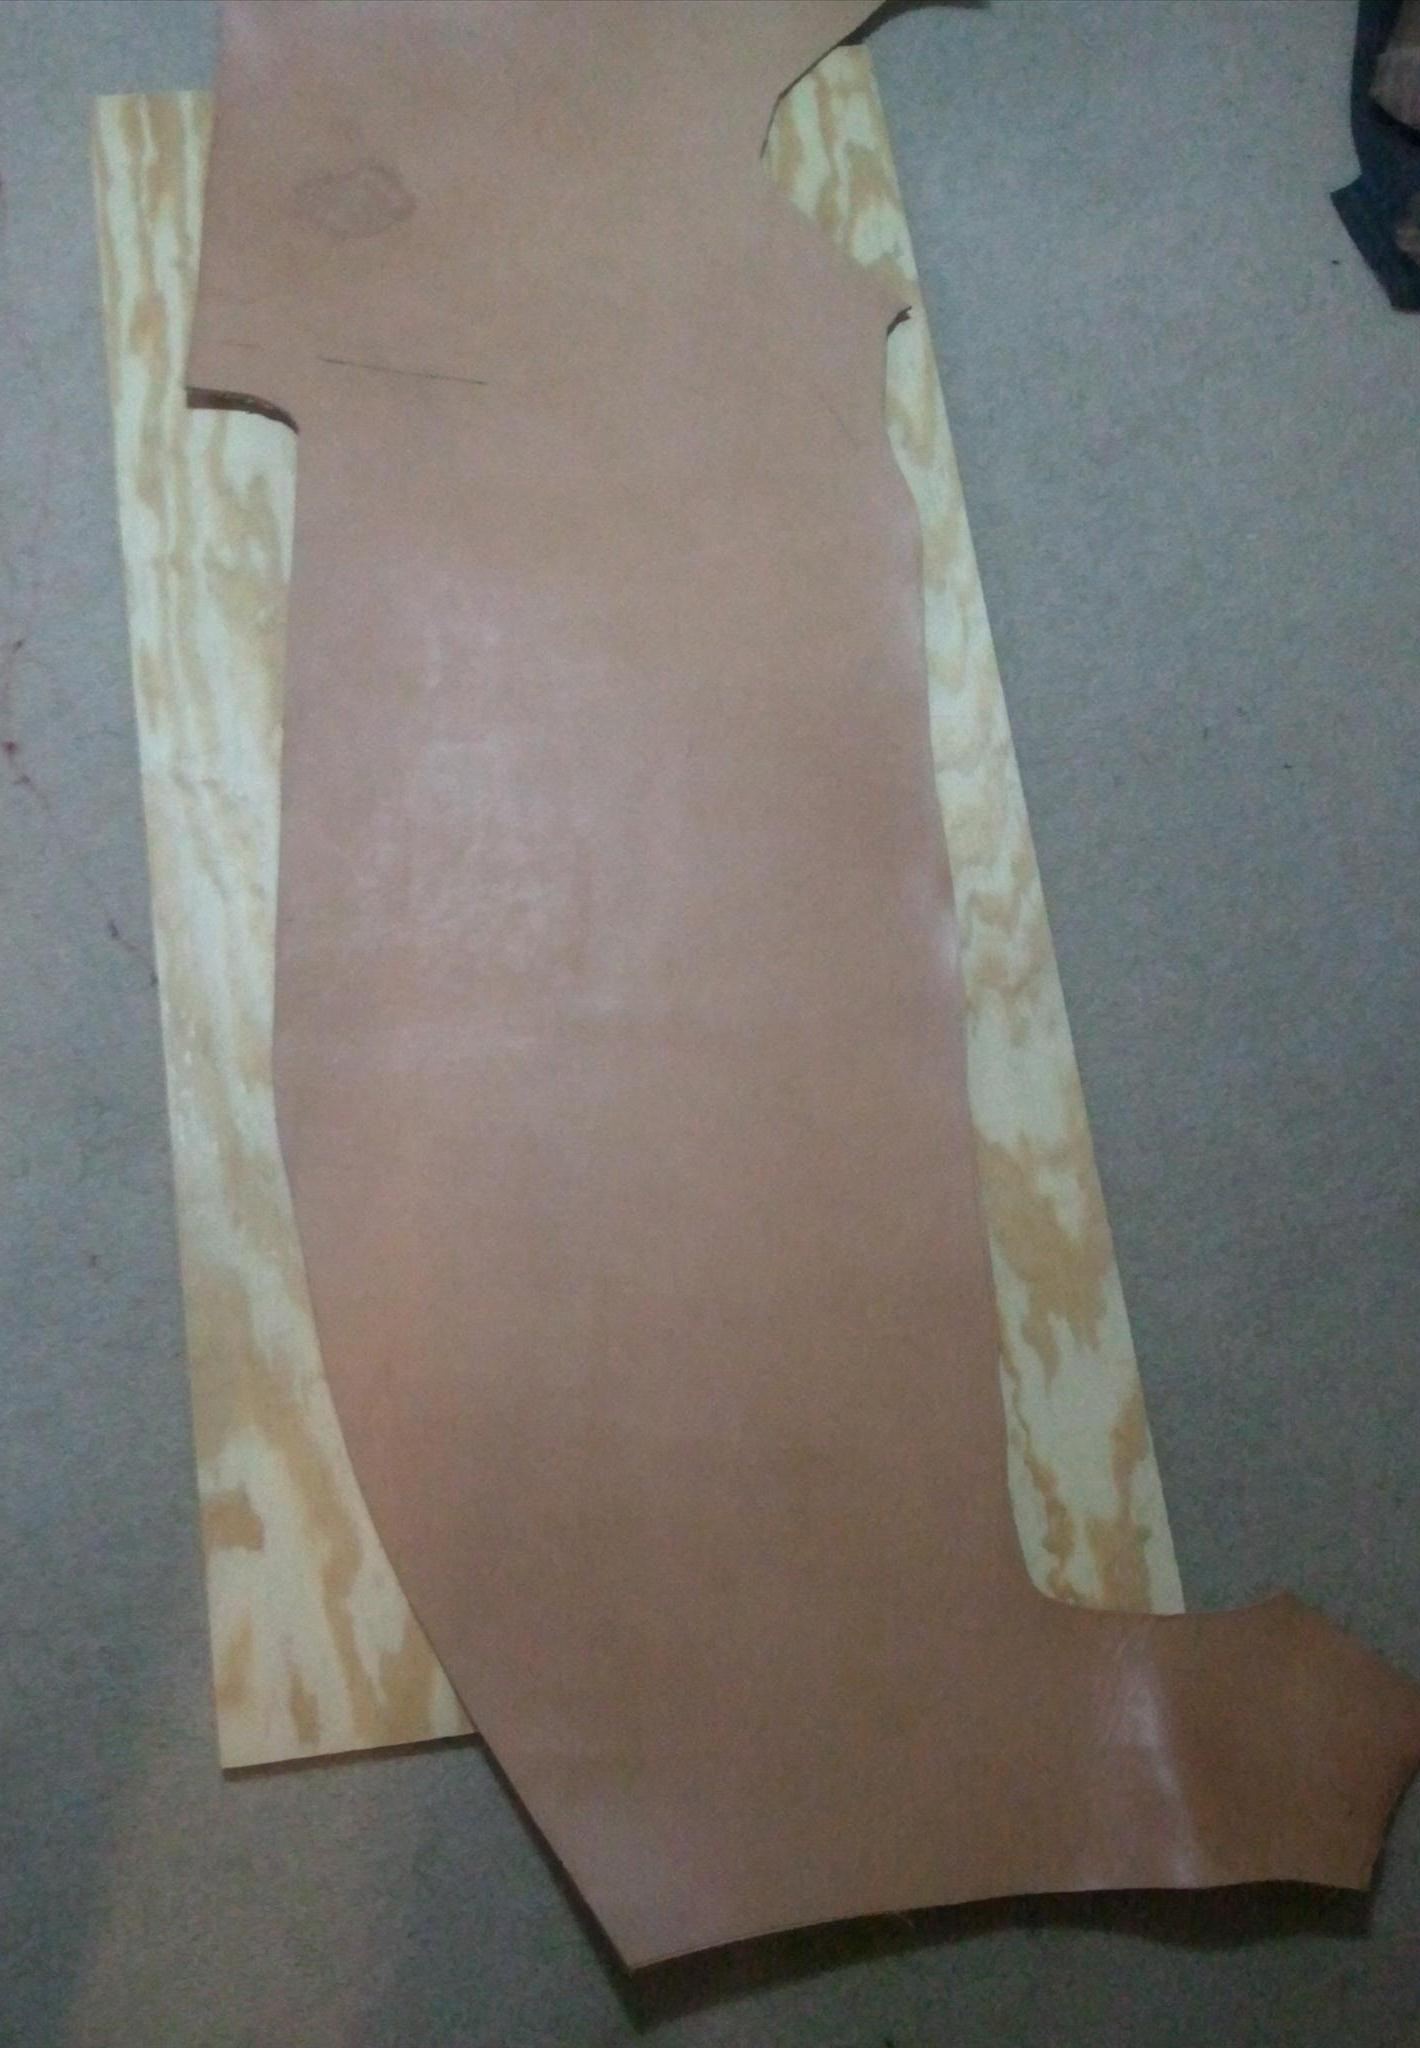
Step 4: Trace the Pattern onto the Leather
Once you have a pattern that fits your dog (you can just wrap it around them to test the fit), you need to trace that pattern onto the leather so that you can cut it out properly.

However, I totally forgot that I wanted to make the straps for this out of one piece rather than by attaching them on later. So I ended up with some extra lines on my finished product by accident. Had this been something for sale, I would have just changed my plan and added straps later. But since this was sort of a test project, I decided to just forge ahead, like so:
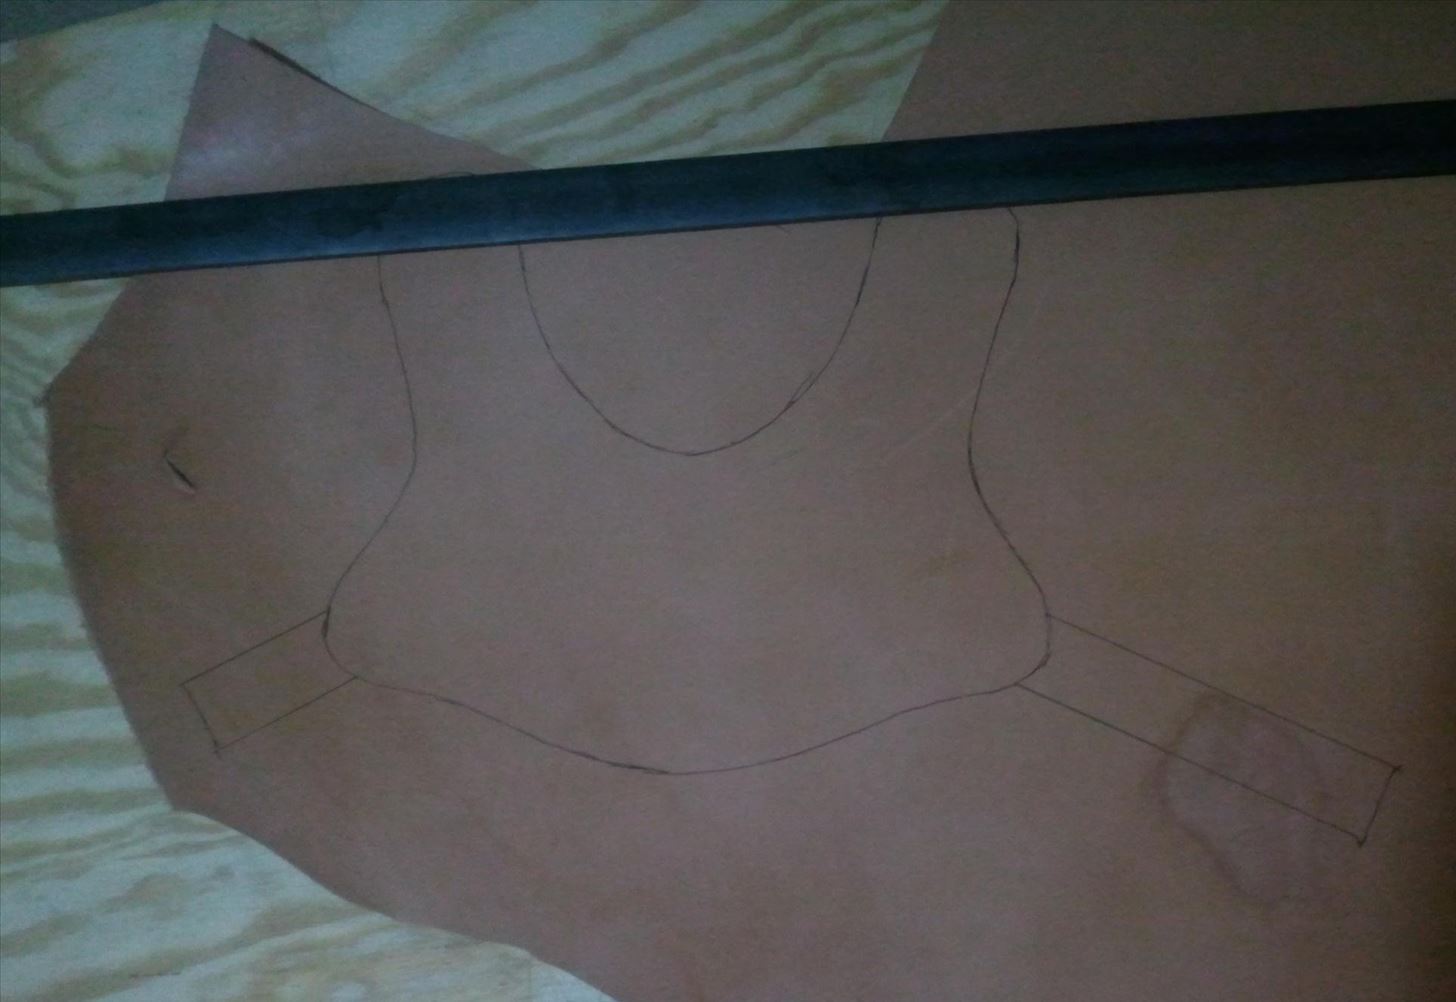
Note that the straps are at an angle. That's so that they better wrap around the dog's midsection.
Step 5: Cut It Out
Using your box-cutter, cut out your pattern.
I know, not the best cutting job in the world, but like I said, this was largely a test piece. Also, have I mentioned that I can't do anything freehand because I'm awful at art? Yeah, I can't even draw stick figures. I'm not even joking.
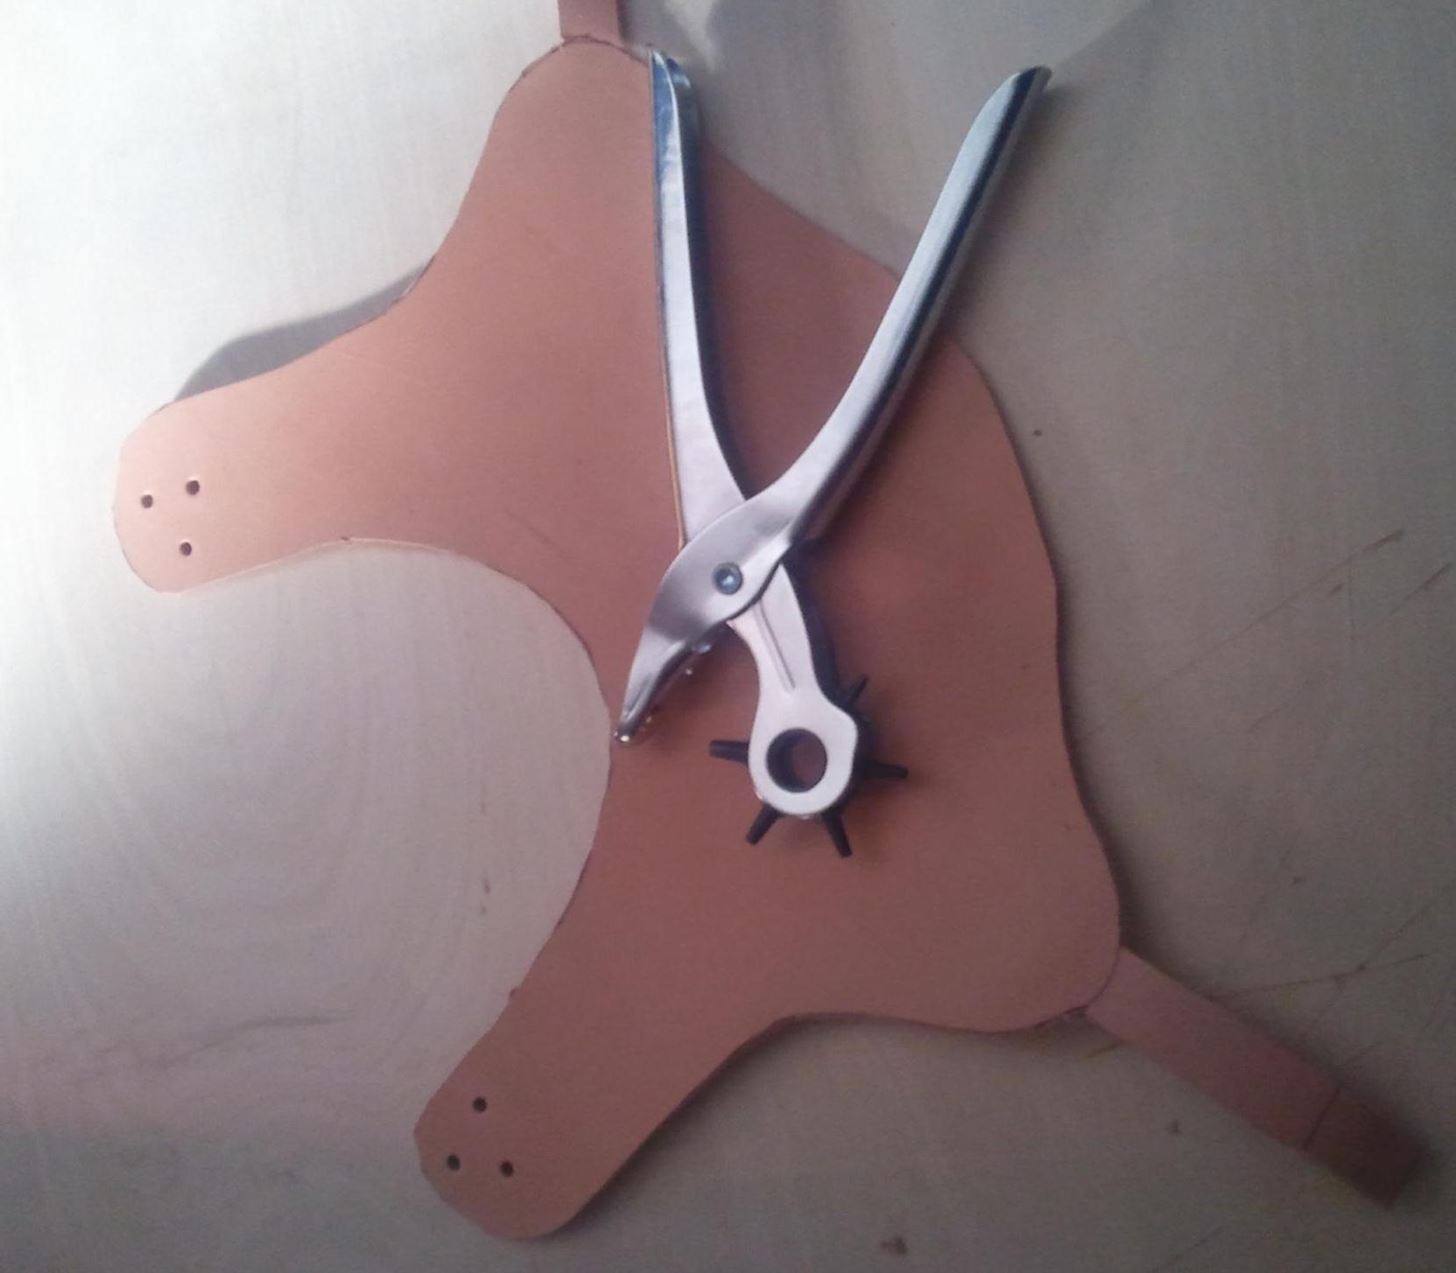
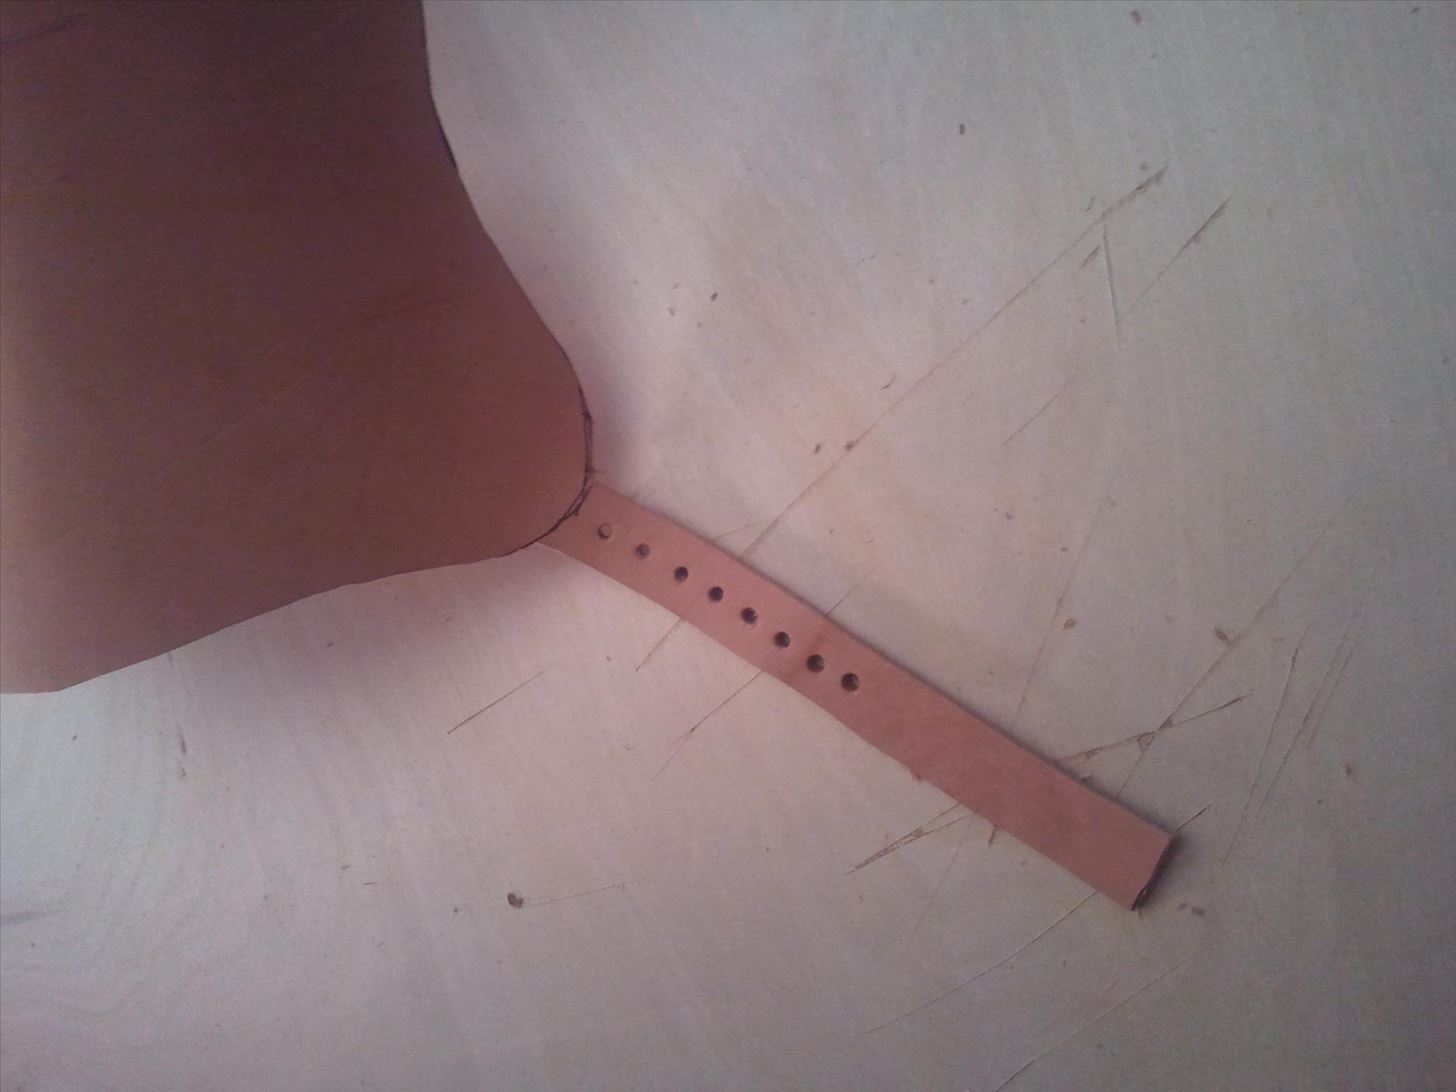
Step 6: Punch Some Holes
What did these holes ever do to deserve being punched?
Seriously, though, you want to connect the two arms around the front of your dog. I recommend testing it on your dog before punching any holes, so that you can see what angle you want the two arms to meet at.
For this piece, I recommend three holes in a triangle configuration. In this picture, you can see the holes, along with the leather punch that I used.
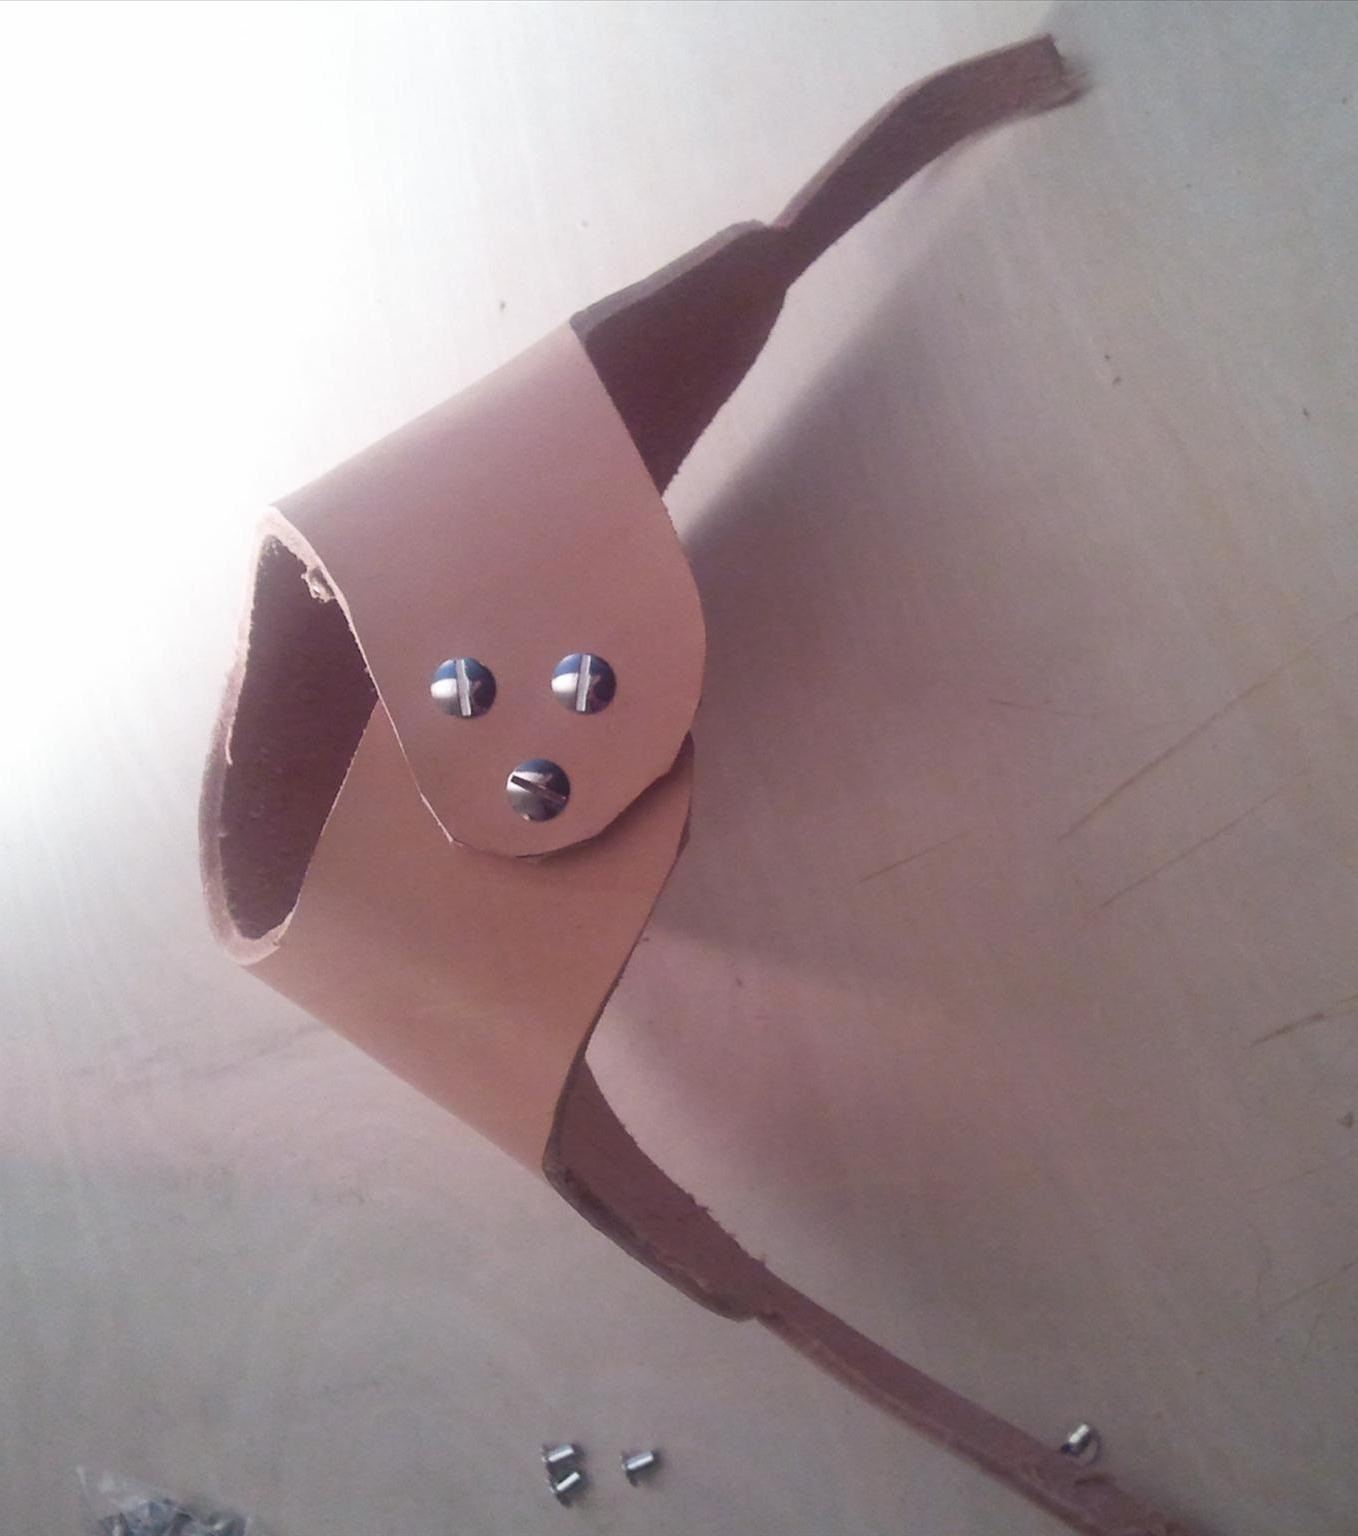
Step 7: Test It Out
I always test this out immediately, to make sure that my holes lined up properly. It's always an awful surprise to find out that your holes don't line up.
I like to use leather screws to test things like this. Rivets are a pain to remove, whereas screws you can just pop in and pop out. So if you did it correctly, it should look more or less like this:
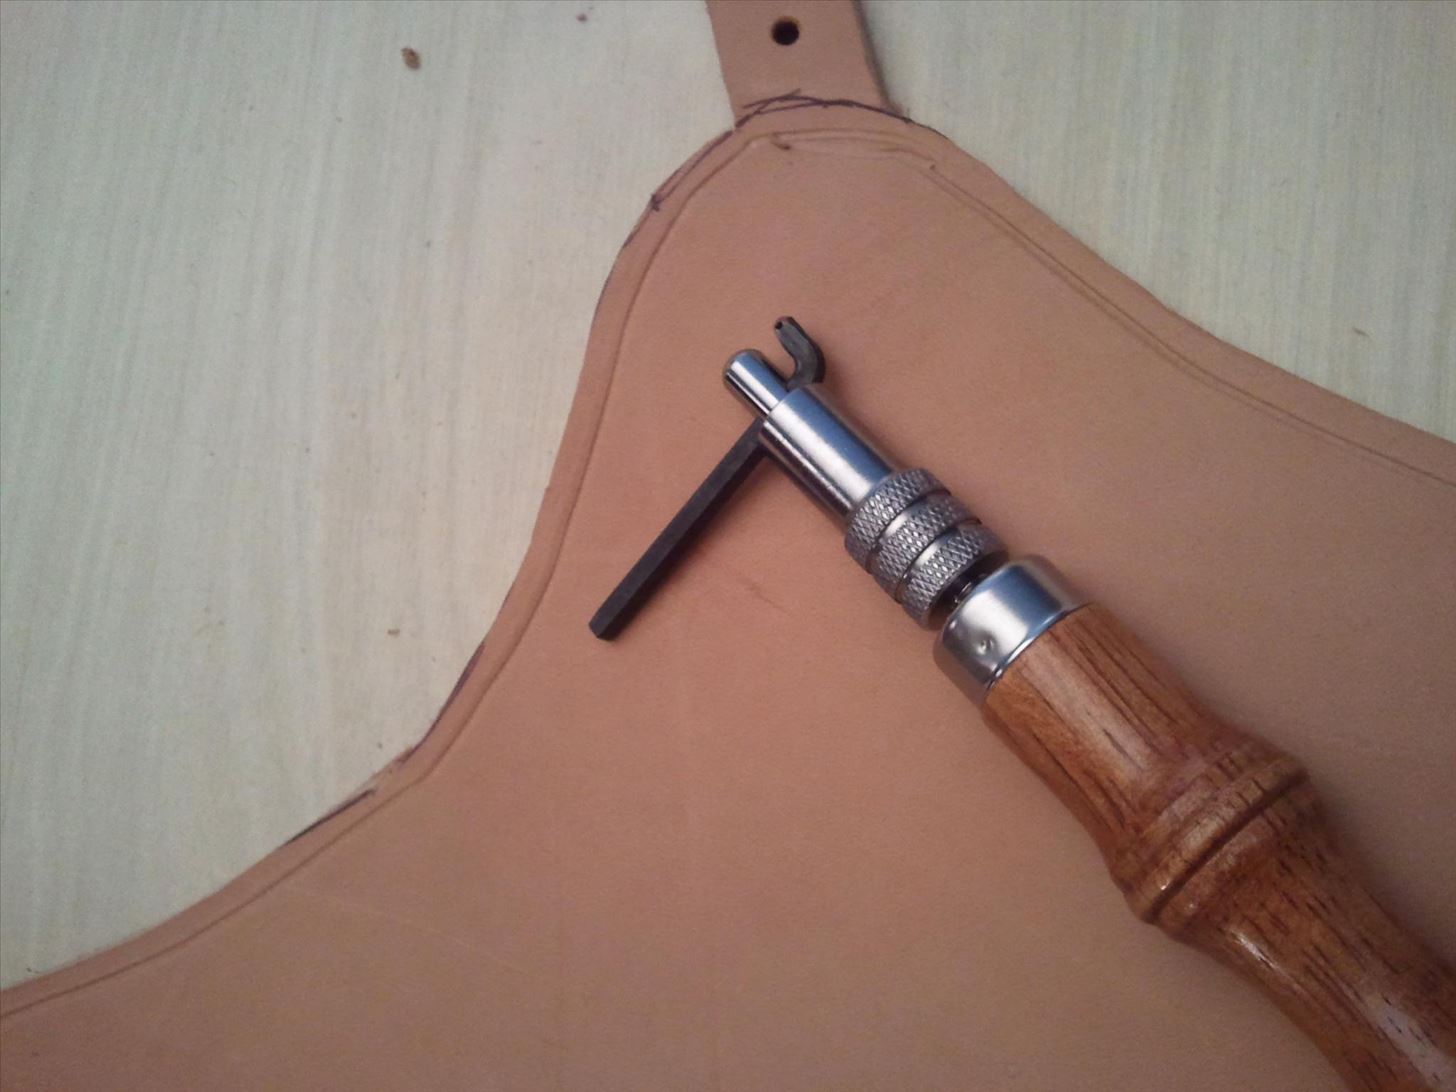
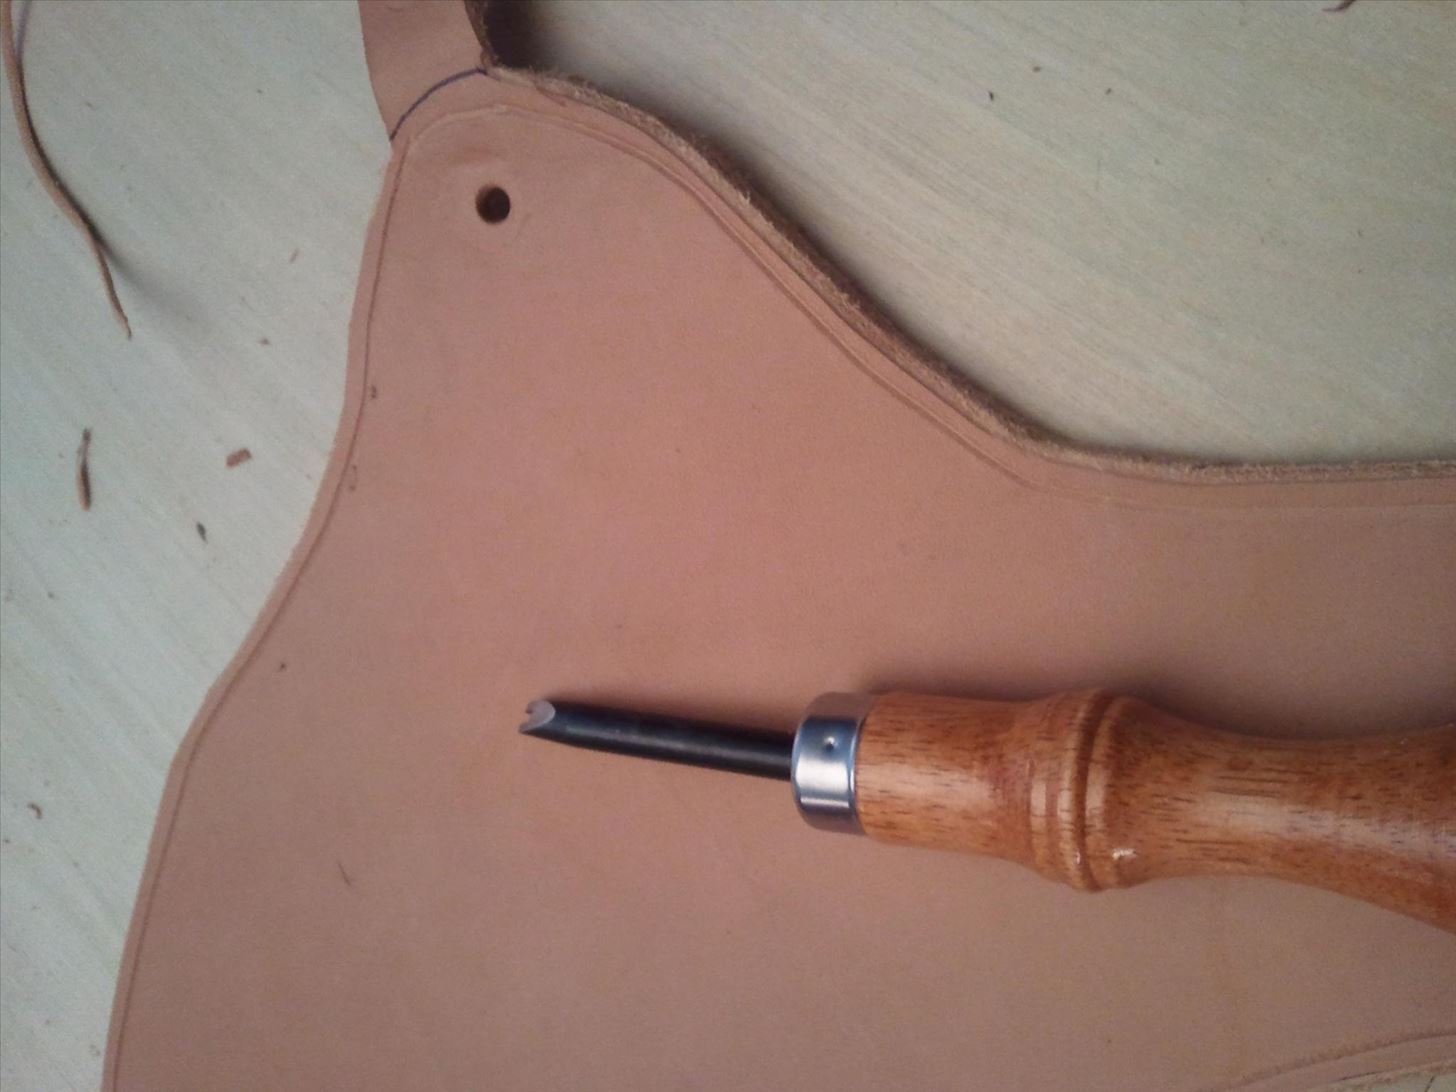
Step 8: Punch More Holes
Now it's time to punch the holes for your buckle. Once screwed together, this is what mine looked like:
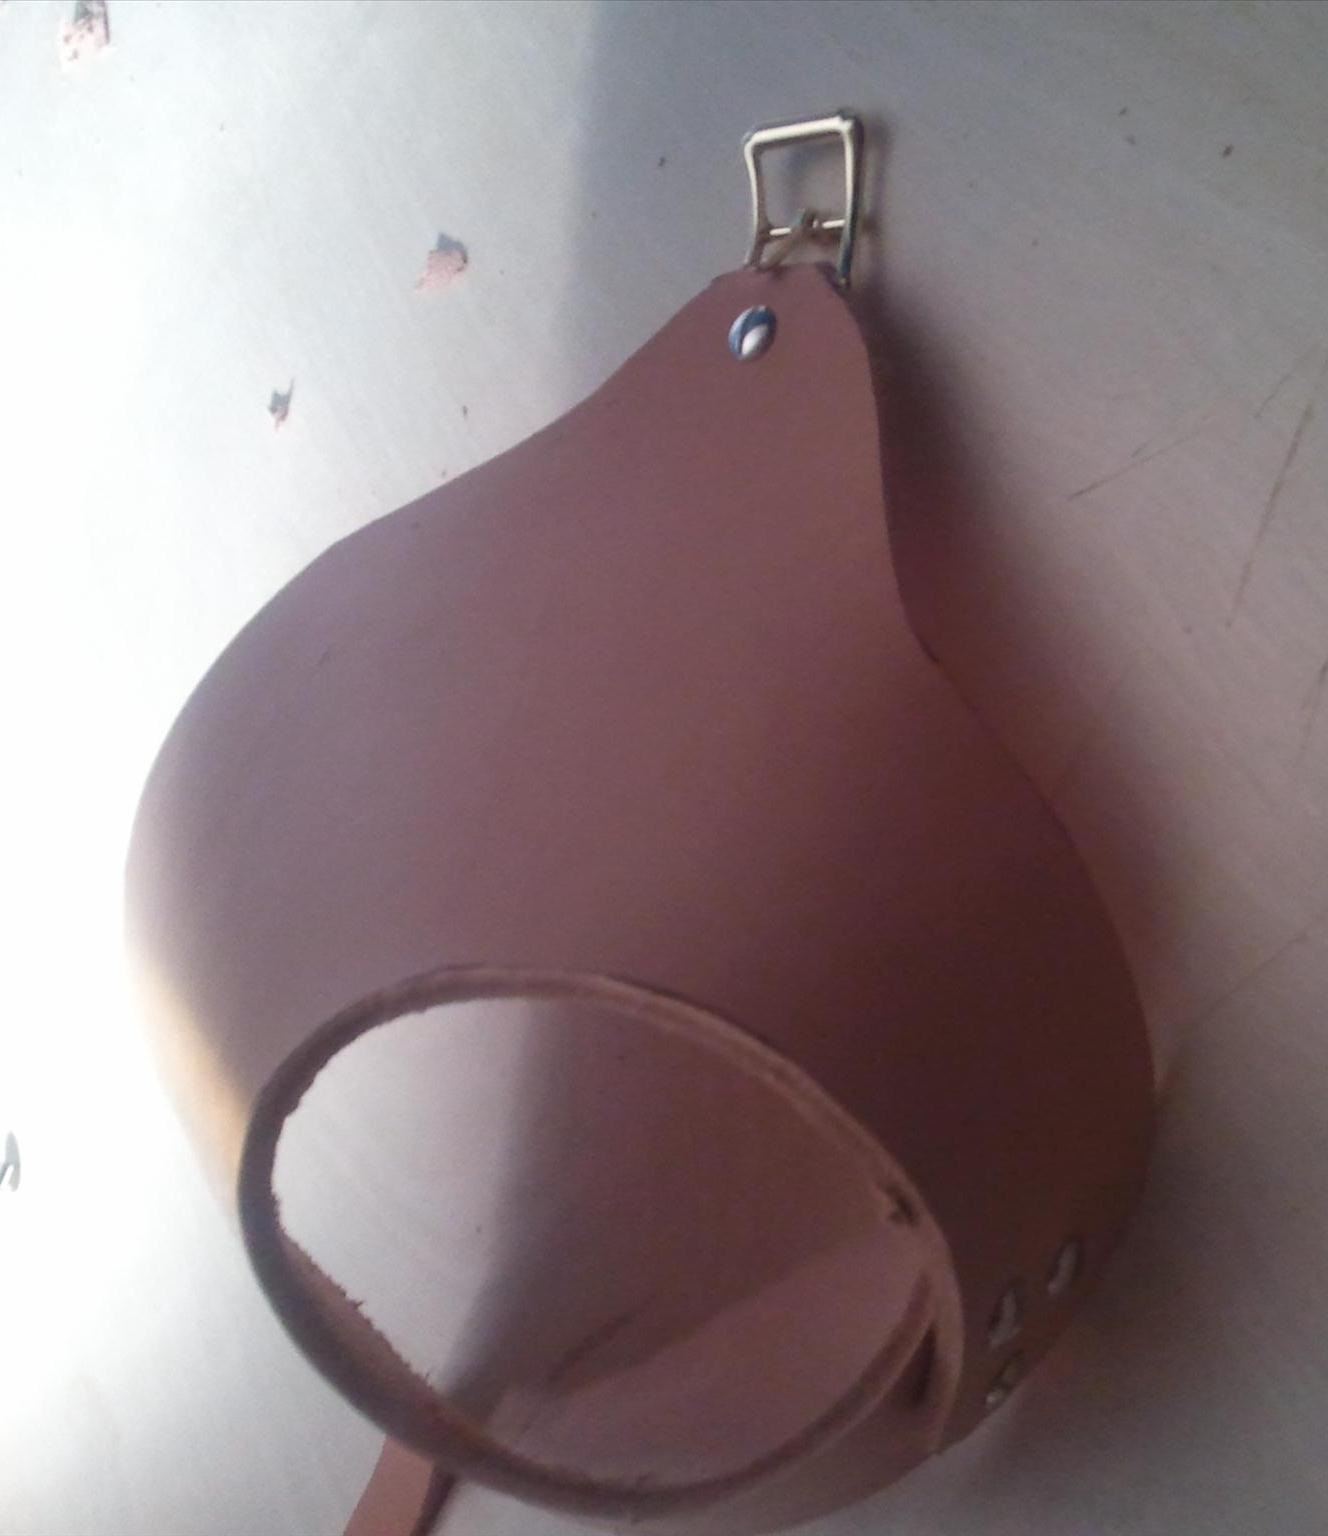
Then don't forget to punch holes in the strap, too, or else it won't buckle, and your dog will look at you like you're an idiot.
Step 9: Get Your Groove On
I love the groover. It makes such nice lines so easily. It makes me feel like I can make art.
Don't groove the straps, though. Just the main body piece.
Step 10: Keep a Bevel Head
Okay, I know, that was a stupid joke. We'll just pretend I didn't say that one.
So anyway, use your beveler to trim off the edges of the leather. This helps smooth out those edges, and makes them look more professional. It also gets rid of any remaining pen marks from when you traced the pattern.
Again, do not bevel your straps.
Step 11: Decoration
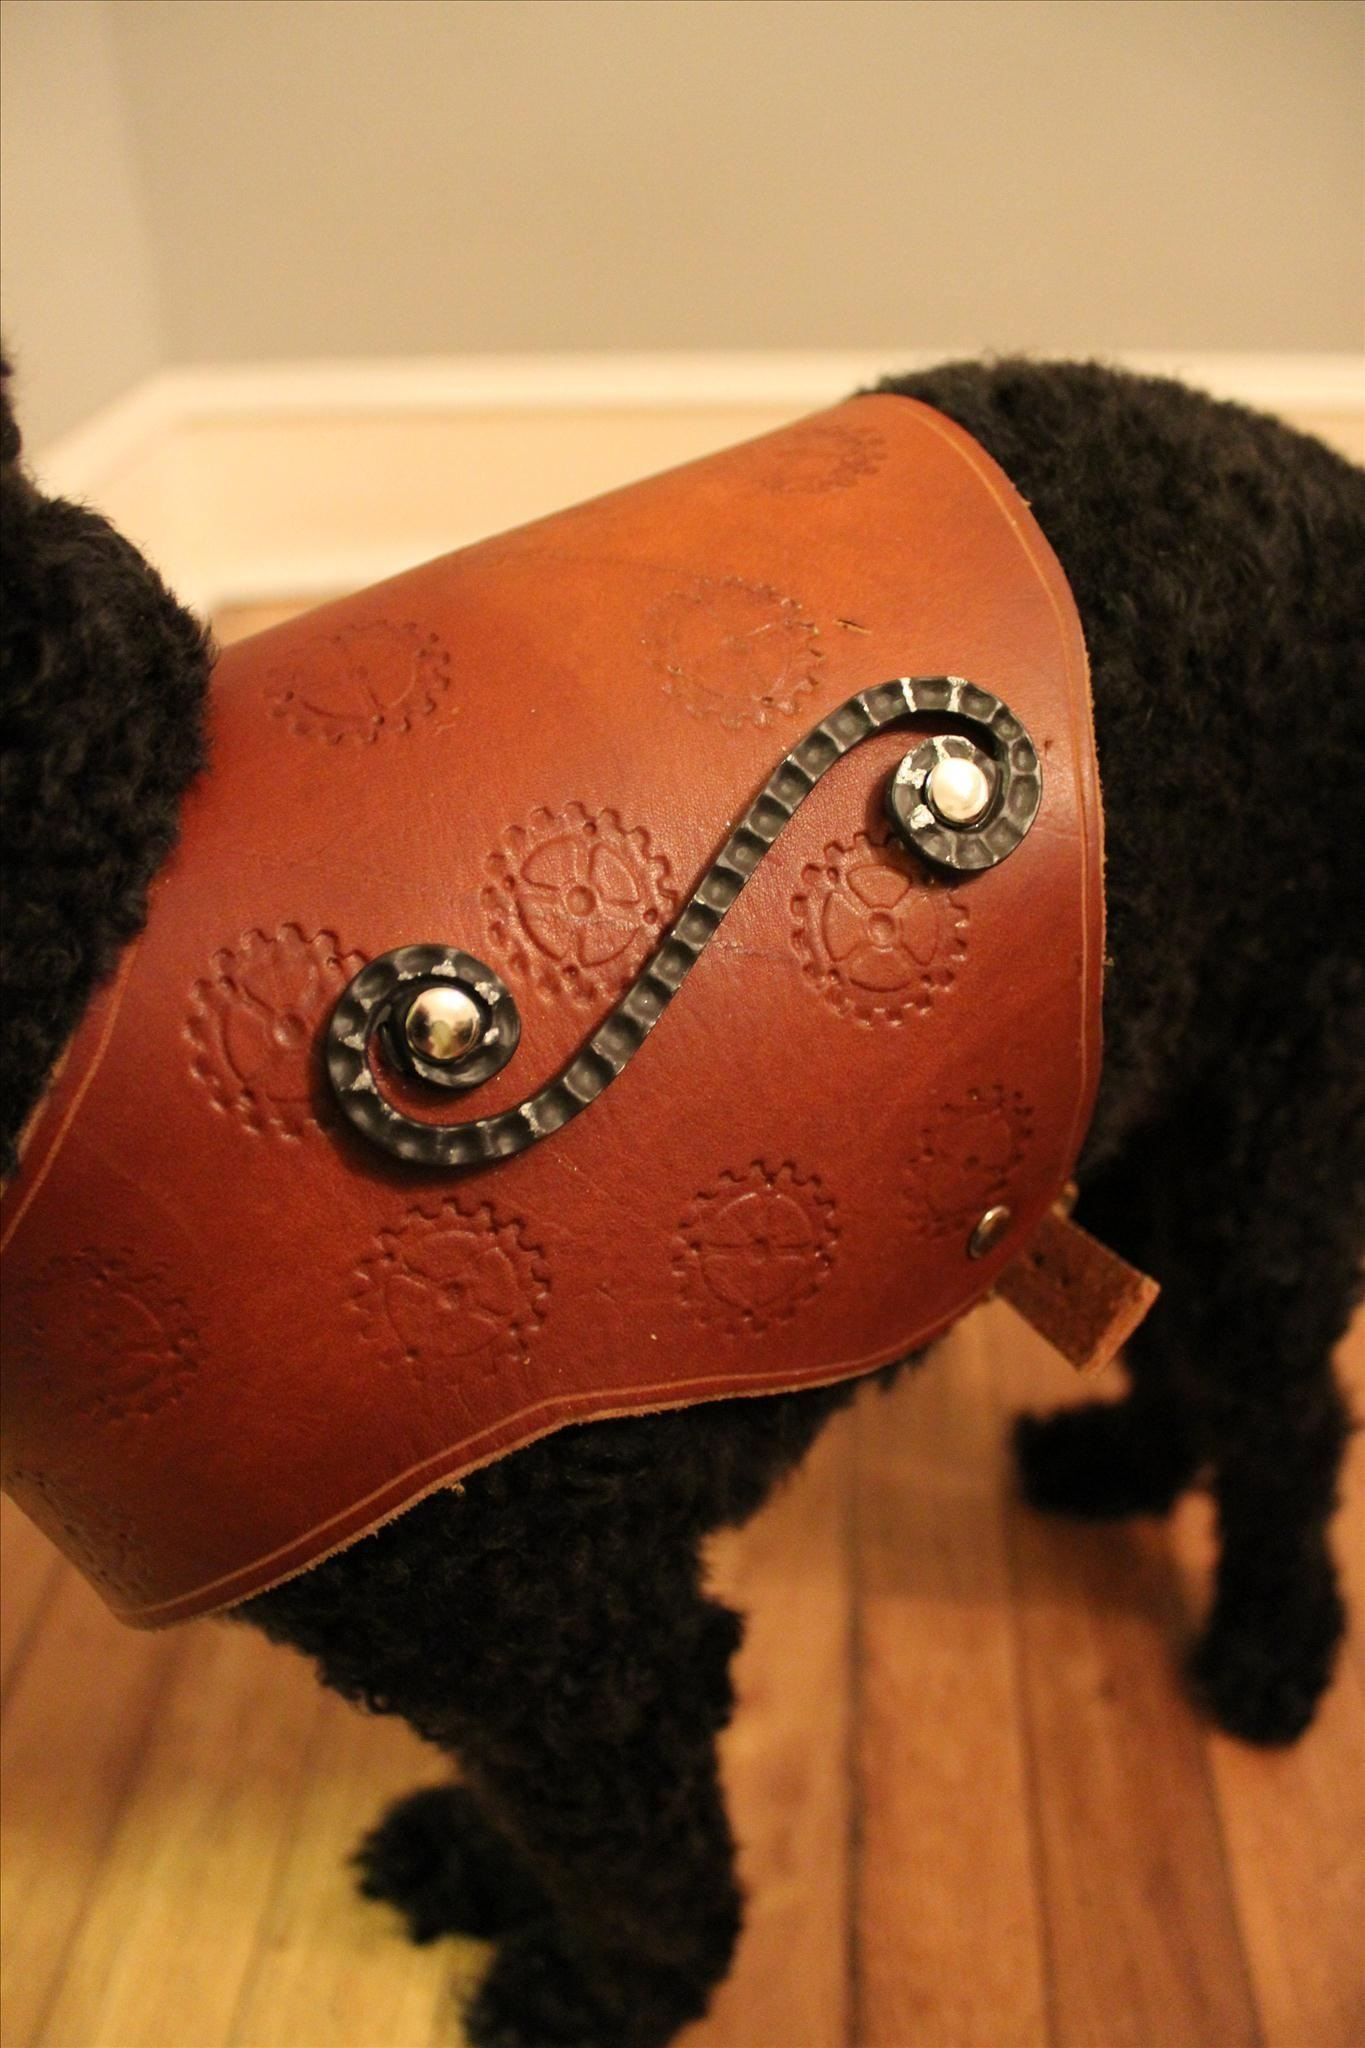
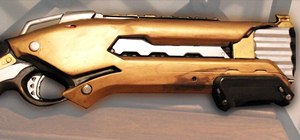
It's time to decorate your harness. I had a gear concho sitting around, so I put that face-down on the wet leather, and hit it with a hammer. I couldn't hit it directly, so I used a coupling nut (har har, I know) with a bolt in it as a... sledge, I guess. I put the nut on top of the gear, and then hit the whole thing with a hammer. Here's the result:
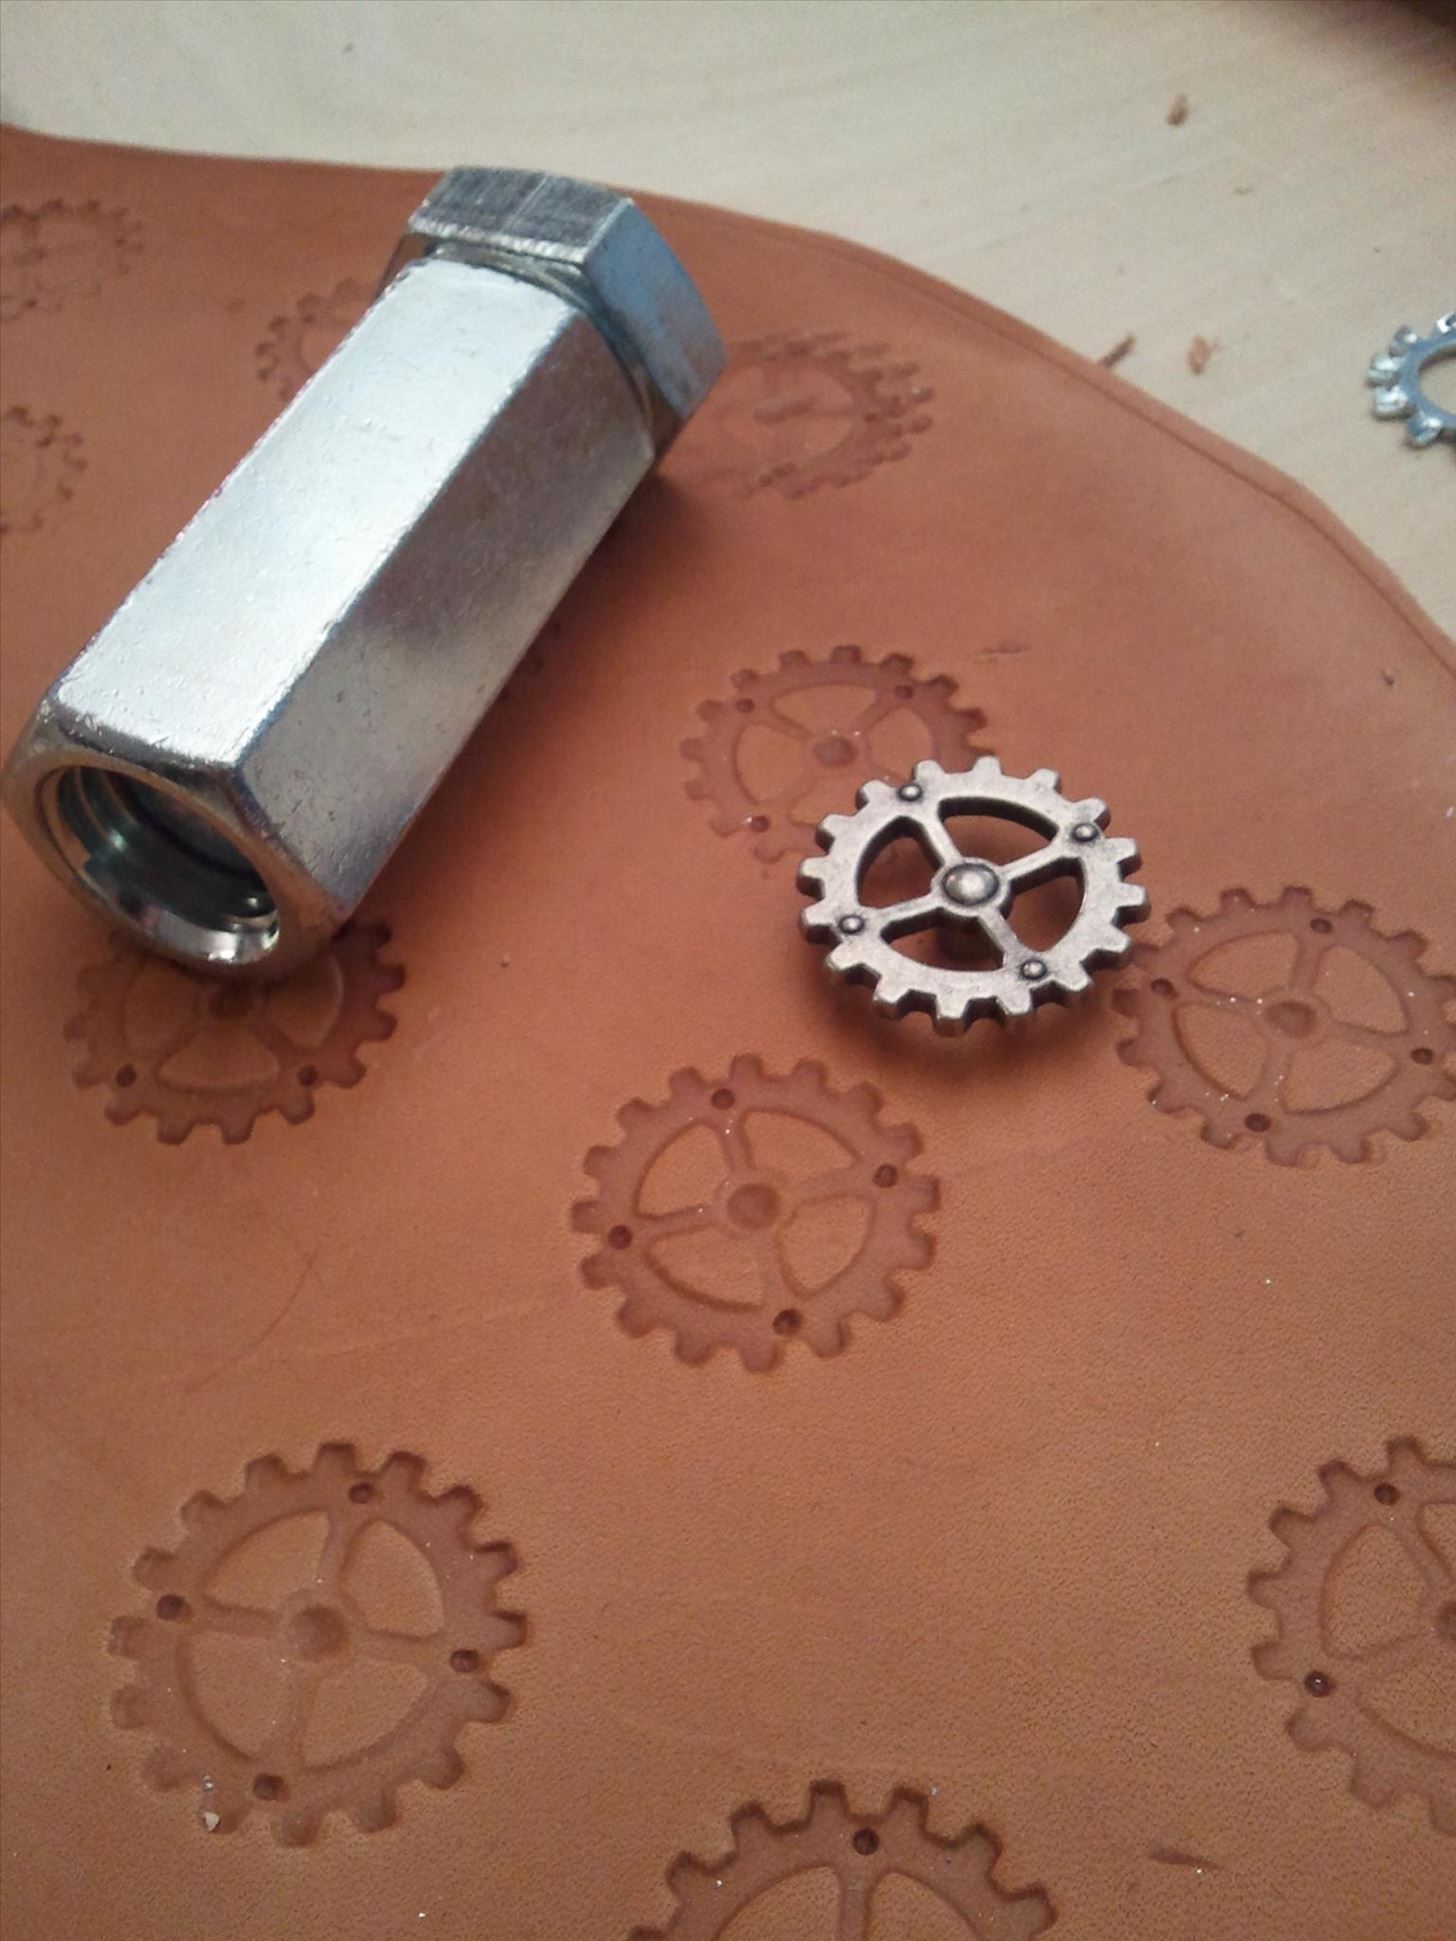
Looks pretty good, right? Well, I think so, at least.
Now, at this stage, you have a variety of options. Depending on your preference, you can potentially just stop here and be done. You have a functional harness with some design on it.
However, you may not want your dog's harness to be the color of raw leather.
Step 12: Coloring/Oiling
There are any number of leather dyes out there that you can use to change the color of the leather. However, given that this is a piece that's going to be worn by an animal, I highly recommend oiling the leather to make it softer.
As far as softening leather goes, neatsfoot oil is where it's at. The only problem is that the oil darkens the leather all on its own, so it can have unpredictable results when used with dye. For this project, I didn't use any dye at all, and used only neatsfoot oil to color the leather. You can see in this picture that the neatsfoot oil did a great job all on its own in coloring the leather:
Make sure that you use pure neatsfoot oil, and not a neatsfoot oil compound. In terms of application, I used a cotton swab to brush it on in thin-ish layers, bending the leather between applications. I think I did four layers, total. Each one only took about an hour to soak in, or thereabouts. Three of the layers I applied to the underside of the leather, and one layer I applied to the top. You don't want the top to be oily or greasy, so after I applied the layer on the top, I waited a minute or so, and then wiped it off with a paper towel.
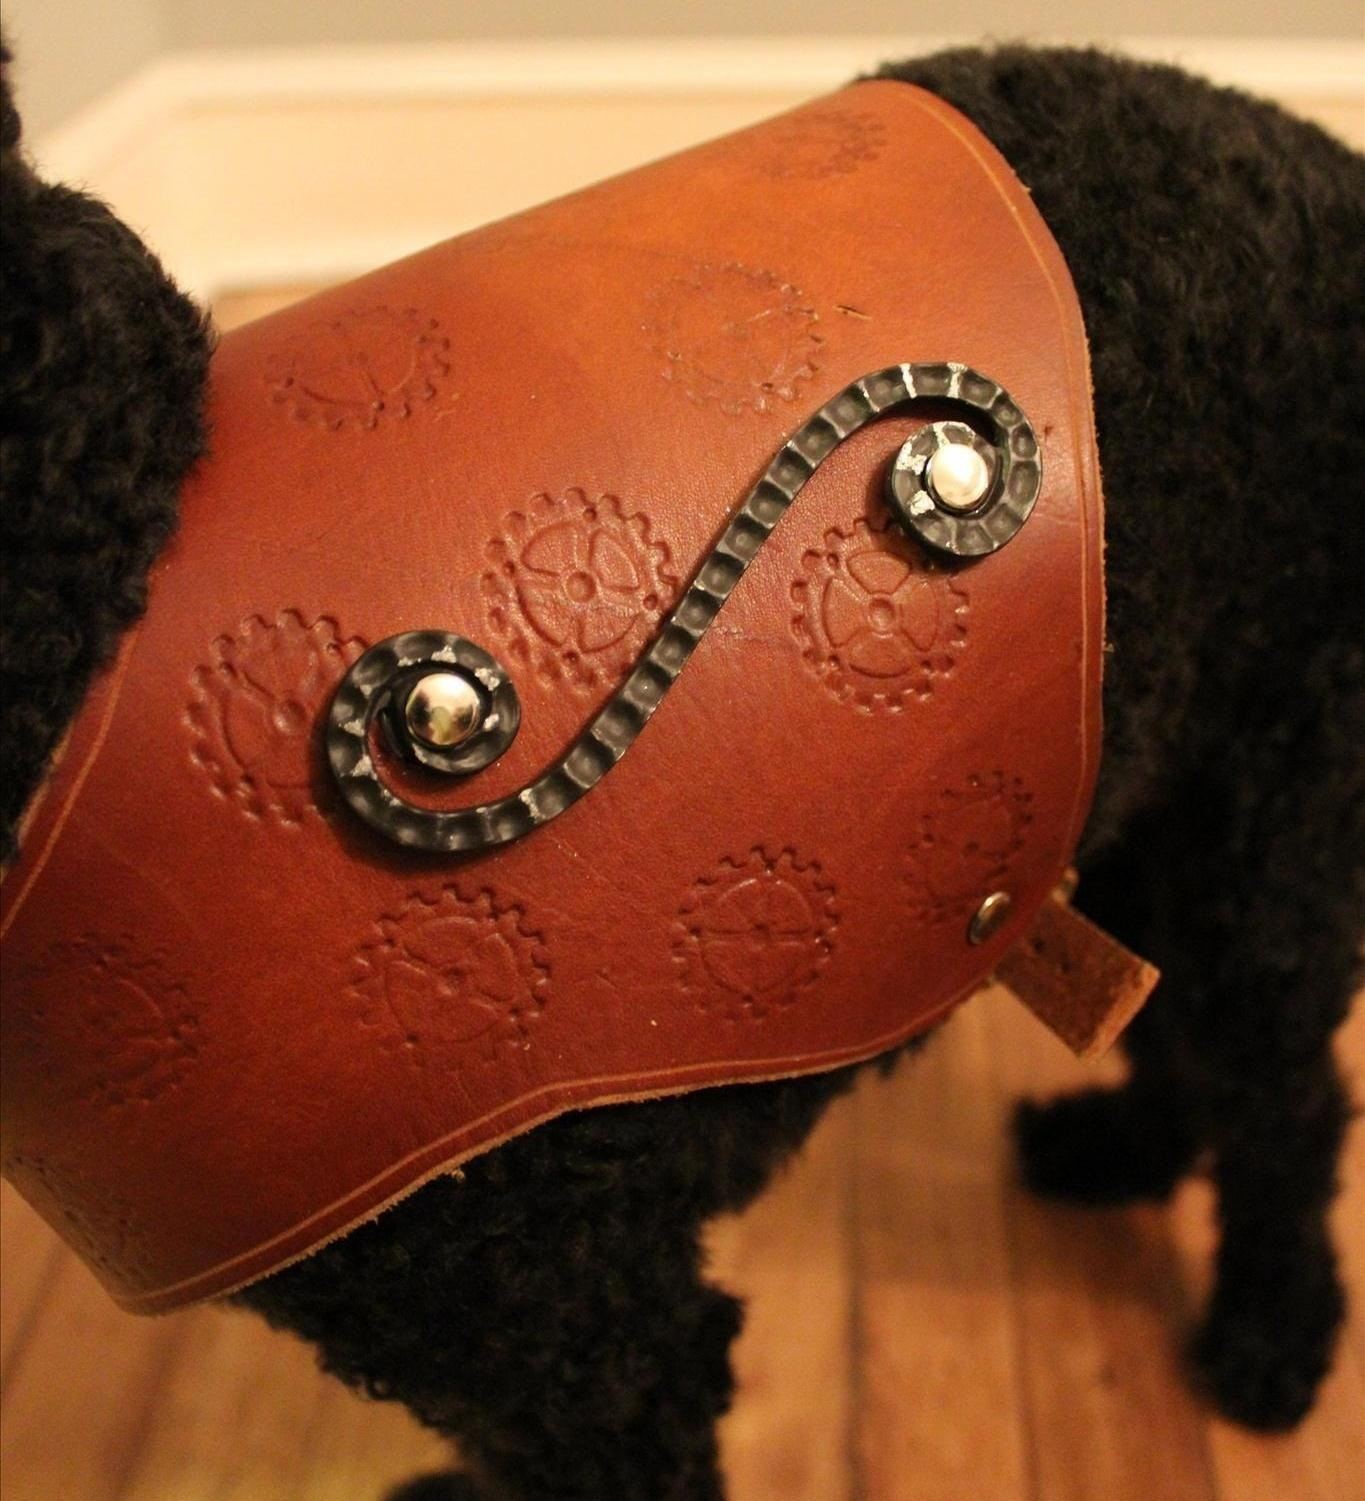
Step 13: Further Decoration
Now that your leather is softened, colored, and functional, you could just stop here! However, you may want to add the little decorate-y bits that make Steampunk so much fun. I didn't really have a clear vision for this project, so maybe I'll revisit it later to add cooler stuff to the harness. I did find these cool little metal bits at the hardware store, though, and they kind of reminded me of a violin. So I put one on each side of the harness to give it a kind of Steampunk violin-vibe.
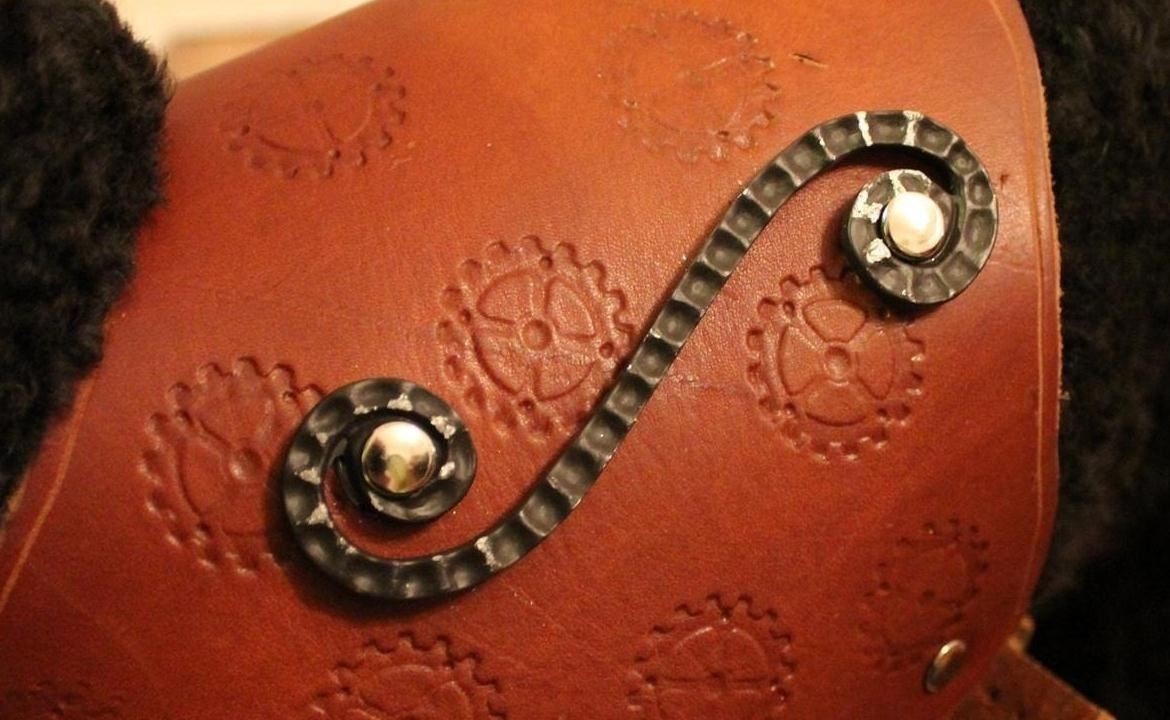
Those metal bits actually used to be drawer pulls, and I used my Dremel tool to saw off the metal prongs that used to be on the back of them.
You can add any decoration you want, though! Steampunk is, after all, your vision!
Just updated your iPhone? You'll find new emoji, enhanced security, podcast transcripts, Apple Cash virtual numbers, and other useful features. There are even new additions hidden within Safari. Find out what's new and changed on your iPhone with the iOS 17.4 update.


Be the First to Comment
Share Your Thoughts