
Steampunking Nerf guns by painting them is a pretty common practice among Steampunks, but unfortunately, the really amazing-looking ones involve literally taking the gun apart, painting it, and then screwing it all back together.
Well, I'm glad that some people can do that, but let me tell you something: I have never been able to put a Nerf gun back together once I've taken it apart, and then had it still work. Never. I understand that there's some form of skill to it, but it may as well be rocket science to me.
So instead, I'm going to show you how to paint a Nerf gun without taking it apart. The only thing you need for this tutorial is whatever color spray paint you intend to use, and some painter's tape! As far as tape is concerned, I recommend the Scotch "Easy Release" Painter's Tape. It's blue, and you'll see it used extensively in this tutorial.
Step 1: Get Yourself a Nerf Gun (or Buzzbee, If You're Desperate)
I picked this gun up at the thrift store for 99 cents. You can still see the price tag on it in the picture below!
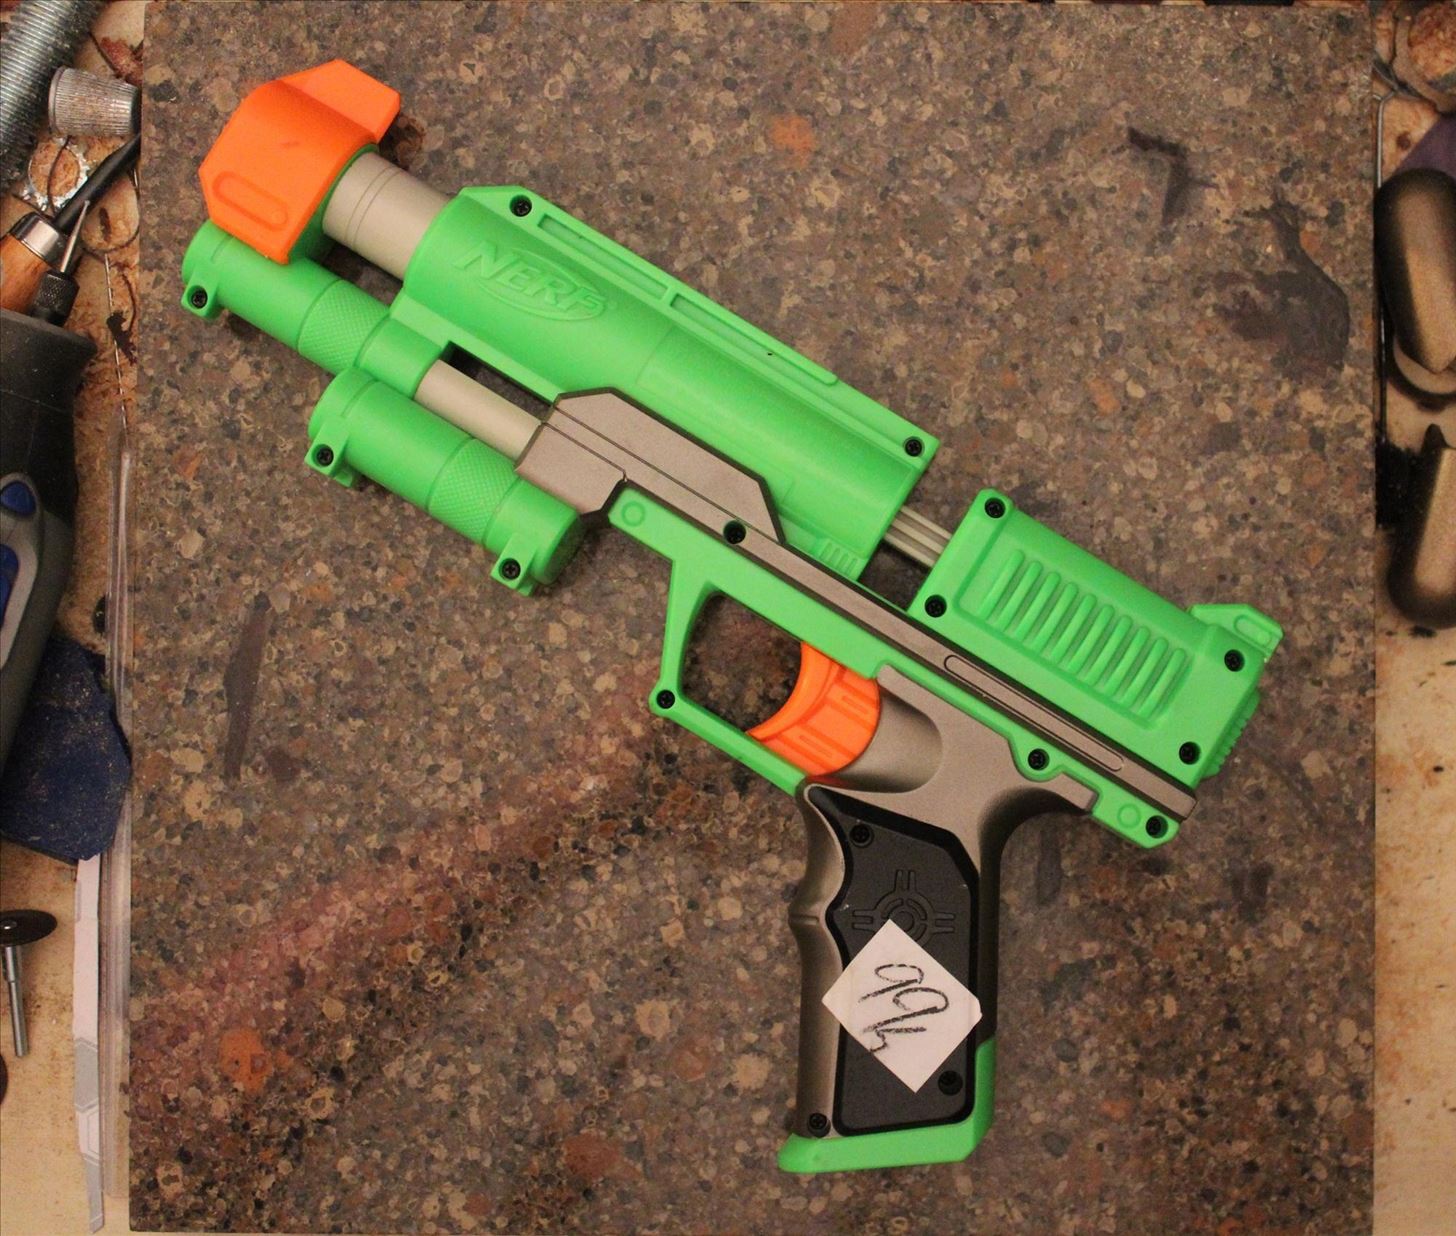
This gun is from the 'Dart Tag' series of guns, and I thought it would make a cool-looking Steampunk gun that would prevent me from having to make yet another Steampunk Nerf Maverick.
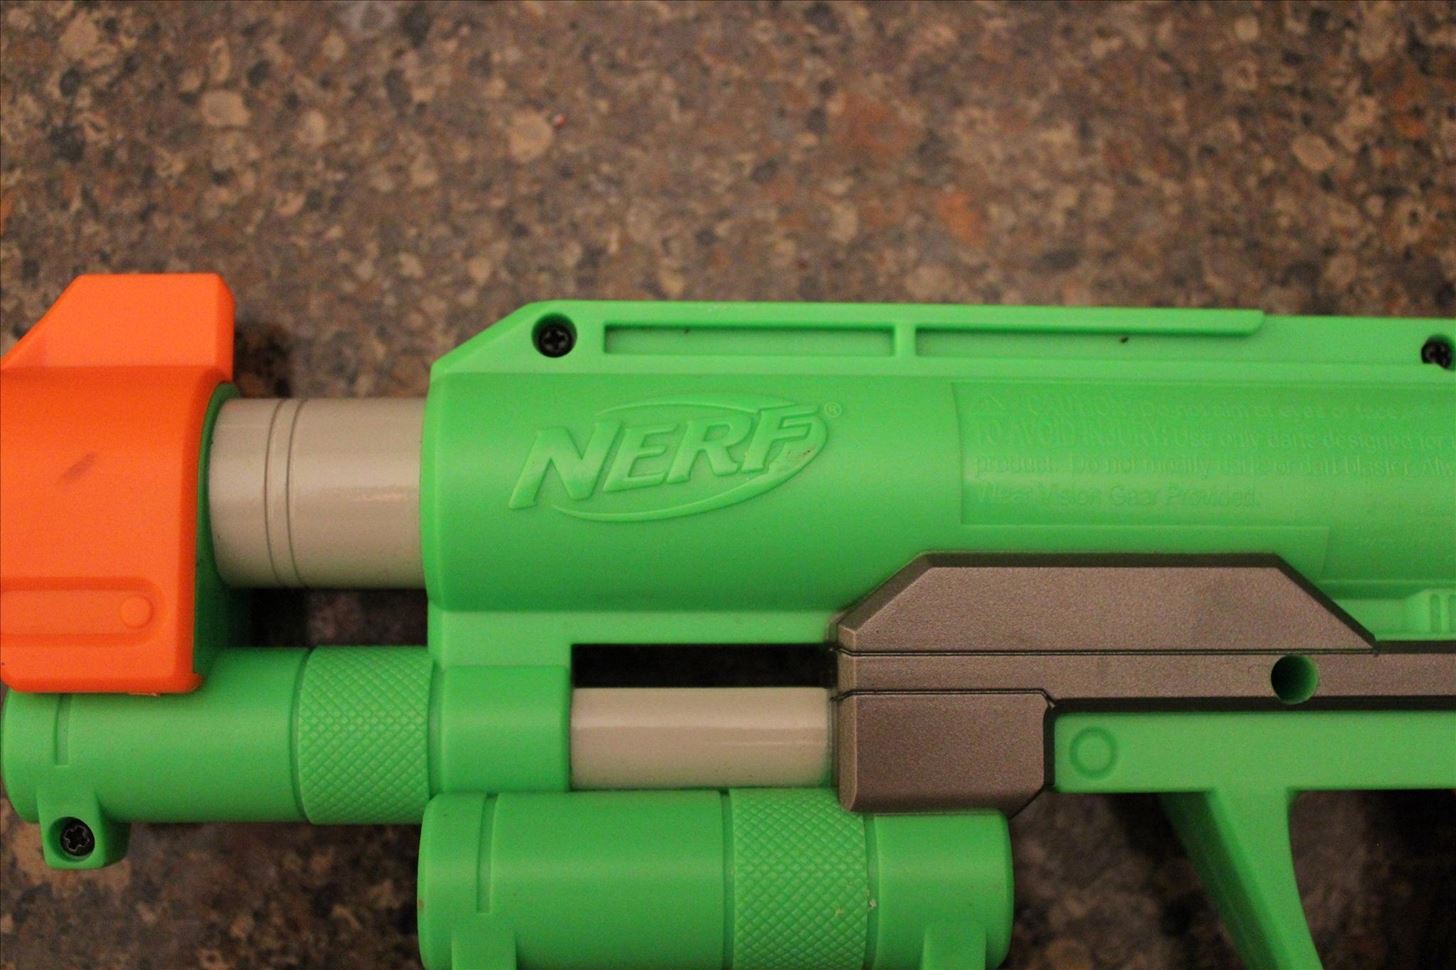
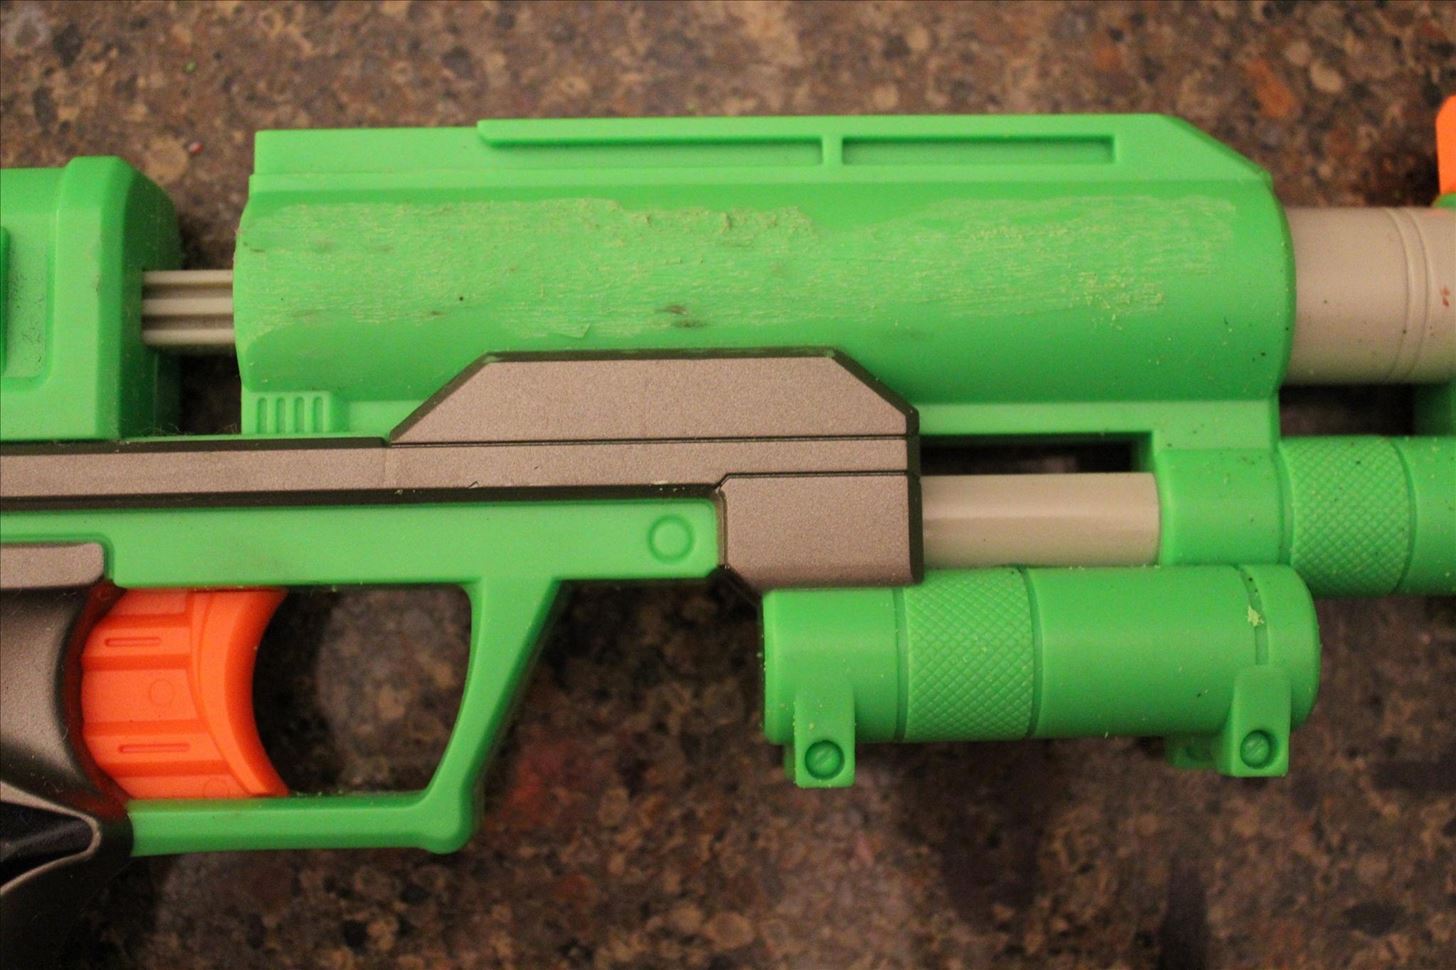
Before we even get any further, let me identify some problem areas. First we have some Nerf logos:

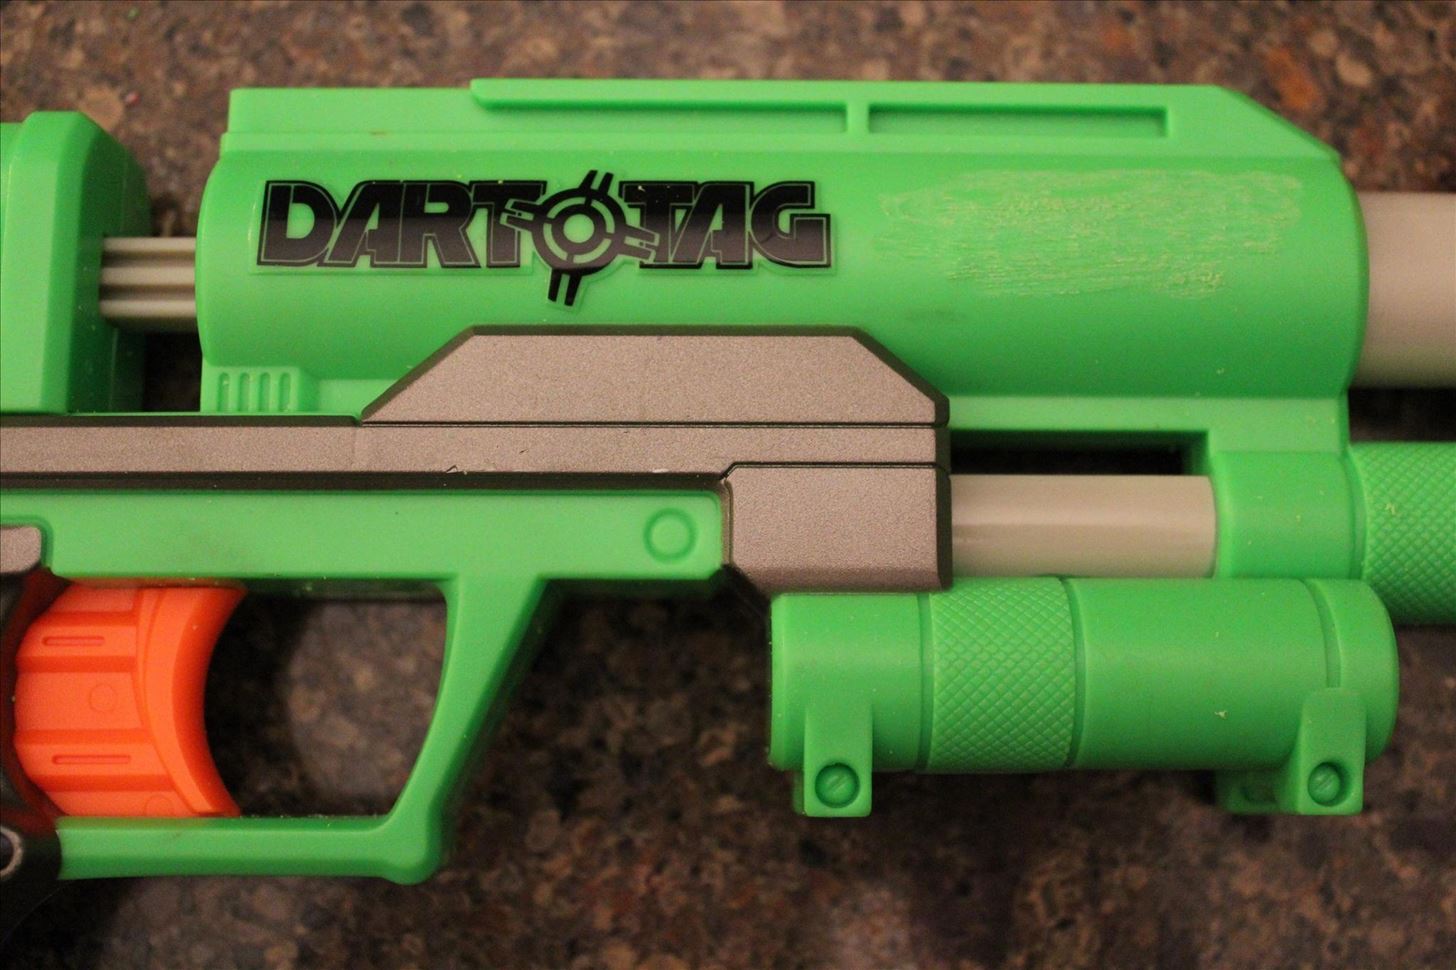
As you can see, we have a "Dart Tag" bit that's painted directly onto the plastic, and then a raised Nerf logo made of plastic. This next one was the hardest to take care of, though:
It's hard to see because it doesn't really stand out (it's green-on-green), but on the right side of the above picture is a whole bunch of safety text. "Don't point this gun at anyone's eyes, keep it away from your genitals, etc." What was particularly difficult about it was that that whole section is lowered, making it hard to get a smooth, continuous surface across that side of the barrel.
Anyway, our next step will deal with all of that:
Step 2: Sand the Crap Out of It
Yeah, you heard me: sand the crap out of it. This stage will take a long time, so you'd better be prepared to put some elbow grease into it. A few tools will make this job easier for you, but you're probably going to end up doing the fine work with sandpaper, or a sanding block. A Dremel rotating tool will help speed things up, and a power sander will help, too. Start with a coarser grit, and move to a finer grit in order to get a nice, smooth surface.
That said, it's not quite as easy as that. First, what parts of the gun do you sand? Usually I recommend sanding anything that you intend to paint, but there are so many textures and nooks on this gun that sanding evenly is nearly impossible. So in this case, I didn't sand anything other than the parts where I needed to get rid of Nerf logos. However, I did go over the whole gun and sand away any visible seams and plastic protrusions.
Anyway, here's the "Dart Tag" side after I got done with Dremeling the raised Nerf logo:
It looks pretty rough, I know. It's hard to get a smooth surface on plastic when you're using a Dremel. Do it too fast, and the plastic melts. Here's the same side after I've gotten rid of the "Dart Tag" logo:
After this point, power sanders won't really help me due to the odd shape of the gun, so it was time to do it all by hand. In order to make it look even, I had to smooth out the entire barrel with a sanding block, not just the areas where I used the Dremel.
Step 3: First Coat of Paint
Once you're done sanding and you're satisfied that you've got it smooth, it's time to apply your first coat of paint. Because I couldn't sand the whole gun, I decided to use a coat of primer underneath the paint. That way, the paint will have something to stick to without the texture from sanding.
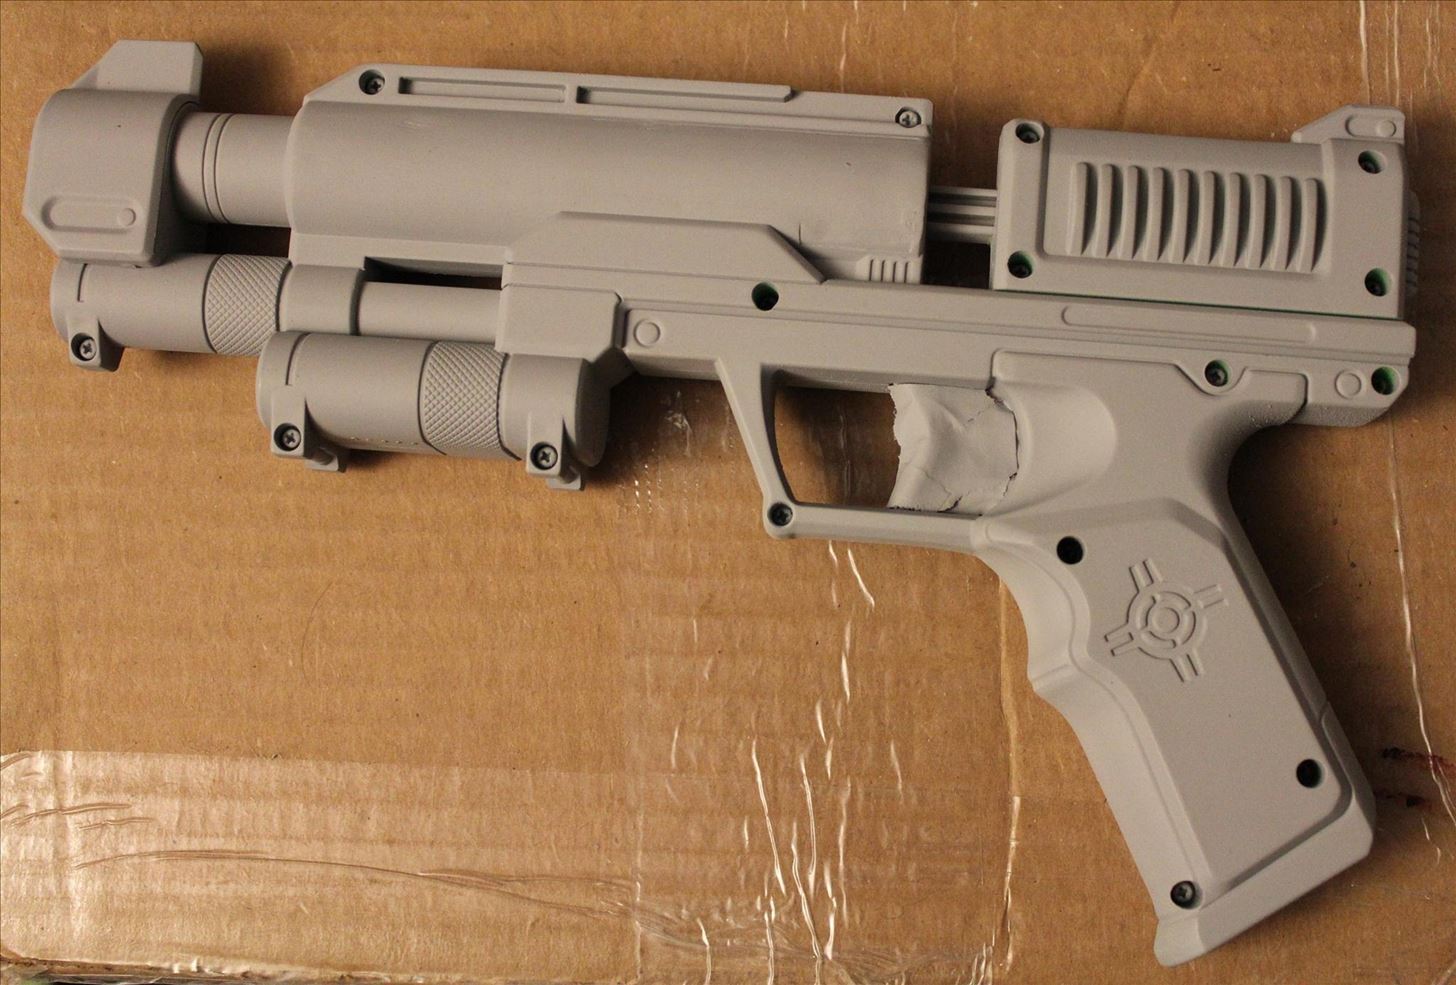
You may note that I've put tape over the trigger. This is because I didn't want the extra primer layer on the trigger. I was afraid that if I got too many layers of paint on the trigger, it would scrape off when the trigger was pulled.
Step 4: Applying Tape and Painting
Okay, so, here's the thing. I went ahead and taped off sections of the gun, because I'm dumb. The best way to do this is to apply a full coat of whatever the primary color of the gun is, before taping. So, let's say you want the majority of the gun to be gold. You would spray paint the entire gun gold, and then cover the gold parts with tape when you spray the rest of the gun.
However, I skipped that step, because I'm a glutton for punishment. So here's what I did:
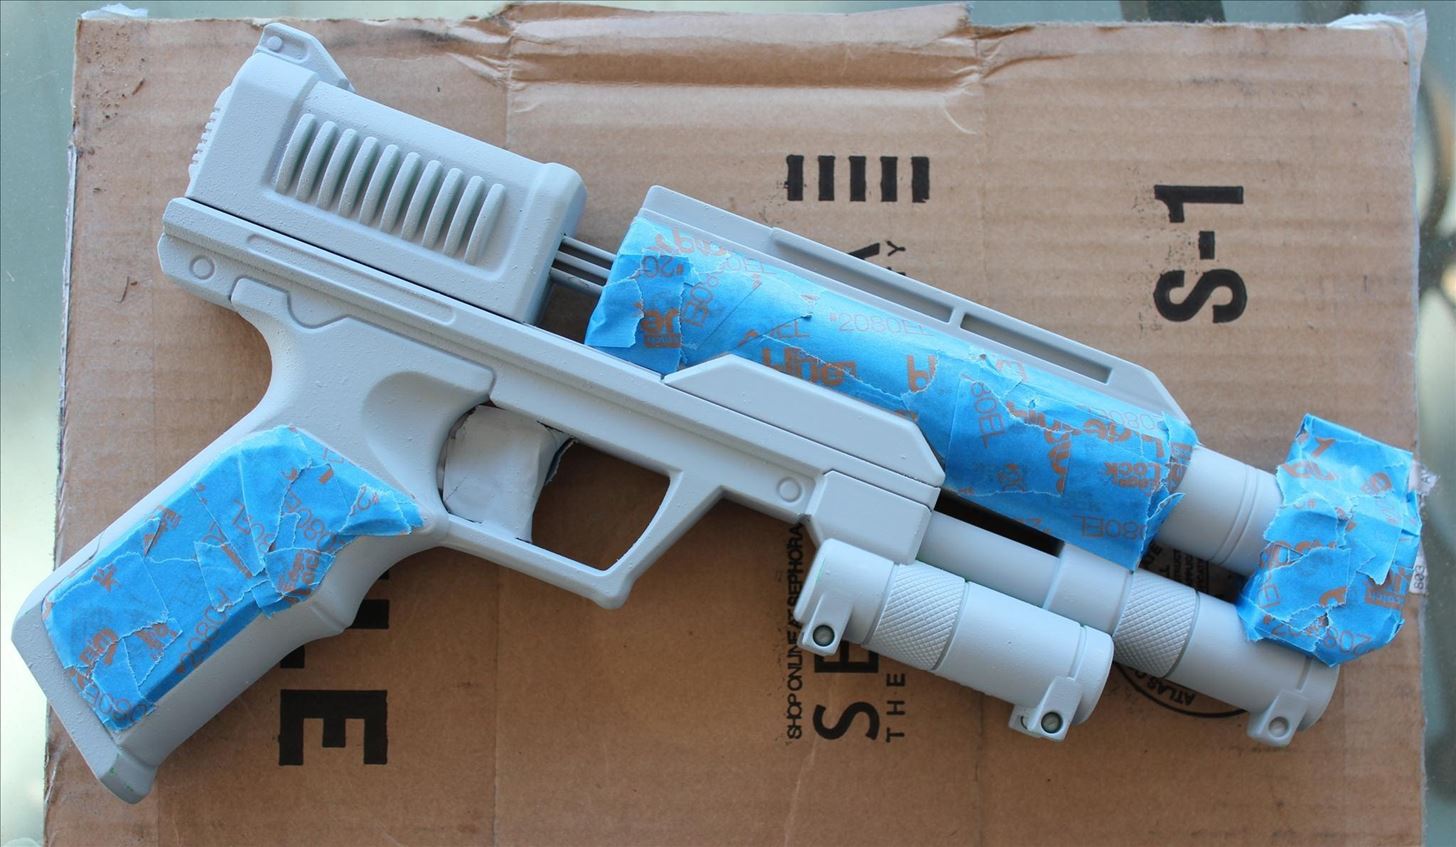
I covered the portions I didn't want to paint, and then painted the gun brass.
Let me make something very, very clear: applying tape in exactly the right position is a time-consuming, annoying process. If you go too quickly or don't pay enough attention to the details, your paint job will look sloppy.
Unfortunately, I forgot to take a picture of the gun when it was just brass and gray, but I'm sure you can use your imaginations.
Step 5: Taping and Painting Again
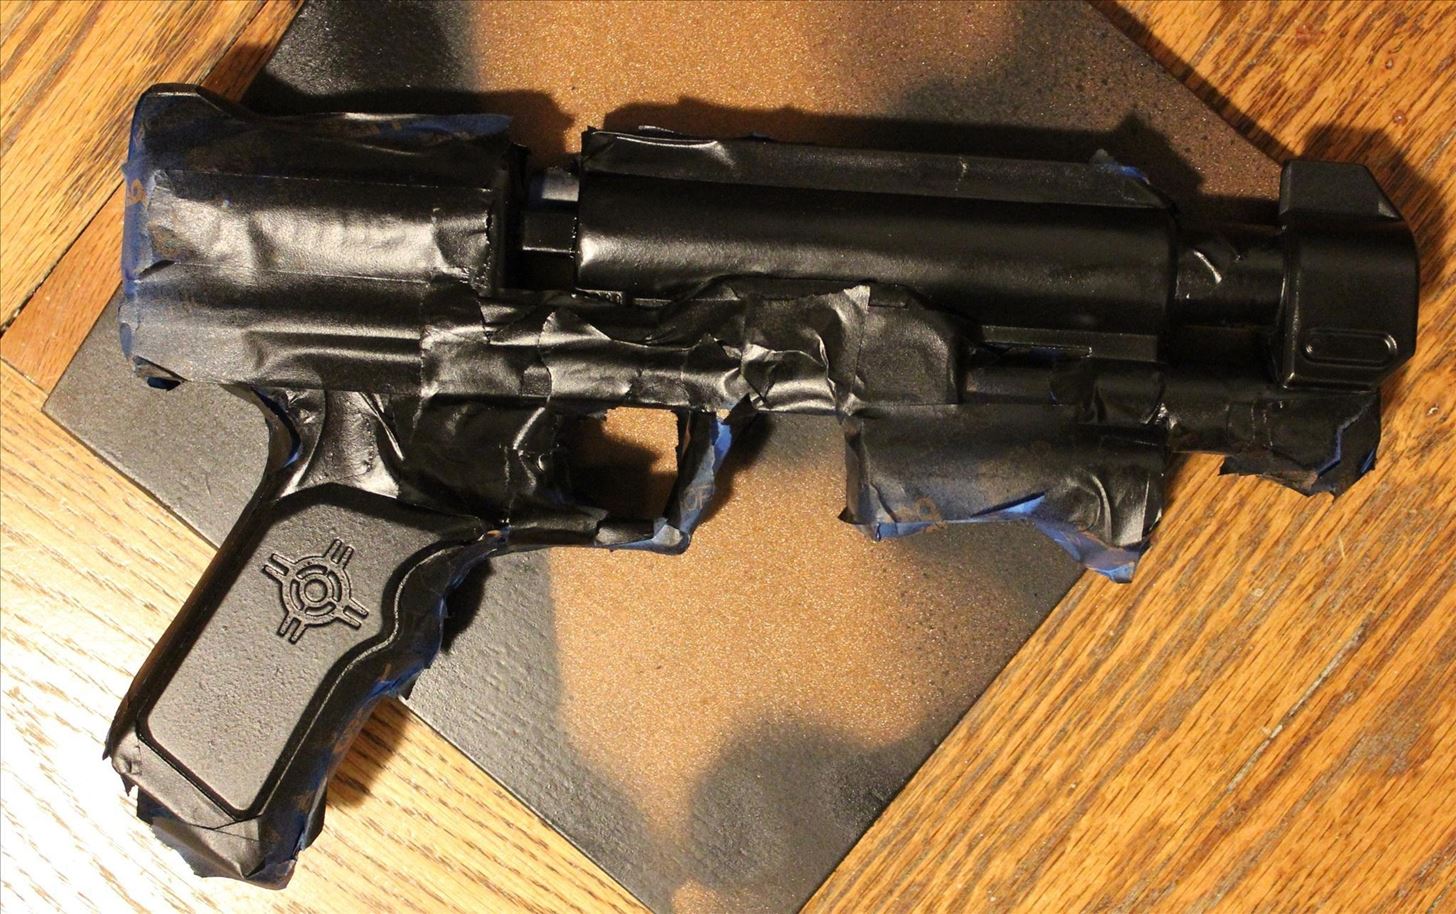
With my gun now brass and gray, I then covered all of the brass parts, leaving the gray bits bare. This way, I can paint the gray parts, and not the brass parts:
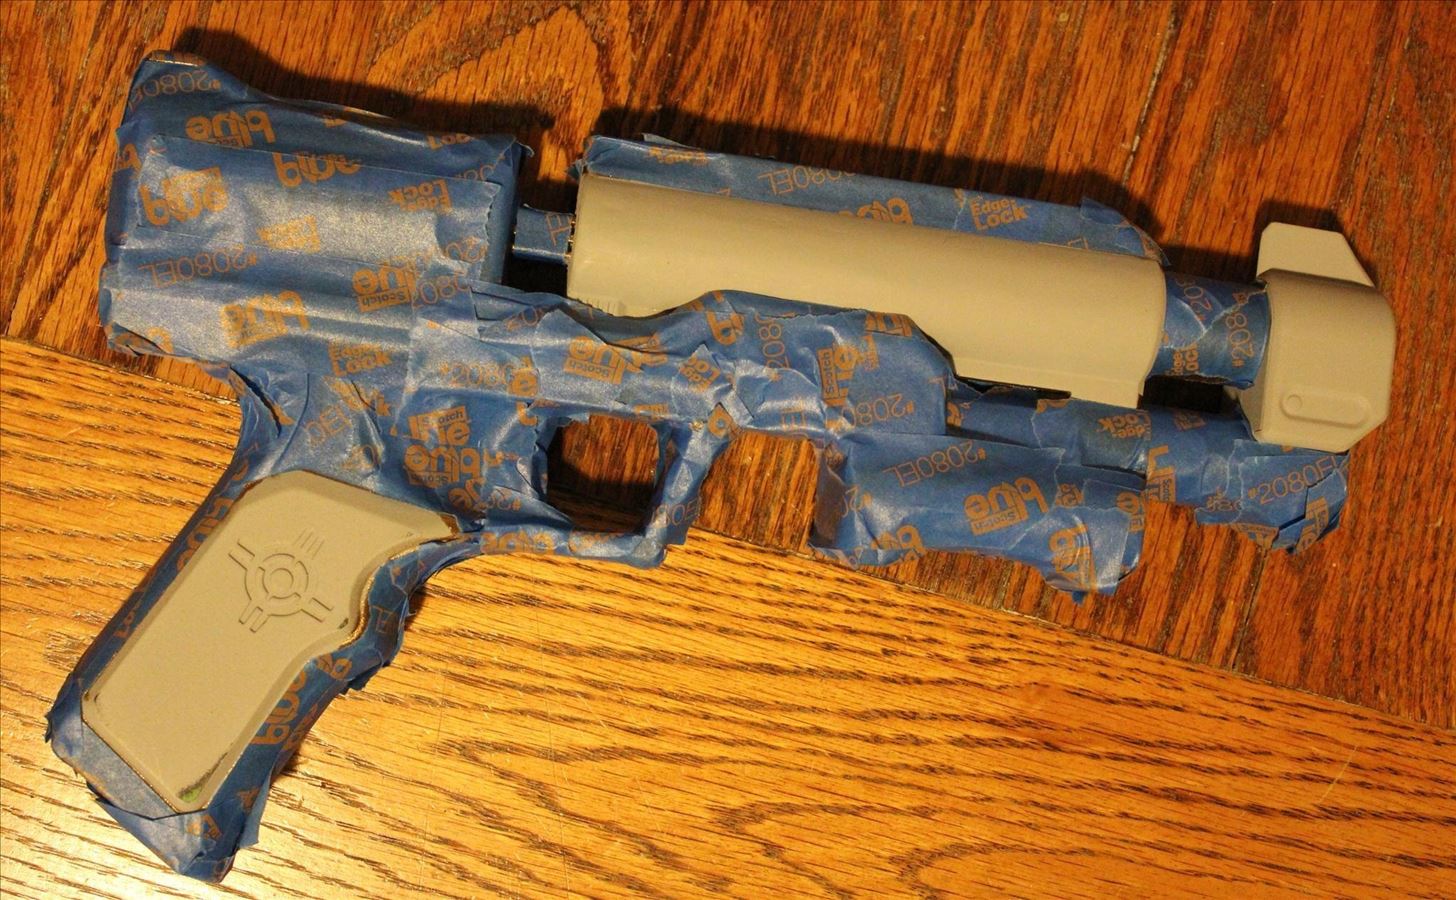
Yes, that's a lot of tape, and yes, it took a long time.
I decided to paint those bits black, like this:
Once it dried, I peeled the tape off, and this is what it looked like:
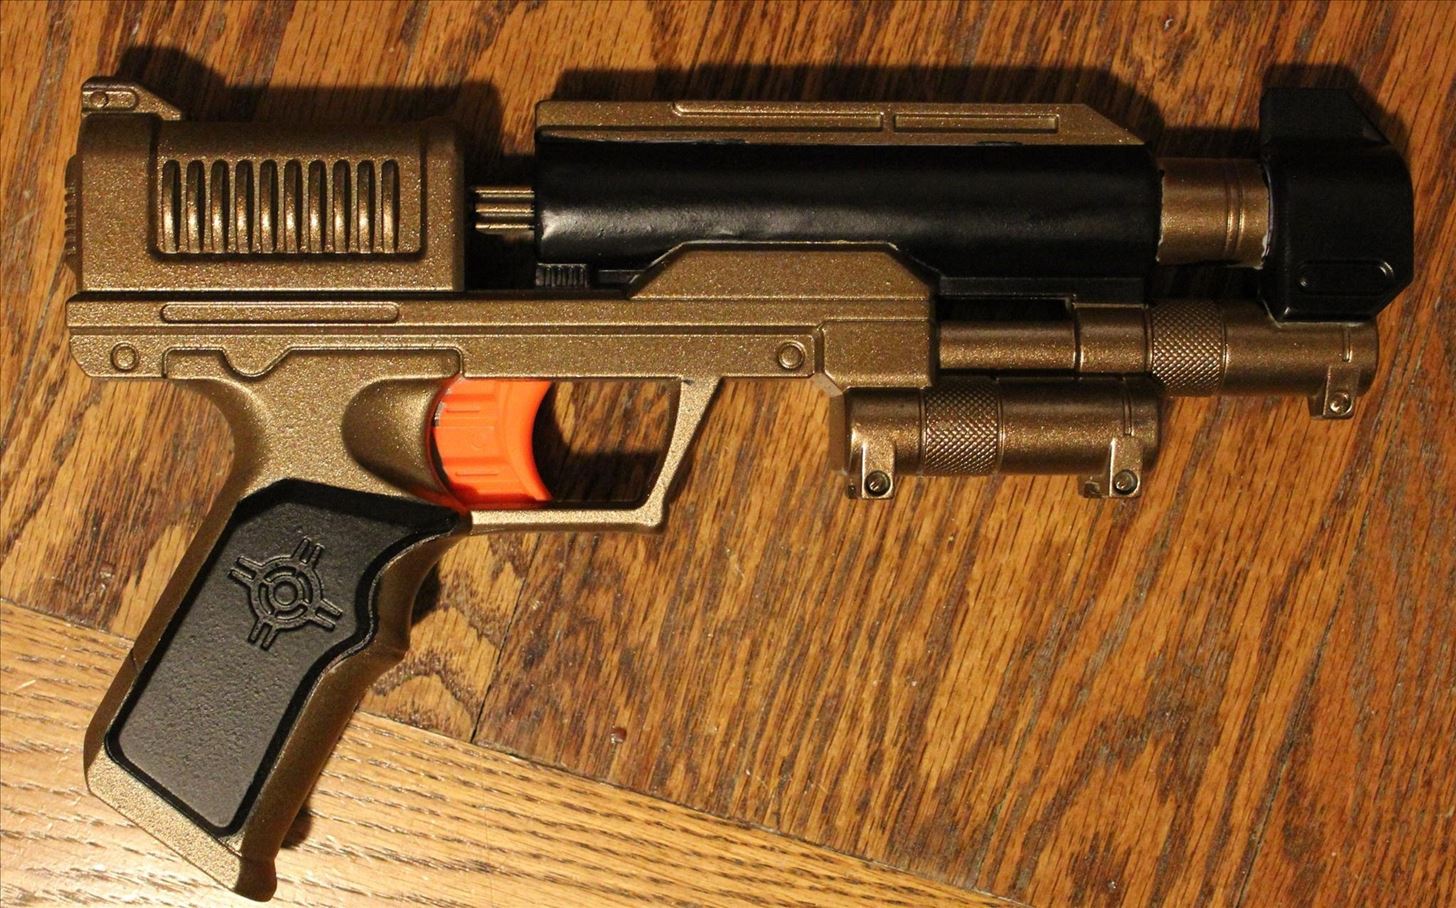
Note that I still have an orange trigger. Time to repeat the process again! Hooray!
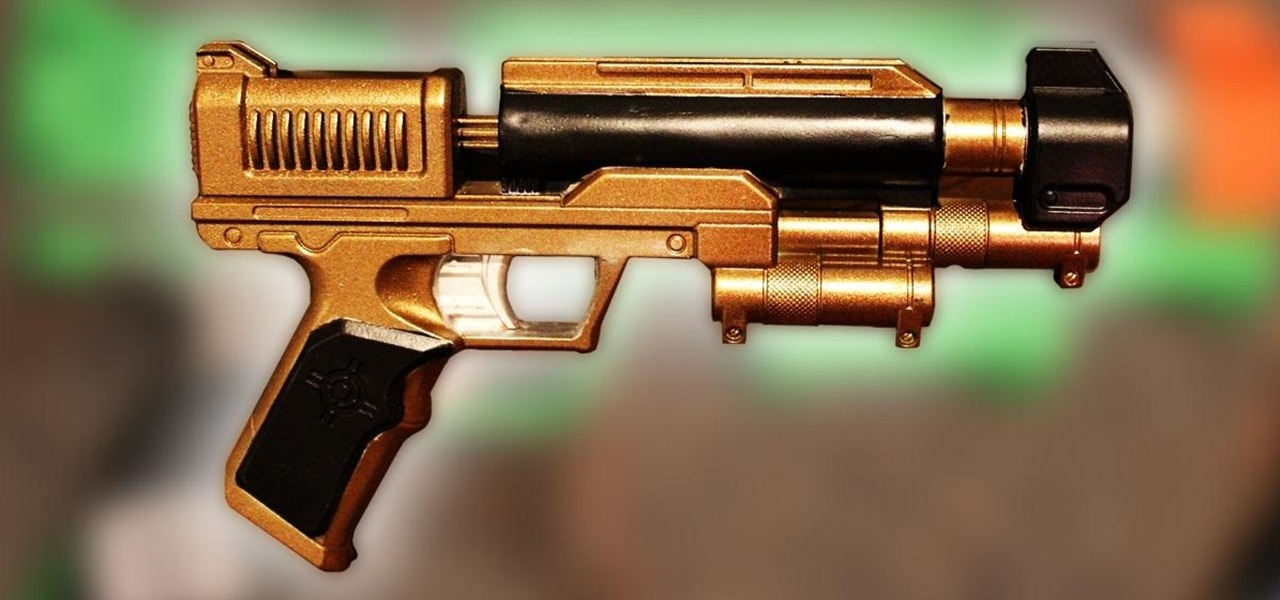
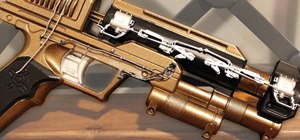
Step 6: The Finished Product
The gun came out alright, though it isn't the best paint job I've ever done. Still, I'm pleased with it, considering that I spent 99 cents on the gun! If I were more committed to making it look good, I could have done more colors, or a better job at mixing the colors up.
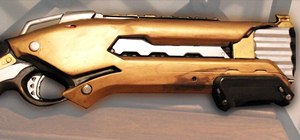
Here's the finished shot:
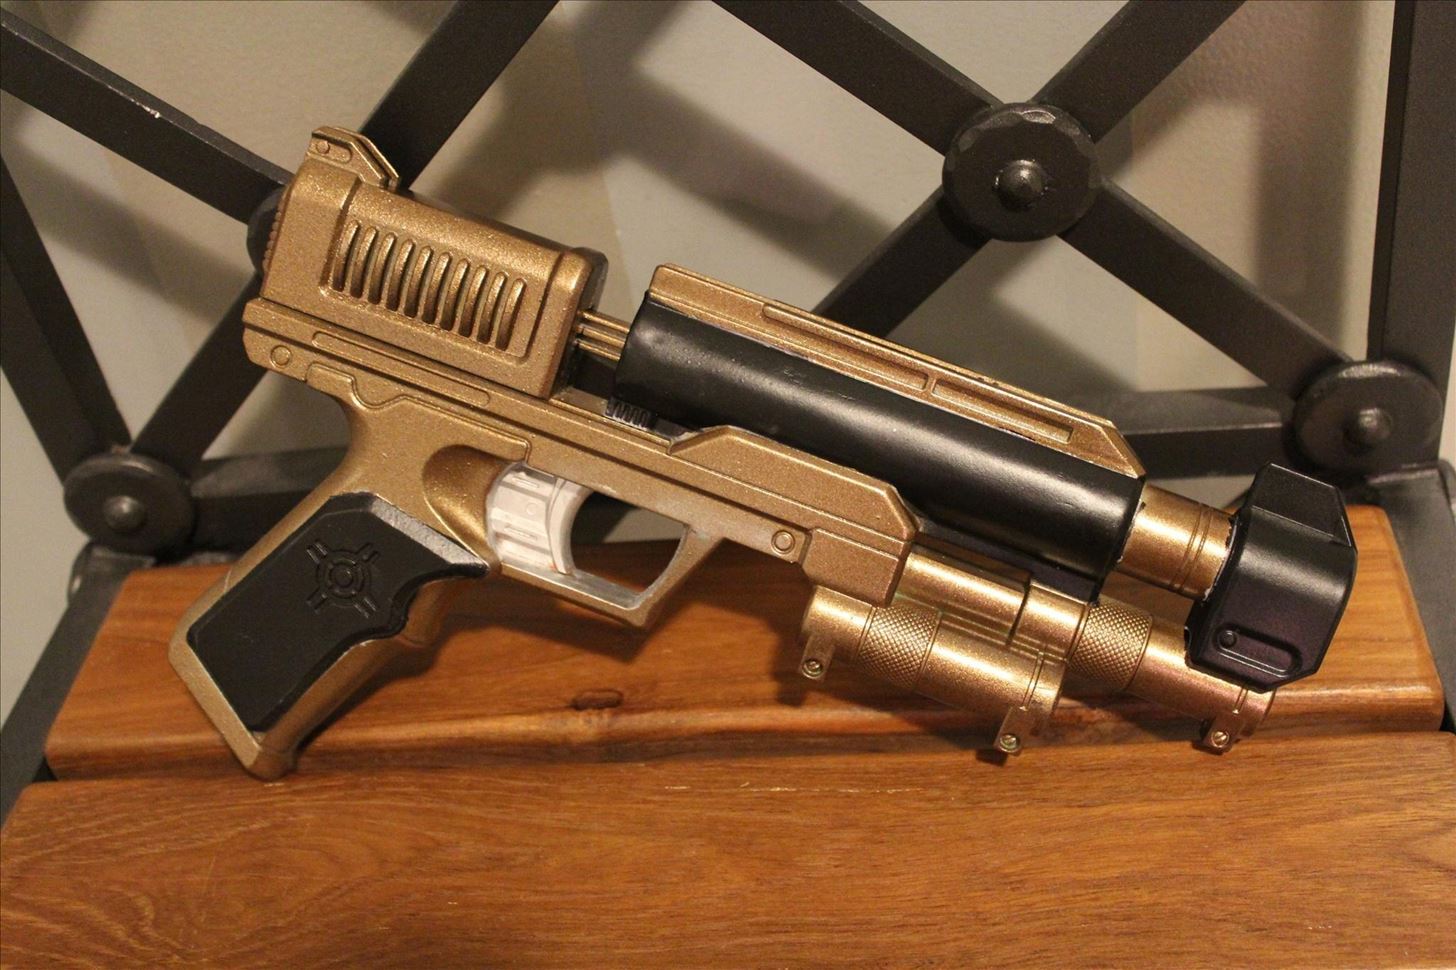
Not so bad for not taking the gun apart, eh?
One caveat when painting Nerf guns:
They have a lot of little nooks, so make sure you paint it from every conceivable angle in order to get the paint into those crevices. It's not always an easy thing to do that without overpainting certain areas, so be careful!
Also, if you have the time and energy, you may want to do more to the gun than just paint it. Wait for my upcoming article on Greebling!
I hope you enjoyed!
Just updated your iPhone? You'll find new emoji, enhanced security, podcast transcripts, Apple Cash virtual numbers, and other useful features. There are even new additions hidden within Safari. Find out what's new and changed on your iPhone with the iOS 17.4 update.


7 Comments
Nice work Austin. I learned a bit about sanding and polishing concave and convex surfaces whilst refinishing cutthroat razors. I am certainly not experienced enough to say it with any authority but I think many of the sanding and polishing techniques would translate into the prep work of gun barrels and other similarly shaped objects. One project I have always envisioned is a Steampunk/Victorian pneumatic sniper rifle. Copper barrel sleeve, brass(or plated) receiver section and a combination of the two for the globular air tank. It makes only good sense to do this in plastic first. Mock ups are a must when making stuff like this. What better way to test the finish combinations that painting plastics with your techniques? Besides, you wind up with a nice prop for any costume event you want to attend.
Absolutely true, Gonville!
Sanding and polishing concave and convex surfaces isn't that bad, the worst is sanding things in tight spaces, or right angles. It's a real pain in the butt to get an even sanding/polishing all the way down to the edge at a right angle, particularly when it's right next to something else that gets in the way.
what gun is this?
As a final touch I would suggest doing a "wash" of either black or bronze to help weather it and make it look more "realistic". I used 1 part flat black acrylic to 9 parts water or glass cleaner in a spray bottle on a Star Wars blaster and it really gave it that used look.
At our second hand store that benefits cats and dogs, there is a special room of just toys. So as not to appear to be a perv, I wait until there are no kids in the room or ask my wife to go in with me.
The point being, they have really great prices on the toy squirt guns and nerf guns - all 25 cents each.
I am working on a special gun that has a toy jet as the basis of the gun. I will show before, during, and after pictures when I finish.
Very nice. This steampunk weapon is quite interesting to make .
Very well done. I've seen a lot of the Nerf conversions, but this one was pretty straight forward. I like the look of it.
Share Your Thoughts